Entertaining, Food, Home

How to Make Emoji Rice Krispies Treats

Hi all! I’m back with some more creativity in the kitchen. Emoji Rice Krispies Treats! (Just look at how good they came out. Believe me, I’m more shocked than you are!)

Sue at Home Emoji Rice Krispie Treats main

Before we get started, I need to give major props to Mister Krisp who is the one-and-only inspiration for this project. If you don’t know about her — and yes, this Mister is a her — Jessica Siskin is a NYC-based writer who just happens to make amazing dessert art with Rice Krispies treats. She has a huge following on Instagram and one of her most famous projects is her emojis. (While you’re checking out her Instagram, be sure to note her Rice Krispies tacos,  her Rice Krispies burger and oh yeah, her Rice Krispies Drake. I figured the emojis would be a great project for me and the girls to make to take to a barbeque today. (Shout out to Kelli and Rob!)

Sue at Home Emoji Rice Krispie Treats ingredients

The ingredients you’ll need are: 6 cups of Rice Krispies cereal, 3 tablespoons of butter, a 10 ounce bag of marshmallows, yellow food coloring, Pam cooking spray and frosting in the following colors: black, white, blue, red and pink. I bought tubes of Wilton decorating icing in black and red and then made a quick mini batch of white icing and used food coloring to make the other colors. (Note: I do NOT recommend the Wilton Ready-to-decorate cans. The frosting comes out too fast and it’s very hard to control.) For supplies, you’ll need a round cookie cutter and a Wilton #3 round piping tip. (If you want blush on some of the blushing emojis, you’ll also need red food coloring and a foam brush.)

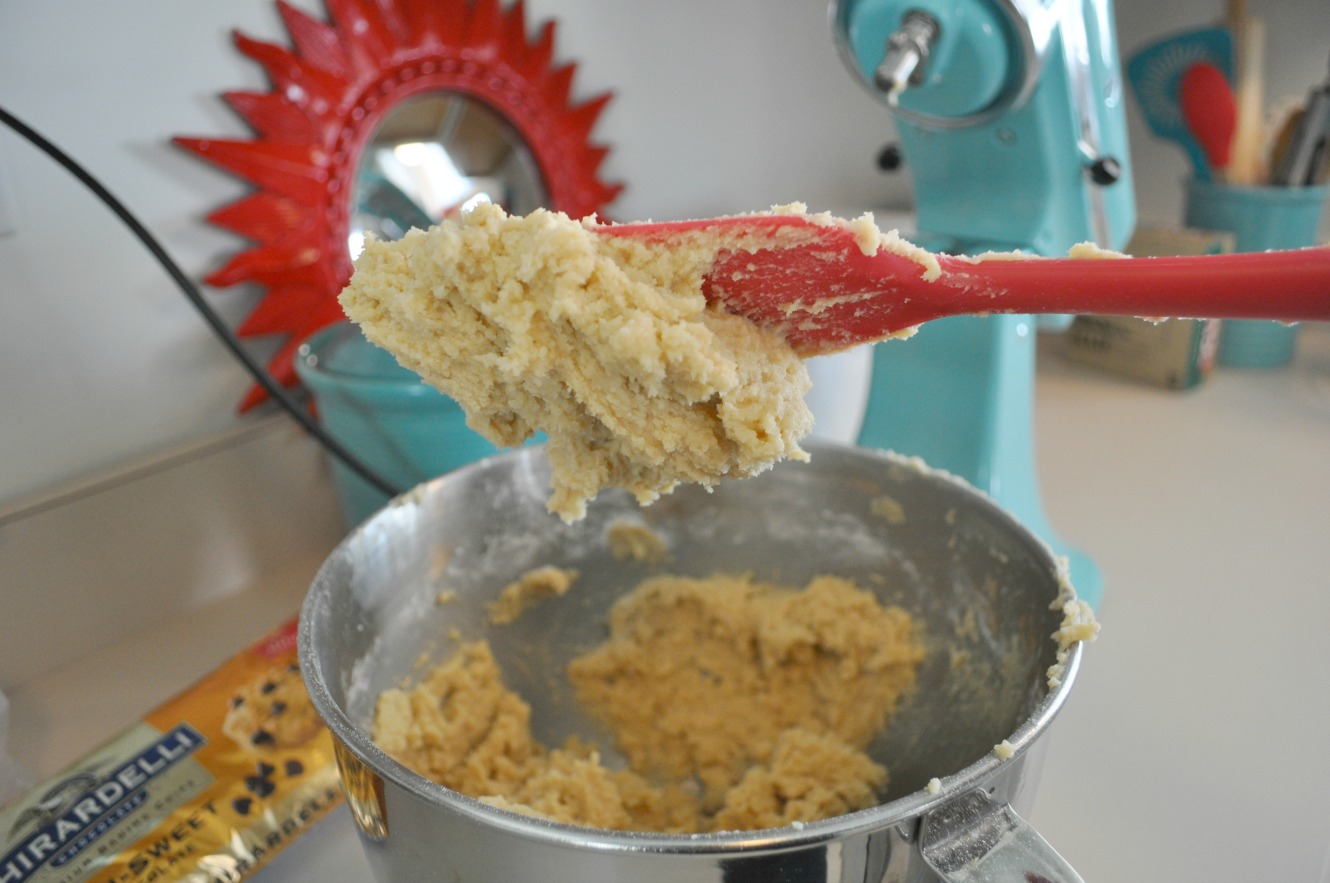
The Rice Krispies treat directions are right on the cereal box: you melt the butter in a big saucepan on low, then add the marshmallows. As they melted, I added about 5-6 drops of yellow liquid food coloring to get the emoji color.

Sue at Home Emoji Rice Krispie Treats melting

Then you remove it from the heat and stir in the Rice Krispies. We laid wax paper on cookie sheets (just to protect the table) and dumped the mixture in the middle. Then I used a spatula coated in Pam to spread it out and press it down so it was flat. They should be somewhere between 1/4 inch and 1/2 inch high. I kind of like how fat this one in the front came out and it’s about a 1/2 inch.

Sue at Home emoji rice krispie treats close up

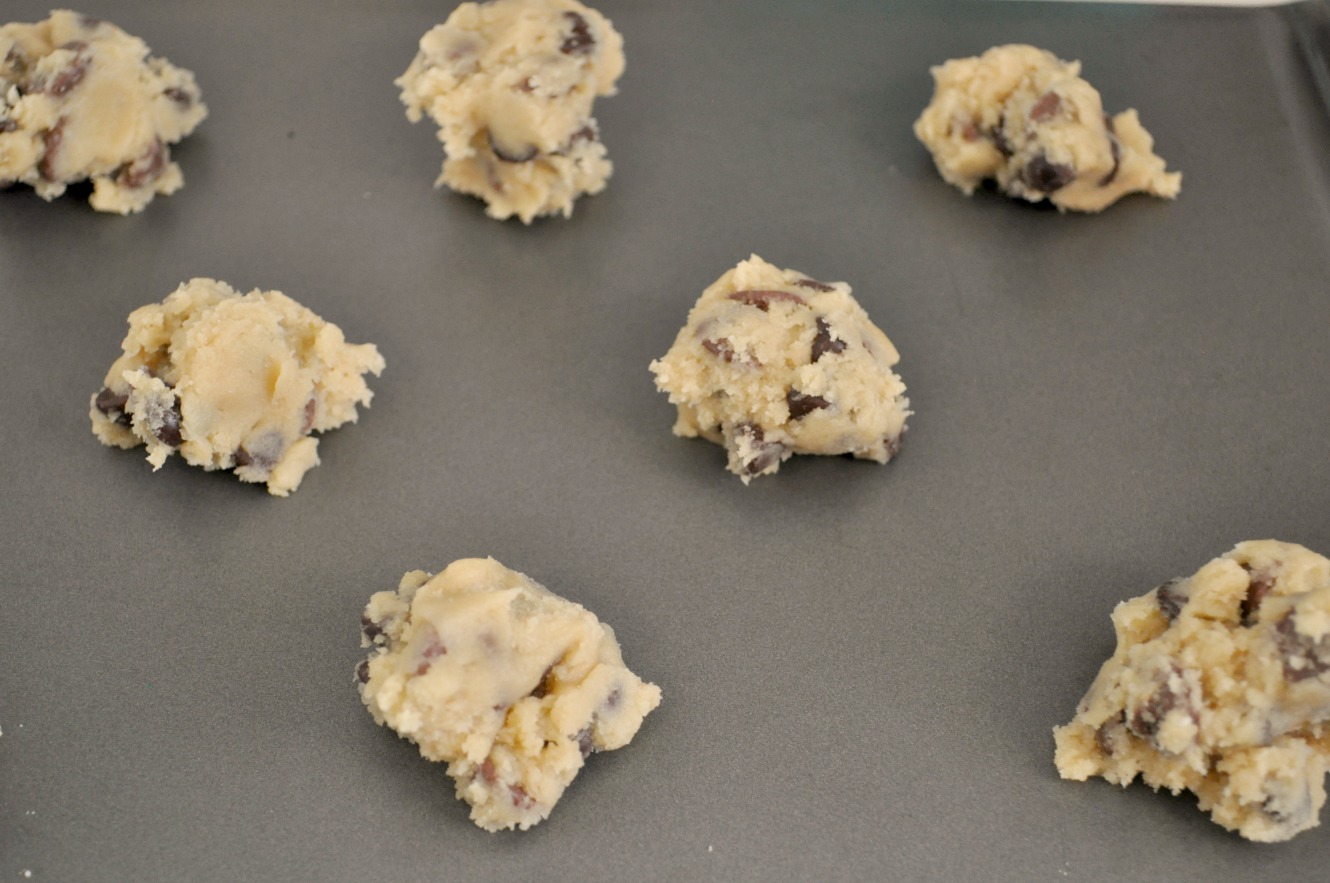
After you’ve got the mixture all spread out (you might need more than one cookie sheet), use the cookie cutter to cut circles. (You can spray it with Pam so it doesn’t stick.) You’ll want to use a flat spatula coated in Pam to lift them. Do not underestimate the stickiness of melted marshmallows! Pam is your friend. Pam is sort of like the most important ingredient in this whole recipe. Use her wisely! In fact, Mister Krisp even advises spraying it on your hands to mold Rice Krispies treats. We did just that and reworked the leftovers into a new layer of Rice Krispies treats to cut from.

Sidenote: On the first batch, I completely forgot the food coloring! We decided to still use some of them (I mean, they taste the same!) even though they looked more like rice cakes. Oops. You can see the difference here.

Sue at Home Emoji rice krispie treats 2 colors

All you have to do after you cut them is pipe on the frosting. I know this may sound daunting but if you’ve ever piped “Happy Birthday Whoever” onto a cake, you can do this. It’s just a series of little half circles and lines, plus some hearts, tongues and teardrops. (I kept this image from Mister Krisp up on my laptop as I worked.)  I don’t have any shots of me actually piping it because my assistants were totally over me at this point but here’s my advise: keep the piping tip close to the Rice Krispies treats, move slowly, and squeeze hard. As long as you stay close and go slow, you can’t screw it up.  If I ever make this again, I’ll invest some more tips because the biggest annoyance was taking the tip off and washing it before starting the next color. Here’s a process shot with just black and white icing.

Sue at Home Emoji Rice Krispie Treats black piping

But they really come to life once the other colors are added!

Sue at Home Emoji Rice Krispies 4 vert

Some of them, like the little guy on the bottom left below, call for blush. I couldn’t find a tutorial from Mister Krisp so I just figured it out on my own.

Sue at Home Emoji Rice Krispies 4.2

I used some blood — just kidding! — but seriously, doesn’t it look like blood? It’s actually red gel food coloring. I put a little on a plate and used a foam brush to just dab a little color onto his cheeks. Just be sure to blot it A LOT on the paper plate before putting it on the emoji. I think it worked out pretty well for those little shy guys!

Sue at Home Emoji Rice Krispie Treats blush collage

It was an easy, though somewhat time-consuming, project that looks a lot more impressive than I thought it would!

So, tell me…what’s your favorite emoji? I probably use the smooch lips the most because I “speak emoji” with my kids more than anyone else but I am partial to the wink and the heart eyes too!

Hope you’ll try this fun project!

XO

Sue at Home

Sue at Home Emoji Rice Krispies Treats Pin

Entertaining, Food

The Only Guacamole Recipe You’ll Ever Need

Sue at Home Guacamole with chip

dormify_posters_summer15_allicareaboutisguac

Okay, maybe not just three people but I do admit I have a pretty serious obsession with guacamole. In fact, I’ve made it my life’s work to perfect my guac recipe. And today I’m here to share it with you beautiful people. (By the way, that print above is a poster from a site called Dormify and I might have ordered it if it wasn’t from a site called Dormify.)

Now don’t think you’re going to get some secret ingredient here because my recipe is pretty basic. But with the right ratios of those basic ingredients, I think you’ll agree that this guacamole is pretty special.

I know I sound like I’m tooting my guacamole horn but I get requests to make guac for just about every party I go to but I recently had such a nice compliment that I figured this post was far past due. It all started when I made it for Sophia’s end-of-the-season soccer party and a bunch of people at the party asked for the recipe. Then a few weeks into the summer, I got this text from one of my fellow soccer moms: “Huge shout out to you for the guacamole recipe. I have made it 4 times for different events/people and everyone LOVES it. Thank you!!!” (So you can all thank Donna for her compliment because it made me finally get around to writing this post.)

Sue at Home guacamole ingredients

I meant to share this recipe with the Sue at Home readers years ago but…I ate it. No — seriously. Back in 2012, I photographed every step of the chopping process but then once it was in the bowl, it disappeared so quickly that I never got a shot of the actual finished product. Oops. Luckily, I got some shots this time before I inhaled it so let’s get down to business, shall we?

First off, you’ll need 5-6 ripe avocados. Don’t even attempt this recipe if your avocados aren’t ripe because you’ll waste your time and end up with crappy guacamole. (And it won’t be my fault.) I get mine at Whole Foods because I like to bleed money  they always have ripe ones. The rock-hard avocados that most stores sell won’t be ripe for about 6 days…and who wants to wait that long for guacamole?

Sue at Home Guacamole avocado and knife

You’ll need 1 or 2 vine-ripe tomatoes. I usually take most of the guts out but I leave a little to keep it juicy. Chop ’em up but don’t worry about getting them too small.

Sue at Home guacamole tomato

Most guacamole recipes call for red onions but since they’re disgusting and they repeat on me, I use spanish or vidala onions. Just a half an onion chopped up should do it. Now is a good time to mention that I use one bowl for the good stuff and one bowl for the junk because it makes me feel like I have my own cooking show. Oh — and my bowls are from Anthropologie (similar here) but you probably already knew that because I used them in the rainbow cake post.

Sue at Home Guacamole onion

Next up is the divisive cilantro. I know some people don’t like it. (In fact some people are even genetically predisposed to think that it tastes like soap. If you think I’m kidding, you’ve got to read this article in the New York Times. Apparently, even Julia Child hated the stuff.) But the recipe isn’t quite the same without it so just hope that you don’t have any of those cilantro haters in your audience. Grab a big handful off the bunch and chop it up. Technically, you’re supposed to pull the leaves off the stems but I never do and I’ve never had a complaint.

Sue at Home Guacamole cilantro

To give your guacamole a little kick without lighting your guest’s mouths on fire, a few jalapeno peppers should do the trick. This is one part of the recipe that has evolved over the years. I used to use one jalapeno, then two. Now I’m up to three or four. As long as you take the seeds out, the jalapenos will just add some nice flavor without too much heat. Just be sure to really mince them so your guac doesn’t have huge chunks of jalapeno. A couple tips: Cut the top off and then make a few little slices down the side with your paring knife. (See below) Then you can slide the knife in and separate the guts from the outside without getting seeds all over the place. And also — scrub your hands like crazy after handling jalapenos because if you don’t and you’re a contact lens wearer like me, your fingertips will burn your eyeballs like the depths of hell. (You’ve been warned.)

jalapeno

Sue at Home Guacamole jalapeno

I like my guacamole nice and citrusy so I use the juice of a whole lime. Can’t you practically hear Tom Colicchio saying that my guacamole has “good acid”?

Sue at Home Guacamole lime

Two more things — which just might be the most important ingredients of all — salt and pepper. I’ve never measured the amount I put in but I can tell you that I’m very generous with the salt. Go ahead and mix everything up and then add salt and pepper to taste. I just keep adding salt until I think it’s perfect. (And to those eagle-eyed readers out there — yes, that’s the pepper shaker from the set of shakers we gave out as wedding favors 14 years ago! More on those here.)

Sue at Home Guacamole pepper

Some people slice up the avocados before they scoop them out but I find that they mush up nicely without doing that. Just scoop them out with a spoon!

Sue at Home Guacamole avocado scoop

Of course, this is just a personal preference but I like to serve my guac with Tostitos Bite Size chips. If you use a bigger chip then you end up eating more chip and less guacamole and really…isn’t the guacamole the star, here?

Sue at Home Guacamole bowl with chips

You’ll definitely want to make this fresh right before you serve it or your guacamole will turn brown. But if you need to, go ahead and combine all of the ingredients (except for the avocados!) a day in advance and keep them in a closed container in the fridge so all the flavors can party and get to know each other.

Sue At Home’s Only Guacamole Recipe You’ll Ever Need

5-6 ripe avocados 

1/2 spanish onion, chopped

1-2 vine-ripe tomatoes, chopped 

1/2 bunch of cilantro, chopped 

3-4 jalapeno peppers, minced

Juice from a whole lime

Salt and Pepper to taste 

**Serve with Tostitos Bite Size chips

Chop all of the ingredients and stir until mashed and combined. It makes a nice, big, party-size portion but it’ll go fast. (One time my friends ate the whole bowl while I was busy making mojitos. True story.)

Happy Guacamole Making!

XO

Sue at Home

guac collage


Food

Recipe: S’mores Bars

I’m here with a quick post to tell you about an amazing dessert I made yesterday. I didn’t photograph all the steps but I heard so many “I need the recipe!” comments at the BBQ that I brought them to, I figured I’d write a quick post to tell you where to go to find it.

s'mores pin collage

smores pic

I had never made a cookie bar before but when I saw this recipe for S’mores Bars on Life in Grace, I just had to make it. 

It starts with a cookie dough-like mix of graham cracker crumbs, flour, baking powder, salt, eggs, vanilla, brown sugar, white sugar, and of course, butter. You start by spreading half of the dough into the bottom of a greased pan. (Follow Edie’s tip about spreading it with a knife dipped in warm water. I used the backside of a metal spatula – like this one – and the water trick made it really easy.) After the dough, you layer Hershey chocolate bars and then marshmallow fluff. 

 photo

After the fluff, you just add the rest of the dough on top, add a handful of mini marshmallows, and bake. They were such a huge hit that I almost missed having one at the party! I was knee-deep in an intense game of cornhole and just couldn’t break away. You understand, right? Luckily I had Pablo snag one for me before they were gone.

It was a little time consuming but very easy. If I can make it, you can too!

image

image (2)

So head on over to Edie’s awesome blog Life In Grace and read her whole play-by-play of how to make them. While you’re there, check out her stunning home that’s full of personal style. Her sexy, moody master bedroom and colorful, busy workroom are two of my favorites.  

Happy baking!

XO

Sue at Home

P.S. If you can’t get enough of yummy graham cracker, chocolate, and marshallow treats, try my S’mores Parfaits too! 

smores parfait Collage

Food

Best Chocolate Chip Cookies on Earth

I know that title is quite a claim but people, I’m about to give you a cookie recipe to end all cookie recipes.

taras cookies 047

But first let me introduce you to the creator of the Best Chocolate Chip Cookies on Earth, my favorite chef Tara Bench (instagram: @tarateaspoon). Here she is getting ready to serve some delicious treats to Al Roker on the Today Show.

tara on today

She may not be as famous as Ina Garten or Bobby Flay but she’s a celeb chef all right: Tara is the Food and Entertaining Director for Ladies’ Home Journal* and in the 7+ years I’ve worked with her, she’s never made a single thing that I didn’t like. Think about that for a second. Every recipe she produced–whether sweet or savory, difficult or a breeze–has been deeeeelish. And I think I’ve tasted them all! I’m also lucky to call her a friend. (She’s the awesome kind of buddy who answers all of my frantic weekend baking texts when I’m questioning my kitchen skills. Everyone needs a friend like that but no, I’m not giving you her number.)

Tara started her career at Martha Stewart and you can see it in her work; aesthetics are as important as taste. Some of her favorite LHJ recipes are Crispy Ice Cream Bars,  Frozen Blueberry Cheesecake, and Thai Chicken Patties.

But her heart belongs to chocolate chip cookies. They’re her favorite thing to make. And why not when she has perfected the recipe!?

I’ve been on a quest to make the perfect chocolate cookie for a long time but they’ve never been quite right. They’re either too crunchy or spread too thin or not chocolatey enough. So, I finally decided to try Tara’s personal recipe and It. Is. Perfect. They’re sweet and chocolatey but not too much of either. They’re lightly golden around the edges, just enough to give them a little bit of crunchiness.  But the gooeyness–oh the gooeyness!–is the key to this recipe’s success. That soft texture remains days after they’re baked. ( But wait! There’s more! Tara even makes a gluten free version that pretty amazing, too!)

And here’s the best part: even though this recipe is so close to her heart, she gives it to friends and family all the time and she even kindly agreed to let me share it with you. Right here. Right now. (Told you she’s awesome!)

TARA’S CHOCOLATE CHIP COOKIES

4 cups flour (fluff the flour before scooping) or substitute Gluten Free All Purpose Flour for Gluten Free version (see Gluten Free note below)

1 tsp baking soda

1 tsp salt

3 sticks unsalted butter, softened

1 1/2 cups light brown sugar

1 cup granulated sugar

2 eggs

2 tsps or 1 tblsp vanilla extract (I go for the full tablespoon when I make them.)

1 package (11.5 oz bag) of milk chocolate chips (I use Ghiradelli and you should to.)

1 package (11.5 oz bag) of semi-sweet chocolate chips (I use Ghiradelli and reduce this amount to a little more than half of the bag.)

Preheat oven to 350. Combine flour, baking soda, and salt in a bowl and set aside. In a separate mixing bowl, cream together the butter and sugars. Add eggs and vanilla.  Mix. Add the dry mixture, a little at a time, and mix. Stir in chocolate chips. Bake at 350 for 10 minutes. (Eleven minutes works perfectly for my oven but be careful. Tara says “Don’t overcook”!)

Gluten Free note: If you prefer rice flour to Gluten Free all purpose flour, you can use that instead (Tara recommends this one) but be sure to add a scant tbsp xantham gum to hold the cookies together. (A “scant” tbsp means slightly less than full.)

A couple things to remember, the dough is thick! Crazy thick! It’ll look like this when you’re done mixing but don’t worry. That’s how it’s supposed to look.

taras cookies 016

Then get ready to work your stiring muscles! No pain, no gain. Right?

taras cookies 025

Looking good.

taras cookies 027

Make sure your little cookie dough balls are spread out enough or else you’ll have a solid sheet of cookies. (I say that like it would be a bad thing. Ha!)

taras cookies 041

When they come out, they look puffy and undercooked.

taras cookies 030

But then they deflate a little bit while they’re cooling.

taras cookies 032

And you end up with perfect cookie goodness.

taras cookies 045

Before you get to baking, I want to urge to follow Tara on Instagram @tarateaspoon. That’s where you’ll get to see her working on her culinary delights…

pop tarst

…hanging out with hottie chefs, like Curtis Stone…

curtis stone

…having cookie throwdowns with her friends (I’ll give you one guess which recipe won!)…

cookie throwdown

…and rubbing elbows (or tummies!)  with all kinds of food industry celebs.

pilsbury

And take note of her oft-used hashtag #wwllt which stands for What Work Looks Like Today. I had no idea what it meant but lots of food industry pros seem to like it so it’s a great hashtag to check out for foodie inspiration.

And don’t forget: Your gluten free friends don’t need to be left out! Just replace the flour with Gluten Free all purpose flour for a perfectly delicious cookie treat.

Happy Baking!

XO

Sue at Home

*With deep sadness I need to tell you that while I was writing this post, Ladies’ Home Journal closed its doors and with that, Tara and I (plus another 33 of my friends and coworkers)  lost our jobs.  I’m trying to stay hopeful that this will be a turning point in my career and that I will move on to bigger and better things. (In fact, maybe you’ll even get more Sue at Home!) But I fear that I will never have a job that I love as much as I loved being the Fashion Editor for LHJ. The kindness of the people that I worked with, the collaborative atmosphere, the quality of the work we produced, and the respect that I felt from everyone around me is a rare thing in business and I feel so lucky to have had that. But I’m hopeful for the future and excited to see what it brings.

I’ll keep you posted on the chapter. And please send positive thoughts my way!

cookie pin 047

Food

Pumpkin Whoopie Pies with Cream Cheese Filling

In the latest installment of If I Can Make It, You Can Too, I’m bringing you one of my favorite baked treats: Pumpkin Whoopie Pies with Cream Cheese Filling. I’ve made this recipe a few times and it is a major crowd pleaser. (I think it would be a nice addition to all the pies traditionally served at Thanksgiving.) Personally, I’ve never met a cream cheese frosting I didn’t want to marry and this is one of my favorite ways to use it. The recipe comes from Martha Stewart via Baked bakery and you can find the full recipe here. I didn’t change the recipe at all — though I would like to mention that Martha’s recipe says it makes 12 whoopie pies and unless they’re the size of your head, that is waaaay off. Last year, I made them silver-dollar bite-size and the recipe made about 50 of them. This time, they were a little smaller than the diameter of a baseball and the recipe made about 25 one-and-you’re-done-size whoopie pies.

First you mix the dry stuff:  flour, salt, baking powder, baking soda, ground cinnamon, ground ginger, and ground cloves. Isn’t it pretty? Make sure you sift it all together.

In a separate bowl, whisk together the oil and brown sugar.  Anything that calls for this much brown sugar is a good recipe in my book.

Next, mix in the pumpkin puree. Then the eggs and vanilla. Once you’ve whisked everything together, your two bowls (dry and wet) should look something like this.

Then — adding a little bit at a time — mix the dry mixture into the wet mixture.

I’ve piped them onto the parchment-lined baking sheet before but this time I just scooped up a tablespoon of dough and dolloped them on. (That’s right. Dolloped. Didn’t know you could use as it as a verb, huh?)

The baking sheet on the left shows them cooked and the one on the right shows them raw. You can see that they don’t spread very much so go ahead and put them closer together than I did. #doasIsaynotasIdo (Remember, for 25 whoopie pies, you’ll need 50 little cookie/cakes so fit as many as you can on each baking sheet.)

Here’s what the little babies should look like when they’re fulled baked. Watch out for the those “I’m done” cracks.

Once they’re cool, you can get to the filling. (In fact, you can bake them the day before you fill them and just store them in the fridge overnight.) Mix your softened cream cheese and butter with confectioner’s sugar and vanilla for a filling so delish, it brings tears to my eyes. Instead of a piping bag, I just stuff it into a ziplock bag and snip the tip. Make sure you fold the top of the bag down before filling it, so that you don’t get frosting all over the opening.

Then just lay out half of the pumpkin cookie/cakes and pipe on some ample frosting onto each one.

Next, just put the tops on and you’re done. Make sure you refrigerate them if you’re not serving them right away. (That goes for all cream cheese frostings or fillings.) If you weren’t paying attention above, here’s that link for the full recipe again: Martha Stewart’s Pumpkin Whoopie Pie recipe.

I promise, you will not be disappointed!

So, tell me…is it a cookie or a cake? It’s certainly not a pie, despite it’s name. And it definitely has a cake-like consistency to it. But it’s hand held, like a cookie. (Plus, it’s a cookie on my World’s Biggest Cookie Swap Pinterest Board.) So…is it a cookie or cake? Let me know what you think in the comments.

Enjoy!  And have a delicious Thanksgiving!

XO

Sue at Home

P.S. For more If I Can Make It, You Can Too recipes, check these out.

Seafood Paella and a Crazy Easy Cake

Rainbow Cake

Food, Home

Seafood Paella and A Crazy-Easy Cake

I’m back with another If I Can Make It, You Can Too recipe. As I’ve told you before, I’m not much in the cooking category but what I lack in the skills department, I make up for with creativity. (Remember the rainbow cake from the first installment of If I Can Make It, You Can Too? )

Recently, I hosted a small birthday dinner for my friend Tracy. On the menu: shrimp and scallop paella and birthday cake, of course.

The paella recipe comes from Ingrid Hoffmann of Simply Delicioso on the Food Network and I first tried it in North Carolina where I was invited to speak at a Women’s Leadership Conference at Lowe’s headquarters. On the last night of the event we ate a meal I will never forget. We were treated to a live cooking demonstration by Ingrid herself, while we ate the delicious paella that she showed us how to prepare. She was charming and funny and I hung on every word she said because I was loving the food! Then we finished with a Duff Goldman cake decorating demo and a chance to decorate our own. Like as in, one mini cake for every single person in a huge ballroom! Duff was as great as he is on TV. (Is it any surprise that Ace of Cakes is my favorite cooking show ever? I mean, it was more about decorating than it was about cooking!) Here’s the cake I decorated at the event:

But anyway, let’s get back to the paella. You can click here for Ingrid’s recipe but I recommend reducing the seafood. It calls for an insane amount and it almost overwhelms it. For this batch, which served 8 adults with plenty left over, I increased each ingredient by 50% but I kept the seafood amounts the same. I’d also like to mention that the recipe calls for Spanish dry-cured chorizo but the meat man in my supermarket recommended a Premio chorizo that was kind of soft and I think it was much better than when I had made it with the more dry, hard stuff.

I started out by getting all the chopping done earlier in the day. The red and green peppers, onion, and garlic were all chopped and put away while I ran to the Y to see Sophia star as Joy the Jellyfish in the Westfield Y Drama Camp’s production of A Little Mermaid. (It goes without saying that she was sensational. But thanks for asking!)

Then about an hour before I started cooking, I measured out the tomato paste, rice, and olive oil. I also chopped and portioned the lemon and chorizo. (FYI: My bowls – which I LOVE – are from Anthropologie. You can get the little ones here and here and the big ones here.)

As the first guests arrived, the oil, onion, garlic, peppers, saffron and chorizo went into the pan.

In less than an hour, we were ready to eat. I served a simple green salad and some ciabatta with the paella. Everyone loved it!

As for the cake, I was stumped. Knowing we were making a birthday cake, Lily immediately asked her “Aunt” Tracy what her favorite color is. (I love that even my 4-year-old knows that when you’re getting creative, you need some inspiration first.) The answer was blue.

I knew I was going to make a box mix cake with my homemade buttercream frosting from this recipe but I didn’t know what else to do. So, I sent a text to the birthday girl asking what her favorite candy is. She replied with this cryptic message: “Twizzlers, reeses peanut cups, sour patch, I’m random.”  Suddenly, I was more confused than ever.

Then I tried a Pinterest search for the most general thing I could think of: “Birthday cake”. And I worked! I started to see a bunch of pennants and since that was something I had always wanted to try, I figured I’d do it. Luckily the girls had a bunch of arts and crafts supplies out already so I made the whole thing in less than 10 minutes. (Swear!) I grabbed some paper and cut it into little triangles. Then I took some foam alphabet stickers and spelled out Tracy’s name. (One guest thought I made the letters with fondant! Ha!) Next I glued the triangles to some twine and tied them to a couple skewers that I had in a kitchen drawer. And that’s how Tracy ended up with a vanilla cake with buttercream frosting topped with blue sugar, mini Reese’s peanut butter cups and a personalized pennant.

Everyone loved the paella and the simple cake was a hit too. Happy 40th, Tra!

XO

Sue at Home

Decor, Food, Travel

A Visit to Hidden Pond

When we recently went to Maine and stayed at Tides Beach Club, we had to make a visit to Hidden Pond, Tides sister hotel located deep in the woods. The resort is a series of free standing bungalows – some one-bedrooms for vacationing couples and some bigger cottages for families. We had read a lot about Earth, Hidden Pond’s farm to table restaurant so we decided to give it a try. The decor was so spectacular that we were smitten with the place before we ever took a bite of the delicious food. Check out this branch that was suspended from the ceiling and wrapped in twinkle lights.

The shelves above the bar were simple but stunning. And I’m guessing those are Tom Dixon pendants (or  something similar).

Two of the walls were lined with slices of logs. (The treatment that the Novogratz’s just gave to Tony Hawk’s fireplace reminded me of the decor at Earth. Check it out here.) We also loved the industrial light fixture of hanging bulbs. But the best was the beautiful chesterfield sofa that sat in front of a roaring fire.

We went back to Hidden Pond to hang out at the adults-only pool the next day. It was located in front of The Tree Spa. We didn’t get a chance to indulge in any treatments but the spa was named to Conde Nast Traveler’s Hot List so I’d guess it’s pretty good.

If you ever wanted to know what it’s like to get a massage in a treehouse, then The Tree Spa is your place.

Near the pool is one of Hidden Pond’s firepits. I was upset that we never visited at night (they bring you a basket of s’mores fixins!) but that would have meant that would have missed the amazing dessert we shared at Earth: Banana and Peanut Butter ice cream with salted caramel.  It was one of the best desserts I’ve ever had!

The outdoor bar by the pool was so cute and it has so many great ideas for modern rustic decor. Check out that woody cocktail table.

These baskets were cut in half and attached to wall the hold citrus.

I loved the huge mason jar water jug and the bark-edged bar.

I love this idea (mason jar + sand + candle) and I’ll totally do this for my beach house. (Too bad I don’t have a beach house.)

This little chalkboard cow offered a healthy treat. And then at 11:30, the bartender wiped it off and replaced those words with “Margarita” and “Bloody Mary”! I had to have a bloody, of course. (Check yesterday’s post of the picture of that beauty.)

We loved the super rustic style of Hidden Pond and I think we need to go back one day for the s’mores!

XO

Sue at Home

Check out my other posts about our trip to Maine.

Three Days in Kennebunkport, Maine

Decor Ideas from Tides Beach Club in Maine

How to Create a Tides Beach Club Room at Home

Family, Food, Shopping

Three Days in Kennebunkport, Maine

I’ve been sharing lots of pictures of the beautiful Tides Beach Club that we stayed at in Maine (here and here) but I’d like to take you off campus to show you some of the other charming things we loved about Kennebunkport, Maine. (If you’ve never been, plan a trip for next summer!)

We checked out this big fella and then ate his brothers for the next 3 days.

Our first stop was The Clam Shack where we had ended up having lunch everyday. The line was long and the food was pricey but it was totally worth it. Do they have the best lobster roll in Maine?  I don’t know but I can tell you that lobster roll was one of the best things I’ve ever eaten in my life. (Yes they do, according to the Travel Channel’s Food Wars!)

At The Clam Shack, the lobster roll isn’t your typical hot dog roll looking thing. It’s on a delicious buttery bakery roll and the lobster is just perfection. We loved the fried clam strips too (and the shrimp which we tried on day two) but nothing could beat that perfect lobster roll.

As for shopping in the harbor, it was mostly disappointing tourist traps with two big exceptions: Daytrip Society and their kid’s store, Daytrip Jr. They both carried such a smart assortment of quirky items that any tourist or local could love. (And lucky you, they have ecommerce, too!) I was particularly smitten with the kids store, pictured below. They had toys and games that I had never seen before and I had to pry myself out of there before I spent a fortune!

When we got back to our hotel, we decided to take a walk on the beautiful beach just across the street. The water was ice cold but Pablo braved it for one Nestea Plunge He’s crazy!

Before dinner, we relaxed on the front porch of Tides and while I sipped a cocktail (or three), Pablo did a Fantasy Football draft. (Yes, I allowed my husband to do a draft while we were on vacation. Yes, I am the best wife on the planet.)

The next day, we took a drive around to look at some insanely beautiful houses (check out this listing if you have 4 million dollars).  We took this picture near Ocean Avenue. I think it’s the only one we got together.

We drove by the Bush compound (ya know – cause you have to if you go to Kennebunkport or something like that) and marveled at it’s pretentiousness. I mean, they live on their own peninsula!

We also sampled the world’s greatest Bloody Mary at Earth at Hidden Pond. We spent a lot of time at the pool there. More on our delicious dinner at Earth tomorrow as well as lots of beautiful rustic decor ideas you can steal from Hidden Pond.

Pablo kept talking about how the fires smelled so great in Maine. Personally, I think it was just the idea of smelling a nice fresh fire in August. In the summer, you just forget how good that smells. But he swore it was the Maine firewood. So, when we saw this roadside firewood “shop” that operated on the honor system, we had to pick up a bundle. Check out the sign: “Camp Wood. $4.00 a bundle. Theives…” (yes it was spelled that way) “…smile for camera. I’m sorry honest people.” So, we put our money in the little cup and took a bunch.

On our way out of Maine, we did some antiquing on Route 1. We visited probably 10-12 shops so we were pretty exhausted by the end. I snapped this happy picture of Pablo as we entered our first store. (There would be no more happy pictures because he ended up listening to sports radio in the car while I endlessly hunted for treasures.) My favorite shops were the one pictured here, Antiques USA in Arundel (it was massive), Wells General Store Antiques in Wells (which had lots of 1950s diner stuff) and Columbary House in Cape Neddick where I ended up getting a cake plate with a glass dome for $35 and a blue and cream striped crock for my mom for $15.

I’m already dreaming of getting back there again. That lobster roll is calling me!

XO

Sue at Home

crafts, Family, Food

Our Wedding: The Details

First of all, thanks so much for your interest in our wedding! Monday’s post on the setting for our wedding, and Tuesday’s post on the fashion choices were two of my most read blog posts EVER, so thanks!

Today, I’d like to show you some of the details from the wedding. Let me first explain something to the youngins out there: Before Pinterest, there was a wedding binder. And let me tell you, mine was huge! I pulled it out of the attic (of course I still have it!) to take a peek again. Honestly, the binder seems to be the most outdated part of my wedding! The cover, which features a flower inspiration pic and our teal detailed invitation, shows the color palette we worked with. There were also touches of Tiffany Blue throughout the wedding.

Here’s a picture of a flower inspiration page. Pretty, huh? I would have died to have carried a huge arrangement of peonies but they weren’t in season so when I saw this picture of cabbage roses from Martha Stewart Weddings,I was smitten.

The arrangement came out beautifully. It was heavy as hell – but I loved it. (That’s me and my dad before we left the mansion to walk down the aisle.)


Funny story: My dad is no sap but he can be known to get a little sentimental.  So, I warned him. I said, “Dad, don’t you dare turn to me right before we walk down the aisle and say something that makes me cry. I want you to tell me a joke.” And he took this task very seriously. He bought joke books and looked for the perfect one for weeks. Finally, he decided on this short, sweet, and giggle-inducing one: A pig is sitting at a bar drinking beer and after beer. Finally, the bartender asks him if he needs to use the bathroom and he says no thanks. He continues to drink and the bartender is baffled. After a few more beers, the bartender asks again, “Don’t you need to use the bathroom?” and finally the pig says, “No. Don’t you know who I am? I’m the little pig who goes Wee Wee Wee all the way home!”

Thanks Dad for the potty humor when I needed it the most. (You can actually see me gaffaw in the wedding video!)

Ok – back to the decorative details:

The bridesmaids all carried different flowers in various shades of pink. Everything from hydrangeas to daisies to snapdragons. They were small and simple and they looked great. (For more about the bridesmaids dresses and where you should NOT get yours, check yesterday’s post).

For centerpieces we had some low and some tall and they were mixes of pinks and greens.  I spent weeks making beaded table numbers but they were a bit of a bust. In fact, they’re crooked and you can’t even see them in these pics. I feel like I need to explain: I took wires, added large silvery clear beads and bent the wires in the shapes of the table numbers. Then I had the florist insert them into the centerpieces. Unfortunately, they were too small/clear and no one could see them. Oh well.


One of my favorite flower arrangements was the huge one in the Music Room. As guests arrived, they entered through the foyer and then were directed into this small blue room that had a large arrangement in it with all the seating cards stuck in the arrangement. (I guess sticking things into flowers was a big thing 10 years ago! Or at least I thought it was!)

Now to the yummiest detail – the cake! Now listen, my mood on my wedding day was one that I have never had before or after. (Yes, even different than the birth of my kids.) I was giddy, elated, and high-on-life. I drank several glasses of champagne throughout the evening and none of it touched me. It was like I was drunk from the day itself and nothing else could compare. So maybe you don’t want to trust me when I tell you that my wedding cake was The. Most. Delicious. Cake. Ever.

But it was.

It was simple – white cake with buttercream and chocolate ganache covered in fondant. And now that I think of it, I need to take a trip to Fall River, Massachusetts and get an anniversary cake sometime this summer from Confections.  We rented the vintage cake stand from the bakery and I think it really added the perfect touch.

Our favors were another favorite detail of mine. I discovered early on when we were dating that our initials were the same as the initials for salt and pepper (S&P) so it was natural that we gave shakers as our favors. I found these great stainless steel ones from Crate and Barrel which featured holes in the shape of the letters S&P. I found acrylic boxes to put them in and I decorated each one with a wide silk blue ribbon and a label that said “S&P  – Love is the Spice of Life – July 27, 2002”

The best is that they’re totally personal. They wouldn’t make sense for anyone but us. Unless you have S&P initials, of course! I’m happy to say that many of our friends use them everyday – and we do too!

Hope you enjoyed all the details of our wedding! Stay tuned for more wedding fun tomorrow.

XO

Sue at Home

Family, Food

Rainbow Cake: If I Can Make it, You Can Too

I pretty much suck at cooking. Case in point, tonight’s dinner: I made pasta, a jar of Patsy’s tomato basil sauce and a package of Stony Brook Farm Turkey Meatballs. Yawn!

So it seems kind of silly for me to give cooking and baking advice. But, there are a few things I can make well. My main criteria for my cooking is that it has to be really easy with very little room for human error. And the bonus for you is that If I Can Make It, You Can Too. Hmmm…sounds like a new feature!

Remember a few weeks back when we celebrated Lily’s birthday with a rainbow themed party? And remember that I promised I’d give you the play-by-play of how I made the rainbow cake? No? Well, good. Cause I forgot too!

Let’s start by staring at my beautiful new Kitchenaid mixer in Aqua Sky. Ahhh…she’s lovely, isn’t she?

To make the 6 layer cake, I used three 8-inch diameter pans and made 2 box mixes of cake. You can use any kind you like. (Or knock yourself out with a homemade one. I just find that the box ones are pretty good so why bother with homemade?) I made one batch first and separated the batter into three bowls. I was very careful to make sure that I separated it evenly so the cakes would be the same size. Bowls from here.

I always use gel food coloring for cakes or frosting because I like the colors to be really bold. (If you want pastels, go ahead and use liquid coloring. It’s much easier to work with.) I kept the “color station” very methodical. Each color got its own knife so I didn’t mix them up and I was sure to put it on top of plenty of paper towels because that stuff can stain your counter tops! (Note, gel coloring is kind of disgusting looking but totally effective. If you’d prefer some more natural colors, well…you’re reading the wrong blog.)

I’ve learned that you need to add a lot of food coloring at first because you can’t add color, then mix, check the color, add more color, mix more, check the color again, add more color, mix more…well, you get the point. The problem with that is you’ll end up overmixing the cake batter and it gets thin. So, go bold the first time and don’t overmix!

Once the red, orange and yellow cakes were done baking, I let them cool while I washed and prepared the pans for the second patch.

After the cakes were baked and cooled, I wrapped them individually and put them in the fridge until I had a chance to frost them the next day.

When it was time for frosting, I whipped up a double batch of buttercream frosting. I’d love to share my top secret recipe but if I did I’d have to kill you. Kidding! I use the recipe on the side of the Domino powdered sugar box. It couldn’t be easier and it’s delicious. One by one, I frosted and kept adding layers. Some of the cakes were slightly angled so I used a serrated knife to slice a little off the top to even them out. An important tip I learned from the LHJ food team about frosting a cake: only use the back of the spatula.


 After it was frosted, I let Lily add some sprinkles to the top. I don’t have a cake plate, so I used an upside-down bowl to display it! But there was a tiny lip around the bottom of the bowl and I was totally out of frosting to hide it, so I used a cheap can of ready-to-use frosting to make those little dots around the base. Shhh…don’t tell anyone!

 I love that it’s so simple from the outside because when I cut it open, everyone Ohhh’d and Ahhhh’d!

But most importantly, Lily loved it! For all the other details of her rainbow party, like rainbow balloons, rainbow fruit salad, rainbow favors and rainbow manicures, click here.

Happy baking!

XO

Sue at Home