Before and After, Decor, Home, My house

House Update: New Batik Pillows and West Elm Lamp

Ah, how I love a batik pillow! Remember back when I told you about those Amber Interiors ones that I was dying over? And remember how they were crazy expensive?

sally pillow

Well, my Etsy substitutes from OrientalTribe11 arrived and They. Are. Perfect!

pillows 131

134 pillow

They took a little while to get here–I mean, they were coming from Thailand after all–but they are as beautiful as I imagined. I was a little afraid how the navy and white batik would work with my teal walls but I think it’s divine. And obviously, I love the neon pink and orange accents. (Apologies for the couch that looks like a saggy elephant’s ass. I promise that what it lacks in appearance, it makes up for in comfort.)

pillows 133

They’re made really well. I’ve had them for awhile now and I’m so happy with how they look. Check out the detail:

pillows 137

The room looks so much better with some more streamlined pillows. Remember the hot mess of pillows I had before?

pillows collage textSidebar: And see the change in that doorway to the right? I painted the hideous wood paneling in the playroom (including that stairwell that leads to it) so I’ll be telling you all about that change soon. (And yes, that means that I totally broke my resolution!)

And looky here, another change!

pillows 138

Did you spot it in the foyer behind the couch?

pillows 154

We got a new lamp from West Elm and I am loving it!

pillows 144

It’s the Geodesic Table Lamp and I love the openess of the brassy base. Plus that tan lampshade is so warm and sophisticated. I feel like it’s the look I was hoping for when I got the Nate Berkus for Target one, but this one…well, you get what you pay for. (No knock to Nate of course, his is still damn good for a $50 lamp!)

pillows 140

It’s coming together one little bit at a time.

XO

Sue at Home

P.S. I feel like whenever I show the living room, the paint color never reads right on camera. So, here’s a swatch of the real color: Benjamin Moore Teal.

benjaminmooreteal

Before and After, Decor, Family, Home, My house

Hallway Gallery and Runner

hallway 006When you last met my hallway…what? You’ve never met my hallway? Oh the shame. Let’s get better aquainted.

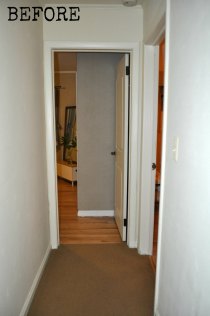
Back in 2010 when we moved in, our hallway had brown wall-to-wall carpet (yikes) and poorly textured creamy walls.

HALLWAY DSC_1232

hALLWAY DSC_1239

It only took about a month before we ripped out the carpet and had the wood floors underneath refinished. We went with a dark stain downstairs but we kept the hall pale to go with the floors in the bedrooms. Check out 2 year old Lily showing off the pretty hardwood back before I fixed the stair risers. (Doesn’t she kind of look like a ghost? Boo!)

5396523371_b55b76b896_z

A few months after that, Pablo attempted to skim coat the walls (I’ll give him an A for effort) and we painted the walls in Benjamin Moore Coventry Gray with Cloud White trim.

5667967610_9b23f3135d_z

That was three years ago and everyday since then I’ve had the intention of hanging some extended family pics up there. And now it’s done! Well, not done. More like a decent start. (You’ll also notice I’ve sort of learned how to use my camera too.)

hallway 023

I shopped for the runner for a loooooong time. That problem with my expensive taste and limited budget got in the way but eventually I fell for a pretty kelly green wool flat weave rug in a Jaipur catalog my mom had borrowed from a local decorator. I was contemplating getting one (and even paying the expensive-for-me $200+ price) when this beauty popped up on One Kings Lane for only $149. I had to go for it. Lucky for you OKL has it right now, too (for a few bucks more).

OKL rug

The next step was the frames and since you know me, you can imagine I tried to go inexpensive with some of the offerings at Target, Kohls and Ikea. But they all just looked too cheap to me so I ended up getting most of them at Pottery Barn. (I can’t say enough nice things about their gallery frames. Just go buy them and thank me later.)

hallway 006

As for the pictures themselves, the focus is on extended family: the girls’ cousins, aunts, uncles and grandparents. (I felt I had thoroughly covered the 4 of the us in our dining room photo wall so it was time to spread the love.) You’ll notice most of them are super casual.

hallway 047

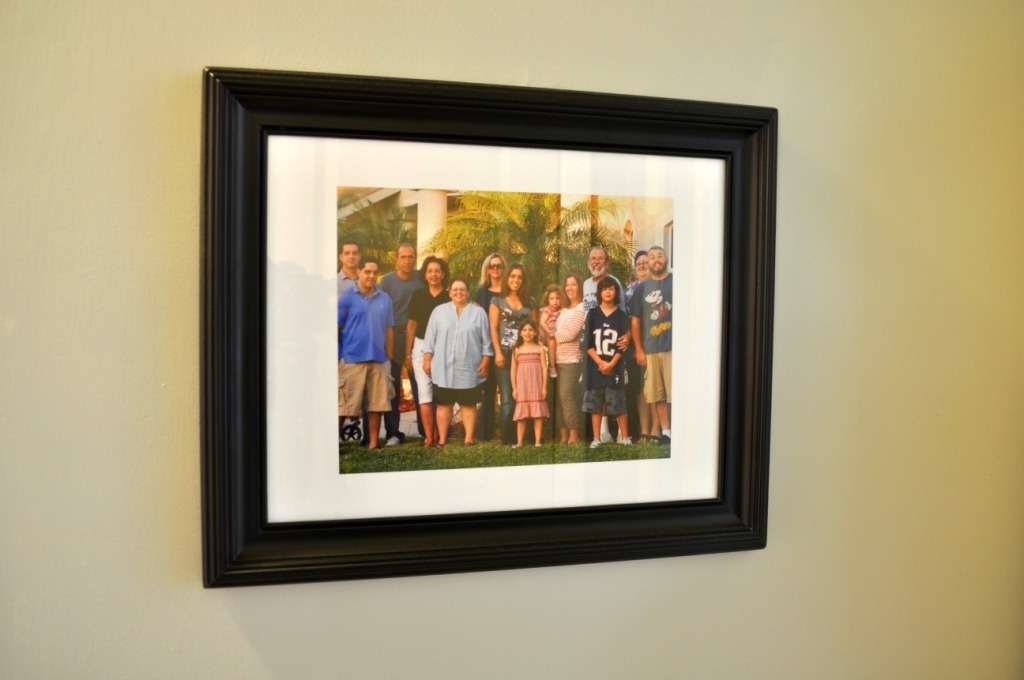
hallway 050One of the favorites is this picture from Thanksgiving a few years ago. It’s the last time we had my family and Pablo’s family together so it’s got a lot of VIPs in it.

hallway 044

The walls look a little sparse for now but the goal is to fill it up top to bottom. Something more like this.

hallway 041

It’s coming together but don’t look up! If you do you’ll see cracked and peeling paint and one of the noisiest flourescent lights in history.

hallway 032

Take a closer look at that texture.

hallway 033

We’re bringing some pros in soon to fix it up and I’ve got plans to replace the light, too. I’ll keep you posted.

And the view from the bedrooms needs a little love too. See that space above the stairs? hallway 056

 I’d love to put something inspirational there so we see if right before we head out for the day. Ya know, something like this:

seize the day

OR

don't forget to be awesome

Maybe we could even jump and smack it like the Notre Dame football team does with their motivational sign…?

play like a champion today

So it’s still a work in progress but I’m happy with the changes we’ve made. It sure is nice to see Mimi, Papa, Uncle Steve, Auntie, Jonathan, Bobe, Grandpa Steve, Uncle Francis, Aunt Nicole, Baylee, Arianna, Carter, Aunt Paola, Aunt Alex, Eliseo, and Weli everday.

hallway 023

XO

Sue at Home

Decor, Home, My house

Sue At Home in Ladies’ Home Journal

As you may know by now, I am the Fashion Editor for Ladies’ Home Journal magazine. So when some of my fellow editors wanted to photograph a story for the April issue about bringing spring color into your home, they thought of my colorful abode and more specifically, my hot pink chair.

chair 068

My pink chair (you can read all about it here) has gotten a lot of love in the past. It’s one of my most read posts, most repinned pins, and it was featured on Emily A Clark’s blog, Centsational Girl’s Best of DIY site, and Apartment Therapy’s Room for Color. (Hey look! There it is again over in the sidebar! Click there for more living room pics.)

chair 050

But this time, it’s in a magazine. A huge national magazine. (OK. I know that I’m one of the editors so it’s kinda like nepotism but still, I’m happy to be included!)

SAH in LHJ thats my house

SAH in LHJ text

So on a chilly day in January, I was pleased to invite two of my fellow LHJ staffers and a small photo team into my home for the shoot (the zero-minute commute was kinda awesome too).

Right away photographer Jennifer Causey and her assistant got to work setting up lights and reflectors and getting my pink chair ready for its close-up. I usually prefer a neutral pillow on the chair but for the purposes of the story, editor Lauren Piro brought lots of bright spring-y options. The yellow one from Target was the clear winner.

pink chair in LHJ

Note: The chair has faded A LOT and is due for another dye job but I just couldn’t get it done before the shoot, So yes, she has had a Photoshop touch up for the LHJ final image you see below. When it gets a little warmer, I’ll be ok with dying on the deck again!

102195199

But the chair wasn’t the only image shot in my house. We also put some artwork from Society6 on my bedroom dresser and styled it with some of my jewelry.

LHJ in bedroom

Do you know what it’s like to have a photo crew, including some of your coworkers, in your bedroom on a Thursday afternoon? It’s weird, people. It’s weird. Luckily, one of those fellow coworkers is my dear friend, our very talented photo director Clare Lissaman, who always knows how to put people at ease on a shoot.

The story also featured my painted kitchen cabinet. It’s one of my favorite DIY projects in my house (you can see it up top in my header collage) but I’ve had such a hard time getting a good shot of it for the blog so that’s why I’ve never written about it.

102195197

The cabinet looks so pretty that I almost don’t notice the fugly countertops!

So how was she able to get that brighter shot in my windowless kitchen? What photo skills does Jennifer have that I don’t have? This big ass light, that’s what! (And I’m sure she has lots of other great photo skills too! But the light helps.)

loght in kitchen

That beauty totally brightened up the space.

camera in kitchen

I was totally thrilled to be included in the issue and I want to thank my co-workers for including my home and supporting Sue at Home. If you’d like to order a subscription to Ladies’ Home Journal, just click the affiliate link in my sidebar.

With the happy spring weather, I’ve decided to come out of my hibernation and I can’t wait to get some spring projects happening soon. Stayed tuned for our newly painted playroom, a new headboard, a hallway makeover and…drum roll…a complete bathroom renovation!

XO

Sue at Home

Decor, Home, My house

Photo Wall or My New Favorite Thing In My House

I first told you about my obsession with oversized photo displays back in October 2012 when I spied this awesome picture from Palihouse on Dilly Dallas.

palihouse

Just to recap: I know that displaying personal pictures might not be #1 on every decorators must-do list (in fact, it’s usually on their NO list) but to me personal pictures are the way to keep a home looking, well…personal. And here’s the thing: I take a LOT of pictures. So, instead of picking a few great ones, framing them, hanging them up and calling it a day, I take a lot and then… they sit in my computer (and on Flickr and Shutterfly). The good part is that I don’t have to make any decisions (yeah!) but the bad part is that no one else gets to see them. And that’s just wrong. I mean, how can I keep pictures like this to myself:

aruba-139

So, I thought long and hard about how to do my photo wall. Should I create photo wallpaper like this Tribeca home by Rinaldi Interiors?

black and white

Nope. Too permanent. I want something that’s changeable. That certainly rules out something like this. I mean, how could I choose just one picture?

large pic

Hmm…maybe a mix of small frames, like this. (Yup, that’s Soph modeling in LHJ!) But, nah. Again, it’s too permanent and too much work to use the huge number of pictures I want to use.

soph modeling in LHJ

So, I decided to just cover a wall with pictures. No frames. Nothing permanent. I even thought about painting on some magnetic paint and then using tiny magnets but I figured there was an easier way. Tape. Just little rolls of Scotch tape on the back of each pic. But it was a little more methodical than just tape and pictures. Here is how I made it happen.

pinterest-photo-wall-198

Step 1: Set some rules for the pictures you want to include. Color or black and white? All horizontal, all vertical or a mix of both? Various sizes or just 4×6? Just immediate family, extended family or include friends, too? I decided on:

– color pictures (I mean, how could I go black and white when I’ve got a kid with baby blues like Lily’s?)

– a mix of horizontal and vertical (because I clearly have problems editing)

–  just 4×6 (to keep it to a graphic grid)

– and only immediate family. I know that family part might be confusing but there are other places to display extended family and friends and I wanted to keep this more focused.

Step 2: Order Prints. I took quite a few long nights on the couch going through all my pictures and ordering HUNDREDS of them. I figured that it had been years since I had actually ordered prints so even if some pics didn’t make it into the mix, they were still lots of favorites so it wouldn’t hurt to have some extra prints on hand. (I highly recommend using a print plan on Shutterfly to keep the cost down.) You can imagine my joy when this arrived:

shutterfly pics

Step 3: Edit into groups. First I split them into horizontal and vertical pictures and then I created three sub-categories: 1) Sophia without Lily (could include me and/or Pablo), 2) Lily without Sophia (again, parents are okay), and 3) Miscellaneous (could be just me and Pablo, all 4 of us, just him, just me, or the two girls together). Now I know this sounds slightly insane (or let’s just say it…totally anal)  but there was a reason for the madness. I really wanted to include an equal number of each kid. Because you know they’ll be counting! And when one kid has been around for 8 years and one has only been around for 5, you can end up with an uneven mix.

Step 4: Use a level to mark your middle line and start taping. I just used one quick roll of scotch tape on the back of each one as I placed them. I tried to keep it balanced with colors and close-ups vs. pulled-back shots. And I tried a balance of posed and candids. And even a good mix of various ages. It looks random but there was a method to the madness.

photo-wall-185

I used the level again every few rows to keep myself on track but I just eyeballed the distance between the pictures. Once I had 4 rows of vertical pictures (with 16 in each row), and 4 rows of horizontal (with 11 in each row), I noticed a problem: I had a lot more horizontal left over. So, I added a few extra rows of horizontal on the top and the bottom. And I have every intention of adding more rows over time but don’t tell Pablo: he thinks there are plenty already. But let’s face it; is he really going to fight seeing more pictures of his kids? I think not.

photo-wall-016

After I stood back and took a look, I had to move a bunch around to keep it balanced. But once I had them in the places I wanted them in, I retaped each one with a piece in each corner. And there you have it: my new favorite thing in the whole house.

photo-wall-026

We love sitting at the dining table and looking at all the awesome memories. And guests really love it too. It’s certainly a conversation piece!

photo-wall-195

Let’s take a closer look at some ridiculously geeky stats about the 141 pictures that made the cut:

106 were taken outdoors (that’s 75%!).

There are 56 pairs of sunglasses, 44 bathing suits, 27 hats, 11 Halloween costumes and 5 appearances by Sophia’s beloved silver sequin-covered cardigan.

Almost half were taken close to home in New Jersey or New York, while a whopping 23% of them were taken in Aruba (more on that here and here). Obviously, we like taking pictures on vacation because 19% were in New England and another 19% were in Florida. Nevis and the Bahamas round it out with one each.

I already mentioned that there are 87 pictures of each of the girls. There are 25 of Pablo and only 17 of me. And the reason for that lies here: I took 84% of them.

(Ignore the spiders on the lamp. I took these in October!)

photo-wall-034

So, I guess the take-away from those stats is this: I’ll continue to get outside to get some great shots, I’ll never take a vacation without the camera, and I need to give someone else the camera more often.

photo-wall-050

So, tell me…how do you display your family pictures? I’m currently working on a display of extended family pictures in our hallway. The plan is to use all black and white photos and solid black frames with mattes. Wish me luck!

XO

Sue at Home

P.S Congrats to Katie who won my Minted giveaway!

crafts, Decor, Entertaining, Home, My house

Spooky Decor

Just in time for our annual Halloween soiree, I finally got the house all spooked out and ready. I started with spiders in the light fixture and a black scarf draped over my painting to make it look a little less pink.

halloween-002

A lot of the decorations were left over from last year, like the little spiders, the tablecloth and the cobwebs. This year, I added lots of Martha Stewart Crafts that another editor gave me at my day job.
halloween-004

All of the wine bottle decorations are from Martha Stewart. You can find them here.  The little owl papers just stick on the front of the bottle. Sophia said they all reminded her of Harry Potter.

halloween-005

For the witchy wine, I combined the sticker from this kit with the witch’s hat from this kit.  My pumpkins are fake ones from Target that I spray painted and glued glitter onto.  (You know I’ll never spray paint a real one again after what happened last year!)

halloween-006

The girls made the creepy hands at an event at Sophia’s school. They’re just medical gloves filled with flour.

halloween-007

My favorite of the wine bottle decorations was this awesome vampire collar. We added fangs from the photo decor kit too.

halloween-008

Sophia made the striped planter at the Y.

halloween-009

Those ghosts in the back are the party favors for the kids. I just trimmed plain white lunch bags to have a ghost shape on top and Soph drew on the eyes.

haloween-010

My glitter skull from last year is sitting on the front windowsill surrounded by brass candlesticks. (And of course, some pretty carnations. They’re my go-to party flower because they’re cheap, pretty and they last a loooooong time.)

halloween-016

The girls colored pumpkins with metallic paint pens in lieu of carving.

halloween-017

Our front foyer table holds this little glass pumpkin (another Target find) filled with lots of essential Halloween toys like glow-in-the-dark teeth and spider rings. (Because you can never have enough spider rings!)

halloween-018

A little ghost that Lily made in pre-K last year hangs out in the den on top of a bowl of shells. Sometime between last Halloween and now, he lost an eye. But I think it’s a good look for him so we’re going with it!

halloween-020

I also did a couple of the Halloween crafts featured in the October issue of Ladies’ Home Journal so I can talk about them for an upcoming TV appearance on Better TV. This is all day job stuff but I’ll let you know when it’s airing. (Follow Sue at Home on Facebook to hear all about it!)

halloween-028

Up in Sophia’s room, she had a blast spookifying her place with this photo kit from Martha Stewart.

halloween-031

Of course, that was before she switched her costume a few minutes before the party. As I told her the first time she changed her mind about her costume, “You can be whatever you want as long as you can put it together from things in this house.” I’m happy to help buy/build/hunt for costumes but not when she changes her mind two days before Halloween! (BTW: She’s a cat–obviously–and Lily is Chee Chee from Teen Beach Movie. When I posted this picture on Instagram, I tagged Chrissie Fit, the actress that plays Chee Chee, and she liked my picture! It’s scary how excited that makes me but you need to understand that this movie is like an Oscar-caliber film in my house and Chrissie Fit is like our Meryl. I don’t even think the girls understand how cool it is!)

Halloween-049

And when they’re not being as cute as can be, they can turn up the spook and scare the crap out of you too!

Halloween 2013 BLOG

XO

Sue at Home

Decor, Home, My house

House Tour: The Man-ish Cave-ish Den

I have a secret. We have a room that I’ve kind of kept hidden from you.

Meet our den.

den-020

Being that this is the room Pablo spends most of his time in, it’s the closest thing we have to have a man cave. Granted, it’s the most well lit man cave in history but still…it’s his. And it’s super hard to decorate! Why? Well, for starters he insists we leave the wood paneling in place. (Seeing some cool wood paneled rooms on Pinterest has shown me that it’s possible.) Plus it’s long and narrow and has a weird layout:  a sliding glass door at one end, a fireplace at the other end, a wall of windows along the back, and finally a wall with a doorway and a weird opening to the kitchen.

den-024

The room was an addition that the previous owners built and it’s a full service space for us: a den for lots of TV watching, an “office” for Pablo (this is where his laptop lives), a music room (his piano and guitar hang out in here too), a casual dining area (though we eat most meals in the dining room, we do like to eat here at our Ikea Docksta sometimes), and now it’s become a storage space for me with the addition of a new credenza (which I’ll tell you about in a minute)…oh, and it’s our fireplace room, too!  And if that weren’t enough function for such a small space, it’s also the room that you walk through to get to our deck and backyard so we can’t pack it too full of furniture.

I’ve given you a couple peeks into the room before. Like, remember when I told you about the thrift shop chairs that I painted red?

den-027

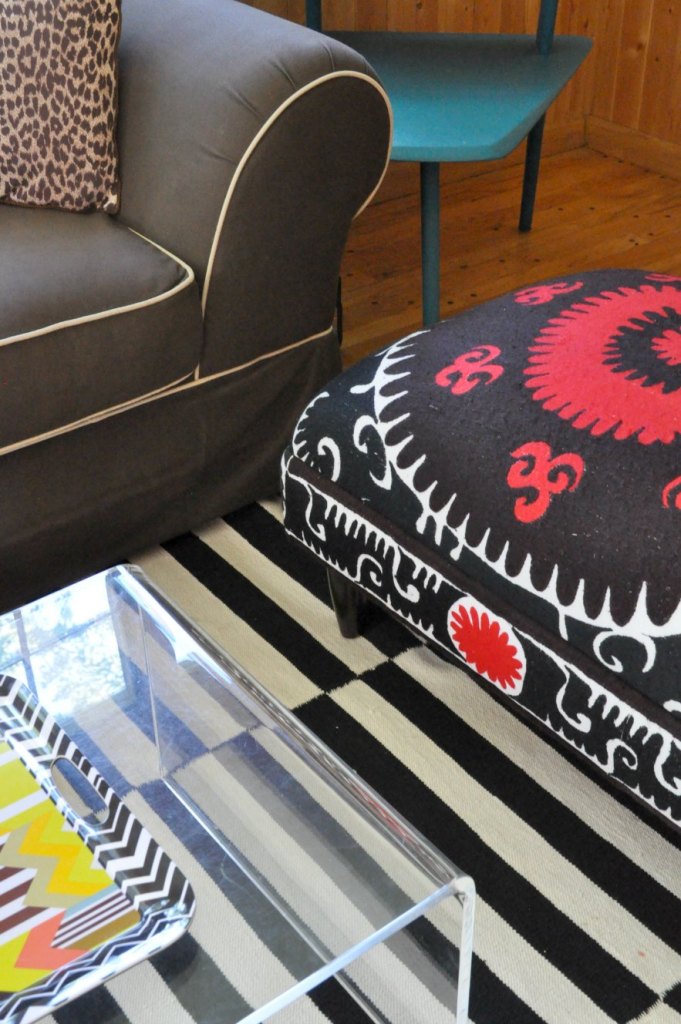
And you learned all about our Suzani-covered ottoman recently, too.

den-033

But I haven’t revealed much else because…well, I’m still working on it. For a couple of years, it was seriously just the couch, piano, and TV in here. (Side note: Looking at this pic now, I see how badly that blue table in the back needs a lamp. With so many windows and recessed lighting, we just never needed the light but I think we just need the shape.)

den-034

But I’m thrilled to say it’s finally coming together. Hey look, there’s something hanging on the wall (details in this post)! Lots more art should be coming soon. I promise.

den-043

And the mantel is an embarrassment. That one frame is hung way too low. (I think I stuck it on the nail that was already there! Sad.) Or maybe it should just be propped up and not hung at all? Thoughts?

den-044

Pablo has a nice view from his spot on the couch into the land of not-wood-paneled dining room and living room.

den-052

We’re on the fence about the TV. Tell me: do we hang it on the wall above the piano? (Which is certainly convenient because the cable cord is over there.)

den-056

Or does it go above the credenza where the tape marks are? (This was our preferred spot but after I realized it would be a cable cord nightmare, I’m pushing for above-the-piano.)

den-032

Oh! And let’s talk about that purty credenza, shall we? It’s vintage but we had it refinished and painted white. I know some people think it’s sacrilegious to paint such a beautiful vintage piece but with wood walls and a wood floor, we didn’t need any more natural wood.  We got it from Forgotten Furniture. (They’ll deliver so check them out online here.) We also got the mid-century dresser in our bedroom and a new headboard for Sophia from them. Their prices are amazing.

I had been looking for a mid-century credenza for this space since we moved in 2 1/2 years ago. The problem wasn’t finding something I liked, it was finding something I liked and could afford. Nice vintage credenzas that I had seen were in the $900-$2000 range. Another option is this mid-centuryesque one from BDDW that sells for a whopping $11,800.  (Umm…I don’t think so.)  We actually got pretty close to getting the Dumont from West  Elm but I know with shipping, that $699 price would have blossomed so I’m glad we didn’t do it. This one came to us by luck. The sellers had something similar but they sold it so when we went to see them to get Sophia’s headboard (solid wood, Depression-era for $75!) I asked if they had anything else similar. Rich showed me a picture of this one on his phone (before it was painted and refinished) and told me he would sell it for $300 “as is” or $400 painted. We bought it on the spot, sight unseen! He delivered it to our house two days later looking as good as new and we were both thrilled. I’m now using it to store some of the “office paperwork” that used to live in the attic. (Remember, I don’t have an office or desk of any kind so my papers and office supplies are all over the place. A girl needs a place to put her washi tape!)

den-030

But let’s be real, this room is far from done. There are still plenty of things wrong in here. Like this eyesore of an air conditioner that’s stuck into the wall. We rarely use it but don’t want to be left with a whole in the wall if we take it out. I’m thinking about sticking a big plant in front of it. Or building something to hide it, like this genius DIY.

den-049

And then there’s this ugly tile that’s in the little windowsill into the kitchen. Ick.

den-047Oh, and I think worst of all is the whitewashed paint job on the window trim.  It just looks dirty and gross.

See?

den-041Now let’s talk about the serious lack of decorating. Poor Pablo gets stuck with my cast offs from other rooms, like this weird grouping. (I hate that little man but he’s been with Pablo for years so we’re stuck with him.)

den-070

I don’t mind this vignette but it could use a little love. The coral is from Aruba so it holds a special place in our hearts. (Remember when Lily used it to make some art for her room?)

den-062

And of course, he has to store all his man stuff in this room. Those weird things in the back are push-up paddles. (Ya know. Cause you can’t do a push up without a twisting paddle? Whatever. He looks hot so I shouldn’t sweat the technique.)

den-065

And now here’s another little secret: I took these pictures a month ago and I’ve actually fixed one of the problems already. Reveal coming soon!

Hint. Hint. Consider this the “before” shot.

den-080

For more den-spiration, follow my Mid-Century Man Cave Inspiration board on Pinterest.

XO

Sue at Home

P.S. It’s the time of year to start thinking about yummy pumpkin baked goodies so check out one of my favorite recipes ever. Click below to be taken to the deliciousness!

pumpkin-whoopie-pie-pin-183

Before and After, Decor, Home, My house

Suzani Ottoman Goodness

Meet our ottoman.

ottoman-088

It came to us at a price of zero dollars which is my favorite kind of price. (We were lucky enough to snatch it up when my parents moved on to bigger and better things.) But unfortunately, I wasn’t that into the washed red cotton skirted slipcover that came with it so it sat naked (slipcoverless) in our den for longer then I care to admit.

ottoman-091

I considered a million different options of how to cover it. A slipcover? DIY upholstery? Professional upholstery? And most importantly, what fabric?

Perhaps a suzani?

I had fallen in love with vintage suzani textiles ever since I stayed at the Colony Palms hotel in Palm Springs. “Delicious” designer Martyn Lawrence Bullard (of Million Dollar Decorators fame) plastered the hotel with suzanis–as headboards, in picture frames, as throw pillows and just draped all over everything. (Images via colonypalmshotel.com.)

colony palms

colony palms 2

Pretty fabulous, right?

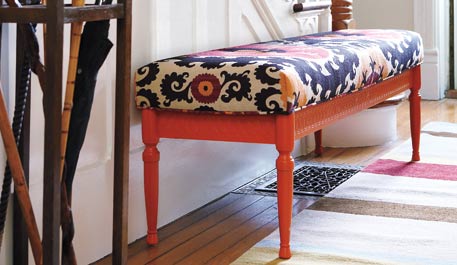
Then I spotted this image over a year ago on a blog and saved it on Pinterest with the text: “I’m thinking the mid-century man cave needs a little boho printed love. Maybe cover the ottoman in a Suzani?” (Just goes to show how long brewing a makeover can be!) Note: I pinned it from another site who used it without crediting it (booo!) so I just did a little Pin-research to find the original source. It was done by a writer named Kevin Austin from Style at Home. It was originally a coffee table!

suzani ottoman

But the problem is that this crazy idea of mine was going to go into our den, a.k.a. The Mid Century Man Cave, a.k.a. Pablo’s room. As I’ve mentioned before, he’s generally very agreeable about all my design choices (see proof in I Have a Hot Pink Chair!), but this is “his” sanctuary and he wasn’t fully convinced about how the suzani would work with our Ikea black and white striped rug. Until we saw this:

hgtv

It’s the home of Amber Lewis of Amber Interiors featured in HGTV magazine. (I seem to be talking about Amber ALL the time lately, like here and here. Is this becoming a serious design crush? I would say so.)

Alas! This was the visual help I needed to convince Pablo but then came the next hurdle…how does one buy a suzani?

I considered lots of different sites and did a bunch of research and ended up finding a REALLY AFFORDABLE one on eBay. I snagged it for only $45 plus $30 shipping. (What? Do you have a cheaper shipping method from Uzbekistan? Yeah, I didn’t think so.) And considering that I looked at some that were well into the hundreds, I think $75 is a fair price to pay for something hand embroidered.

suzani

Looks pretty similar to this one on Wisteria for $900, dontcha think? (It’s no longer available. Does that mean some moron actually bought it?)

wisteria

A few weeks later, we found this little bundle of joy on our doorstep.

ottoman-079

It was sewn closed and dotted with some kind of brown doody-looking substance that had hardened to seal it up.

ottoman-082

But inside it’s unique wrapping (and two protective layers of plastic bags), there it was in all it’s hand-sewn gloriousness.

ottoman-092

Look at the detail from the back. It’s stunning!

See that seam going across the upper left corner? That’s because several women in the family will stitch different sections and then they’re joined together later. Don’t worry. You can barely tell from the other side. (But ironically, you can see the seam in the $900 Wisteria one shown above!)

ottoman-098

But I was a little sad to see that if I centered the red medallion on the ottoman, I would lose all of that beautiful detail at the edges. So, I considered covering it off-center, like this pic below so I could get at least two of the edges on it. (I now know that was dumb and would have been sacrilegious to my beautiful suzani. Don’t worry. I saw the ere of my ways.) After considering a DIY (I mean, I even had out the staple gun and some scissors), I chickened out and decided to have a pro do it. And I am so glad I did.

ottoman-093

Garwood Interiors knew just what to do to center the medallion and preserve the edges of the suzani. Isn’t it a beaut? (And soooooooo much better than what me and my staple gun would have done!) And he only charged $150. I don’t really know if that’s a lot or a little for work like this but it felt totally worth it to me.

ottoman-046

And now she’s sitting in the man cave (the most well lit one in the world) with her new friend the vintage credenza (but that’s another happy story for another day).

ottoman-022

I like how the brown embroidery around the red medallion, ties into the brown couch that–until now–had nothing to do with anything else in there.

ottoman-021

I know I owe you a lot more pictures of the room. It’s one of the places that I’ve barely shared with you (aside from a peek during the blackout after Sandy when we were dancing in the dark and when we looked at my spray painted chairs) but I promise that some “in progress” pics are coming very soon.

Thanks to my parents (who are celebrating their 48th wedding anniversary today! Happy Anniversary Mom and Dad!) for giving us the ottoman. And thanks to you for reading this way-too-long post!

XO

Sue at Home

Decor, Home, My house, Shopping

Batik Pillows from Etsy

I’ve got a problem. It’s an obsession really. You see, I need new pillows for my living room couch and once I saw these beauties from Amber Interiors I couldn’t think of anything else.

amber

They’re dark blue batik with hot pink stitching and that pretty much means they’ve got my name written all over them. But there’s a problem. Let’s take a closer a look at this pillow named Sally.

sally pillow

Do you see the problem? That’s right. She’s $195! Oh Amber, I love your shoppe but I do not have $600 to spend on three pillows. So, I did what any smart shopper (AKA poor shopper) would do: I went to etsy. It didn’t take much–just a quick “batik pillow” search–to find a couple great shops.

First I spied SiameseDreamDesign which has lots of batik pillows (and bonus: their prices are more in the $28 range)! There were lots that I liked and I highly considered these two.  (Click pics for direct links.)

siamesedreamdesign1

siamesdreamdesign2

But I kept searching and finally hit the jackpot with OrientalTribe11.  A little pricier (the 16×16 ones are $40 and the 20x20s are $60) but I felt like they were closer to the Amber ones that I so coveted. I bought these two but there are lots more like them:

orientaltribe111

orientaltribe112

Hmmm…that second one looks kinda similar to our old friend Sally. Let’s take a closer look.

pillow compare

Damn, I love Etsy.

And yes, I know I said I was buying three but I think I’m going to wait until I get the first two and then figure out what else I need. As excited as I am about my cheaper find, I still think Amber (interior designer and seller of the $195 pillows) is a genius so I’m going to follow her lead and make sure my pillows aren’t all too matchy.  I mean, did you see this beautiful pillow pile when her place was featured on Style Me Pretty Living last week?

amber pillows

You’ve just got to check it out. Her whole place is a study in contrasts. It’s all crisp and clean with beautiful ethnic accessories.

amber dining

amber bedroom

amber patio

Can I move in?

Stay tuned to see how the living room shapes up when my new pillows arrive! More on the living room here.)

All Amber Interiors home pictures via Style Me Pretty Living photographed by Bryce Covey.

XO

Sue at Home

Before and After, Home, My house

Landscape Before and After Update

It’s been a year since we had our brand new shrubs installed so I figured it was a good time for an update, especially since it’s all looking so damn good. Before we look at the leafy prettyness, let’s see how far we’ve come. Here’s the half overgrown, half dead landscaping that we inherited on closing day.

December 2010

Closing day

Then we ripped everything out.

May 2012

removed shrubs

And then in June of last year, we had lots of beauties installed. (Read all about it here.) And as you can see, it was a huge improvement from the overgrown stuff we had before. To think, I was so thrilled with that one blue hydrangea blossom!

June 2012

shrubs after

This spring, I took a few pictures as the shrubs began to wake up from the winter freeze.

April 2013

shrubs-354

And finally, let’s take a look at how the whole thing is filling in. (Note: there are pink rose bushes in the middle of each side but some recent storms knocked most of the petals off. I hope we get more soon!)

June 2013

shrubs-022

shrubs-034

shrubs-029

This was the first year (of many, I hope!) that I got to enjoy all the splendor of my weeping cherry in it’s pinktastic glory. (This pic was taken a couple months ago. )

shrubs-358

During the spring months, I had a couple pots of ranunculus on the front steps and I was thrilled with them! They just kept blooming and blooming…until one day they just didn’t bloom anymore. It was a quick and sudden death but they were so beautiful up to that point, I would certainly get them again next spring.

shrubs-351

The best part of the rainbow is the amazing blue hydrangeas. I’m so thrilled with how they’re blooming. They just keep getting bigger and brighter every day.

shrubs-024

And it would be wrong if I didn’t mention that beautiful lawn. It’s like Pablo’s third child. He takes of care of it obsessively.

shrubs-018

I’ll give you an update on the backyard soon but just so you can get an idea of how well his efforts have paid off, check out this comparison on the backyard during our first spring here and the backyard this month.

backyard collage dates

More on that green carpet goodness soon!

XO

Sue at Home

Before and After, Decor, Home, My house

Spray Painted Thrift Shop Chairs

Let’s take a little trip down memory lane, shall we? Back in January I took place in the Young House Love Macklemore Thrift Shop Challenge – with great success if I might say so myself.

thrft-store-challenge-chairs-2

I spent my $20 on four busted looking chairs and I had some pretty grand plans for them. Ya know – something like this where mismatched chairs become a cohesive set thanks to some spray paint and some love.

But as I said back then, I was going to have to wait because freezing cold temperatures don’t work with spray painting.  So at the first signs of spring, I took to the driveway with my chairs, some sandpaper and lots and lots of spray paint.

You may have noticed that one of the chairs was replaced from the original post. I just found one to be too wimpy. (Keep your eyes peeled – it happens again! Still, the total spent on chairs was under $30.)

chairs-007

Step one was to give each chair a light sanding with fine grade (220) sandpaper. I was using a spray primer first so I didn’t make myself crazy with this step. Just a little roughing up.

chairs-013

Next, I built myself a little area to paint with cardboard boxes and some duct tape. Obviously, I completely underestimated how much the fine mist of paint would travel and my driveway ended getting a little redish but it actually washed right off. (Note that I started with them upside-down first so I had less chance of getting any sticky marks on the parts that show by doing it the other way around.)

chairs-014

As for my spray paint, I went with a three product method: Krylon Primer in Gray, Krylon Gloss in Banner Red, and Krylon Crystal Clear protective coat. I’m a Krylon addict ever since it performed so well in my gold spray paint test.

chairs-022

It took a lot more coats than I anticipated but finally, it started to look red. I think during the process, I wiped out all the Banner Red in the tri-state area. I’m kidding of course but I did have to try 5 or 6  local stores to track down all the paint I needed. After I was done, I think I used a total of 3 cans of primer, 9 cans of color and 3 cans of top coat for the four chairs. I used every Michael’s coupon I could get my hands on and I bought a bunch at my local hardware store so I saved when I could but it definitely ended up costing more for the paint then I ever imagined. Lucky for me, the chairs were cheap!

chairs-023

Here’s a look at three chairs: 1 primed, 1 with a couple coats of color, and 1 all done. Yay for the all done!

chairs-028

Now, before I show you how cute the finished chairs look in our den, let’s take a peek at the sad spot that so badly needed them.  Poor little Docksta!

thrift-store-challenge-016

And now…

chairs-505

Now it’s a happy place!

chairs-508

chairs-513

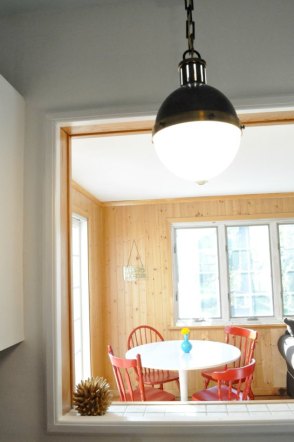
The chairs fit perfectly around the table and add some much needed color to the room. Check out how much better my view is from the kitchen “window”.

chairs-523

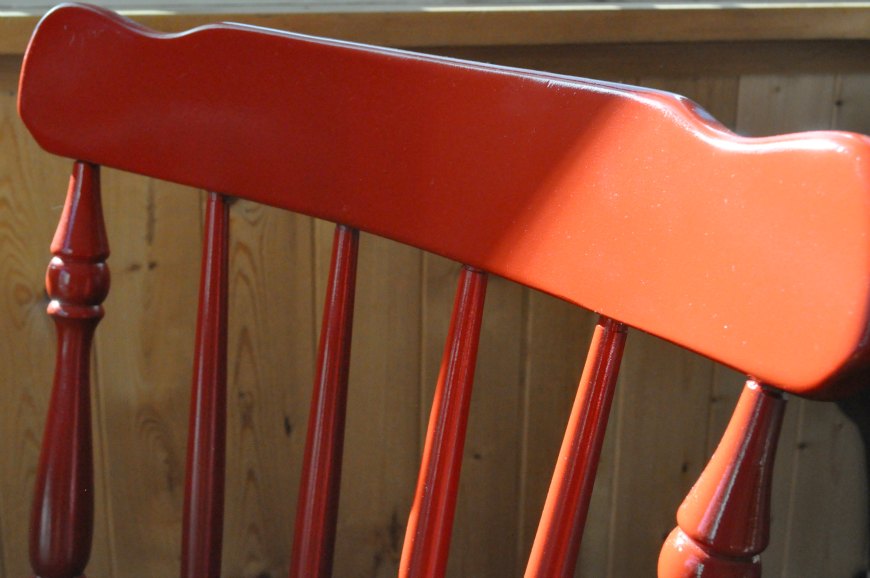
I didn’t sand them like crazy so they’re not perfect but I do like the slight glossyness of the finish.

chairs-527

chairs-515

Now that the weather is nicer and this room is no longer freezing, I’m thrilled to get to sit here for lots of lunches and dinners.

chairs-535

And I think the red works so well with lots of other things in the room.  (I know this picture doesn’t show much. I promise to take more pictures of this room soon. Really! I promise!)

chairs-510

One thing I will point out is the little vintage Piano Teacher sign I got on Ebay. It was a birthday gift for Pablo. This room is the closest thing he has to a “man cave” so I wanted to add something personal. And since playing the piano is one of his loves, I figured it was fitting. It’s small but we both love it.

chairs-517

So, what do you think? I’m really happy with how they came out. They’ve got a lot more personality than something store bought and they’re a LOT cheaper!

XO

Sue at Home

paint chair collage