Entertaining, Food, Home

How to Make Emoji Rice Krispies Treats

Hi all! I’m back with some more creativity in the kitchen. Emoji Rice Krispies Treats! (Just look at how good they came out. Believe me, I’m more shocked than you are!)

Sue at Home Emoji Rice Krispie Treats main

Before we get started, I need to give major props to Mister Krisp who is the one-and-only inspiration for this project. If you don’t know about her — and yes, this Mister is a her — Jessica Siskin is a NYC-based writer who just happens to make amazing dessert art with Rice Krispies treats. She has a huge following on Instagram and one of her most famous projects is her emojis. (While you’re checking out her Instagram, be sure to note her Rice Krispies tacos,  her Rice Krispies burger and oh yeah, her Rice Krispies Drake. I figured the emojis would be a great project for me and the girls to make to take to a barbeque today. (Shout out to Kelli and Rob!)

Sue at Home Emoji Rice Krispie Treats ingredients

The ingredients you’ll need are: 6 cups of Rice Krispies cereal, 3 tablespoons of butter, a 10 ounce bag of marshmallows, yellow food coloring, Pam cooking spray and frosting in the following colors: black, white, blue, red and pink. I bought tubes of Wilton decorating icing in black and red and then made a quick mini batch of white icing and used food coloring to make the other colors. (Note: I do NOT recommend the Wilton Ready-to-decorate cans. The frosting comes out too fast and it’s very hard to control.) For supplies, you’ll need a round cookie cutter and a Wilton #3 round piping tip. (If you want blush on some of the blushing emojis, you’ll also need red food coloring and a foam brush.)

The Rice Krispies treat directions are right on the cereal box: you melt the butter in a big saucepan on low, then add the marshmallows. As they melted, I added about 5-6 drops of yellow liquid food coloring to get the emoji color.

Sue at Home Emoji Rice Krispie Treats melting

Then you remove it from the heat and stir in the Rice Krispies. We laid wax paper on cookie sheets (just to protect the table) and dumped the mixture in the middle. Then I used a spatula coated in Pam to spread it out and press it down so it was flat. They should be somewhere between 1/4 inch and 1/2 inch high. I kind of like how fat this one in the front came out and it’s about a 1/2 inch.

Sue at Home emoji rice krispie treats close up

After you’ve got the mixture all spread out (you might need more than one cookie sheet), use the cookie cutter to cut circles. (You can spray it with Pam so it doesn’t stick.) You’ll want to use a flat spatula coated in Pam to lift them. Do not underestimate the stickiness of melted marshmallows! Pam is your friend. Pam is sort of like the most important ingredient in this whole recipe. Use her wisely! In fact, Mister Krisp even advises spraying it on your hands to mold Rice Krispies treats. We did just that and reworked the leftovers into a new layer of Rice Krispies treats to cut from.

Sidenote: On the first batch, I completely forgot the food coloring! We decided to still use some of them (I mean, they taste the same!) even though they looked more like rice cakes. Oops. You can see the difference here.

Sue at Home Emoji rice krispie treats 2 colors

All you have to do after you cut them is pipe on the frosting. I know this may sound daunting but if you’ve ever piped “Happy Birthday Whoever” onto a cake, you can do this. It’s just a series of little half circles and lines, plus some hearts, tongues and teardrops. (I kept this image from Mister Krisp up on my laptop as I worked.)  I don’t have any shots of me actually piping it because my assistants were totally over me at this point but here’s my advise: keep the piping tip close to the Rice Krispies treats, move slowly, and squeeze hard. As long as you stay close and go slow, you can’t screw it up.  If I ever make this again, I’ll invest some more tips because the biggest annoyance was taking the tip off and washing it before starting the next color. Here’s a process shot with just black and white icing.

Sue at Home Emoji Rice Krispie Treats black piping

But they really come to life once the other colors are added!

Sue at Home Emoji Rice Krispies 4 vert

Some of them, like the little guy on the bottom left below, call for blush. I couldn’t find a tutorial from Mister Krisp so I just figured it out on my own.

Sue at Home Emoji Rice Krispies 4.2

I used some blood — just kidding! — but seriously, doesn’t it look like blood? It’s actually red gel food coloring. I put a little on a plate and used a foam brush to just dab a little color onto his cheeks. Just be sure to blot it A LOT on the paper plate before putting it on the emoji. I think it worked out pretty well for those little shy guys!

Sue at Home Emoji Rice Krispie Treats blush collage

It was an easy, though somewhat time-consuming, project that looks a lot more impressive than I thought it would!

So, tell me…what’s your favorite emoji? I probably use the smooch lips the most because I “speak emoji” with my kids more than anyone else but I am partial to the wink and the heart eyes too!

Hope you’ll try this fun project!

XO

Sue at Home

Sue at Home Emoji Rice Krispies Treats Pin

Before and After, Decor, Home, My house

House Update: New Batik Pillows and West Elm Lamp

Ah, how I love a batik pillow! Remember back when I told you about those Amber Interiors ones that I was dying over? And remember how they were crazy expensive?

sally pillow

Well, my Etsy substitutes from OrientalTribe11 arrived and They. Are. Perfect!

pillows 131

134 pillow

They took a little while to get here–I mean, they were coming from Thailand after all–but they are as beautiful as I imagined. I was a little afraid how the navy and white batik would work with my teal walls but I think it’s divine. And obviously, I love the neon pink and orange accents. (Apologies for the couch that looks like a saggy elephant’s ass. I promise that what it lacks in appearance, it makes up for in comfort.)

pillows 133

They’re made really well. I’ve had them for awhile now and I’m so happy with how they look. Check out the detail:

pillows 137

The room looks so much better with some more streamlined pillows. Remember the hot mess of pillows I had before?

pillows collage textSidebar: And see the change in that doorway to the right? I painted the hideous wood paneling in the playroom (including that stairwell that leads to it) so I’ll be telling you all about that change soon. (And yes, that means that I totally broke my resolution!)

And looky here, another change!

pillows 138

Did you spot it in the foyer behind the couch?

pillows 154

We got a new lamp from West Elm and I am loving it!

pillows 144

It’s the Geodesic Table Lamp and I love the openess of the brassy base. Plus that tan lampshade is so warm and sophisticated. I feel like it’s the look I was hoping for when I got the Nate Berkus for Target one, but this one…well, you get what you pay for. (No knock to Nate of course, his is still damn good for a $50 lamp!)

pillows 140

It’s coming together one little bit at a time.

XO

Sue at Home

P.S. I feel like whenever I show the living room, the paint color never reads right on camera. So, here’s a swatch of the real color: Benjamin Moore Teal.

benjaminmooreteal

Before and After, Decor, Family, Home, My house

Hallway Gallery and Runner

hallway 006When you last met my hallway…what? You’ve never met my hallway? Oh the shame. Let’s get better aquainted.
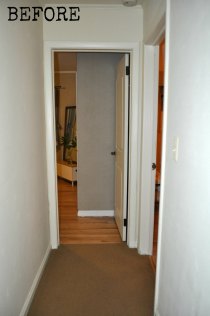
Back in 2010 when we moved in, our hallway had brown wall-to-wall carpet (yikes) and poorly textured creamy walls.

HALLWAY DSC_1232

hALLWAY DSC_1239

It only took about a month before we ripped out the carpet and had the wood floors underneath refinished. We went with a dark stain downstairs but we kept the hall pale to go with the floors in the bedrooms. Check out 2 year old Lily showing off the pretty hardwood back before I fixed the stair risers. (Doesn’t she kind of look like a ghost? Boo!)

5396523371_b55b76b896_z

A few months after that, Pablo attempted to skim coat the walls (I’ll give him an A for effort) and we painted the walls in Benjamin Moore Coventry Gray with Cloud White trim.

5667967610_9b23f3135d_z

That was three years ago and everyday since then I’ve had the intention of hanging some extended family pics up there. And now it’s done! Well, not done. More like a decent start. (You’ll also notice I’ve sort of learned how to use my camera too.)

hallway 023

I shopped for the runner for a loooooong time. That problem with my expensive taste and limited budget got in the way but eventually I fell for a pretty kelly green wool flat weave rug in a Jaipur catalog my mom had borrowed from a local decorator. I was contemplating getting one (and even paying the expensive-for-me $200+ price) when this beauty popped up on One Kings Lane for only $149. I had to go for it. Lucky for you OKL has it right now, too (for a few bucks more).

OKL rug

The next step was the frames and since you know me, you can imagine I tried to go inexpensive with some of the offerings at Target, Kohls and Ikea. But they all just looked too cheap to me so I ended up getting most of them at Pottery Barn. (I can’t say enough nice things about their gallery frames. Just go buy them and thank me later.)

hallway 006

As for the pictures themselves, the focus is on extended family: the girls’ cousins, aunts, uncles and grandparents. (I felt I had thoroughly covered the 4 of the us in our dining room photo wall so it was time to spread the love.) You’ll notice most of them are super casual.

hallway 047

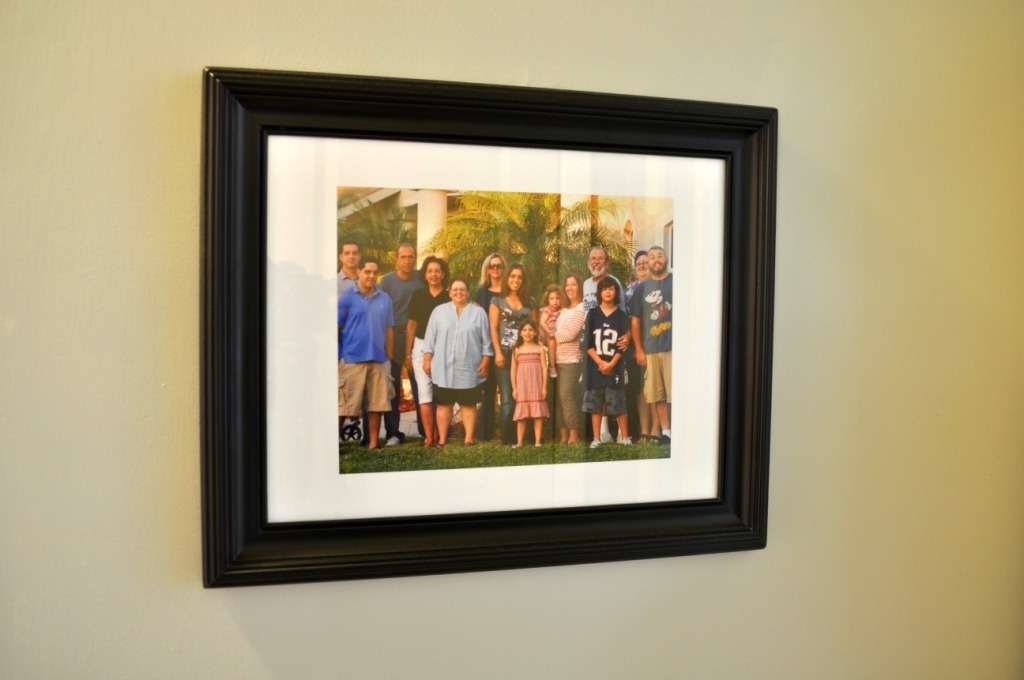
hallway 050One of the favorites is this picture from Thanksgiving a few years ago. It’s the last time we had my family and Pablo’s family together so it’s got a lot of VIPs in it.

hallway 044

The walls look a little sparse for now but the goal is to fill it up top to bottom. Something more like this.

hallway 041

It’s coming together but don’t look up! If you do you’ll see cracked and peeling paint and one of the noisiest flourescent lights in history.

hallway 032

Take a closer look at that texture.

hallway 033

We’re bringing some pros in soon to fix it up and I’ve got plans to replace the light, too. I’ll keep you posted.

And the view from the bedrooms needs a little love too. See that space above the stairs? hallway 056

 I’d love to put something inspirational there so we see if right before we head out for the day. Ya know, something like this:

seize the day

OR

don't forget to be awesome

Maybe we could even jump and smack it like the Notre Dame football team does with their motivational sign…?

play like a champion today

So it’s still a work in progress but I’m happy with the changes we’ve made. It sure is nice to see Mimi, Papa, Uncle Steve, Auntie, Jonathan, Bobe, Grandpa Steve, Uncle Francis, Aunt Nicole, Baylee, Arianna, Carter, Aunt Paola, Aunt Alex, Eliseo, and Weli everday.

hallway 023

XO

Sue at Home

Decor, Home, My house

Sue At Home in Ladies’ Home Journal

As you may know by now, I am the Fashion Editor for Ladies’ Home Journal magazine. So when some of my fellow editors wanted to photograph a story for the April issue about bringing spring color into your home, they thought of my colorful abode and more specifically, my hot pink chair.

chair 068

My pink chair (you can read all about it here) has gotten a lot of love in the past. It’s one of my most read posts, most repinned pins, and it was featured on Emily A Clark’s blog, Centsational Girl’s Best of DIY site, and Apartment Therapy’s Room for Color. (Hey look! There it is again over in the sidebar! Click there for more living room pics.)

chair 050

But this time, it’s in a magazine. A huge national magazine. (OK. I know that I’m one of the editors so it’s kinda like nepotism but still, I’m happy to be included!)

SAH in LHJ thats my house

SAH in LHJ text

So on a chilly day in January, I was pleased to invite two of my fellow LHJ staffers and a small photo team into my home for the shoot (the zero-minute commute was kinda awesome too).

Right away photographer Jennifer Causey and her assistant got to work setting up lights and reflectors and getting my pink chair ready for its close-up. I usually prefer a neutral pillow on the chair but for the purposes of the story, editor Lauren Piro brought lots of bright spring-y options. The yellow one from Target was the clear winner.

pink chair in LHJ

Note: The chair has faded A LOT and is due for another dye job but I just couldn’t get it done before the shoot, So yes, she has had a Photoshop touch up for the LHJ final image you see below. When it gets a little warmer, I’ll be ok with dying on the deck again!

102195199

But the chair wasn’t the only image shot in my house. We also put some artwork from Society6 on my bedroom dresser and styled it with some of my jewelry.

LHJ in bedroom

Do you know what it’s like to have a photo crew, including some of your coworkers, in your bedroom on a Thursday afternoon? It’s weird, people. It’s weird. Luckily, one of those fellow coworkers is my dear friend, our very talented photo director Clare Lissaman, who always knows how to put people at ease on a shoot.

The story also featured my painted kitchen cabinet. It’s one of my favorite DIY projects in my house (you can see it up top in my header collage) but I’ve had such a hard time getting a good shot of it for the blog so that’s why I’ve never written about it.

102195197

The cabinet looks so pretty that I almost don’t notice the fugly countertops!

So how was she able to get that brighter shot in my windowless kitchen? What photo skills does Jennifer have that I don’t have? This big ass light, that’s what! (And I’m sure she has lots of other great photo skills too! But the light helps.)

loght in kitchen

That beauty totally brightened up the space.

camera in kitchen

I was totally thrilled to be included in the issue and I want to thank my co-workers for including my home and supporting Sue at Home. If you’d like to order a subscription to Ladies’ Home Journal, just click the affiliate link in my sidebar.

With the happy spring weather, I’ve decided to come out of my hibernation and I can’t wait to get some spring projects happening soon. Stayed tuned for our newly painted playroom, a new headboard, a hallway makeover and…drum roll…a complete bathroom renovation!

XO

Sue at Home

Decor, Home

A Remarkable Renovation: 43 Church Street in Westborough

Last summer when we were visiting my parents in Westborough, Massachusetts–the town I grew up in (remember I told you about it here and here?)–I drove past this stunning house on Church Street and it stopped me in my tracks. I just couldn’t believe that I had never noticed it before. Well, that’s because it didn’t look like this when I lived there. 43church 225

Back when I lived in Westborough,  it looked more like this.

43 church as it was

Lucky for me, the stunning house had a sign out front that said 43churchst.com. So, I checked it out and found the story of how Michael Fitzpatrick (a very talented wood furniture maker) and his wife, Dr. Jean Keamy, had purchased the house with the intention of renovating it and bringing it back to its former glory. I mean, look how gorgeous it was back in 1880.

original house

Their website is great and it shows lots of process shots but I was dying to see it inside, so I emailed Michael and asked if he would let me–and the Sue at Home readers–take a peek. He could not have been more gracious and welcoming so the next time I was in Westborough, Pablo and I went to take a look. (Yes, it’s taken me over 6 months to write this post. What can I say, it’s got a LOT of pictures.)

They brought the exterior of the house back to its original style except for the addition of this porte cochere on the side. No need to Google it. “Porte Cochere” translates to Carriage Porch.  (It’s like a fancy carport.)

43church 222

Here’s the back of the house.

43church 172

As they were building the porte cochere, some birds decided to make it their home so they continued building around the birds and now they’ve got permanent houseguests. See that little square in the picture below? That’s how their little feathered friends get in and out.

43church 180

 Michael restored and built reproductions of all the exterior millwork himself. (See more about that in this video.)

43church 173

I especially loved the pale blue painted porch ceiling. Let’s go inside, shall we?

43church 160

While they respected the aesthetic of the original structure on the exterior, they opted for a more modern interior with an open floor plan and a focus on function. I loved all of the clean simple furnishings.

43church 195

The floating stairs–that connect all four levels–let in tons of light.

43church 186

43church 192

This little sitting area connects the living room and kitchen.

43church 196

I love how the color of the mid-century chairs is picked up in the kitchen backsplash.

43church 197

The center column in the house, which has a small bathroom and an elevator on this floor, also includes this built-in bookshelf. (Note the wood carved grate. Yup – that was made by Michael, too. It’s the details like this that make this house like no other I’ve ever seen.)

43church 199

Here’s Michael showing us the diary of Mary White Forbes that they found in the house.  The entries are dated 1850-1857.

43church 198

The kitchen is a story itself. Every single shelf and drawer is completely thought out and made for full function.

43church 187

The wood veneer is Black Palm from Ecuador, a renewable resource. (Now’s a good time to mention that 80% of the materials that were taken out of the house at the time of demo were recycled to other homes around New England.)

43church 188

Adjacent to the kitchen is the dining room. That low table on the right is one of Michael’s designs made for a show at the Fuller Craft museum.

43church 183

Check out these small “floorlights” that connect to the basement below. (Remember those. You’ll see them again.)

43church 185

These amazing doors (from Thailand, circa 1780) were bought at auction. They lead to…

43church 181

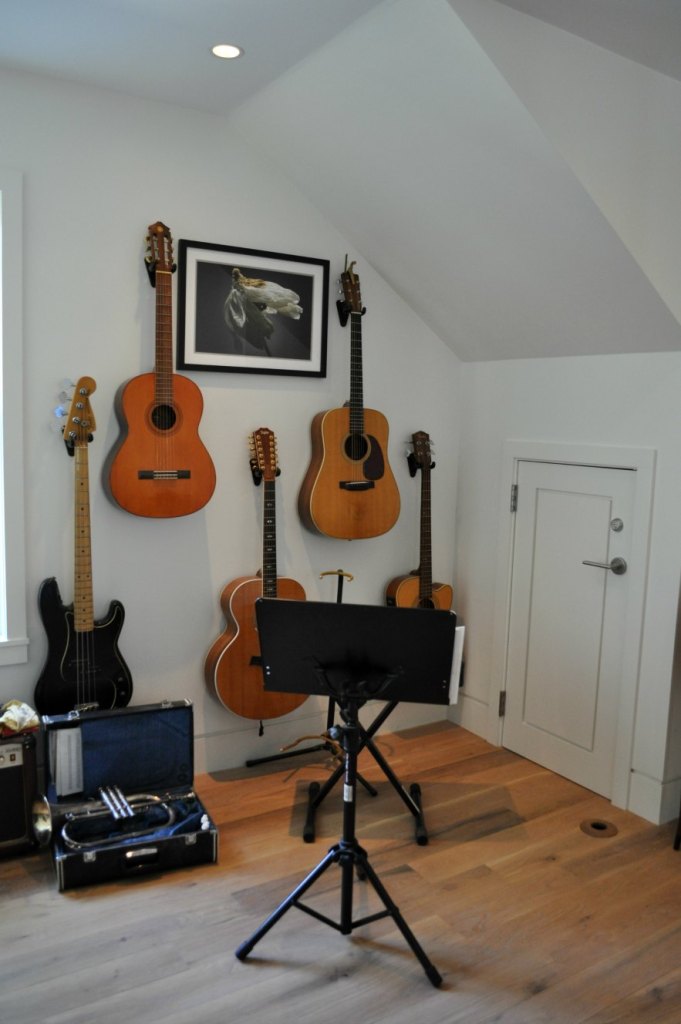
…a small music room in the back of the house.

43church 182

Now, let’s go downstairs.  This spooky little pod is the entrance to the future darkroom.

43church 201

Of course, we had to go inside.

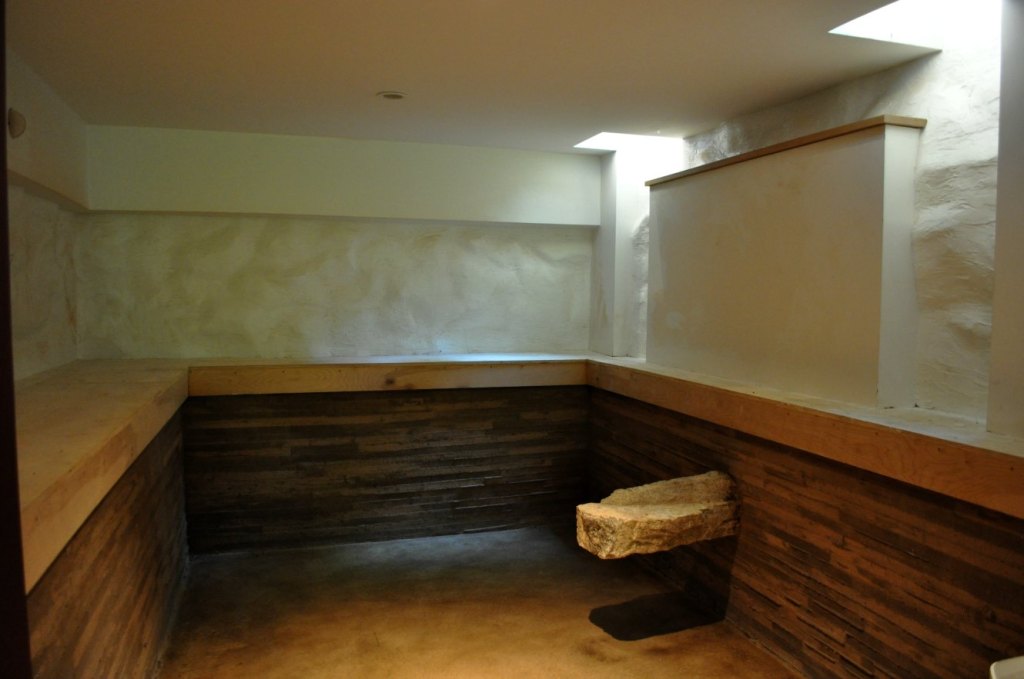
They’re also working on a screening room that hasn’t been furnished yet. And the little space below is the future wine cellar. See those little skylights? Those are the floor panels we saw in the dining room above.

43church 205

I can’t get enough of these beautiful steps. Let’s go upstairs again.

43church 204

Here’s another one of those Michael Fitzpatrick grates.

43church 208

The entrance to the master bedroom.

43church 211

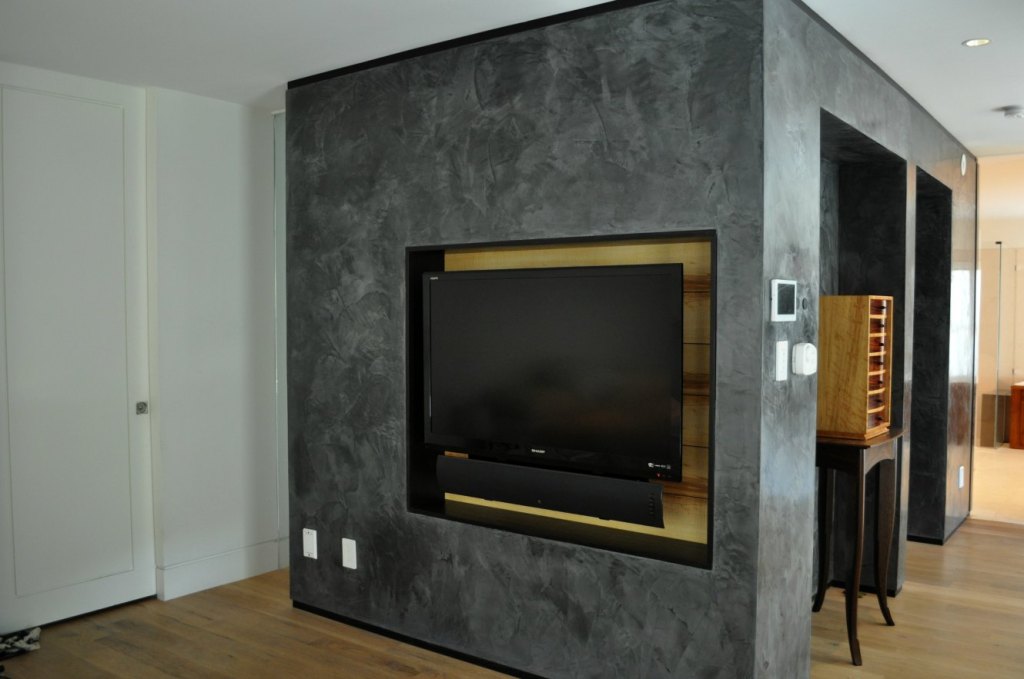
Here’s the TV in the bedroom. On the right is a jewelry box that Michael made for his wife as a wedding gift. This house is a fully wired “smart” house. I think the coolest feature is the keypad near the bed where they can put the house to sleep with the touch of a button: the garage locks, all the lights turn off and the thermostat sets to a predetermined temperature. Need the use the bathroom in the middle of the night? No problem. Motion detectors track their way back to bed and turn off the lights as they’re no longer needed.

43church 209

Of course the tub is surrounded by wood.

43church 210

Now, let’s go all the way to the top floor.  There’s a large TV room that has a balcony.

43church 213

The teak woodwork in the upstairs bathroom was my favorite.

43church 214

Out on the balcony, we get a better look at those shingles and the stunning millwork.

43church 217

And before we leave, we need to take a look at Michael’s wood shop in the back garage. There are lots of plans to renovate this space next.

43church 169

One of Michael’s beautiful veneer topped tables.

43church 164

Some more tables with mid-century hairpin legs.

43church 168

I’d like to thank Michael for the tour of his beautiful home.

43church 225

There are so many other rooms that I didn’t show here because they’re yet to be finished so stay tuned to 43churchst.com for Michael’s updates.

XO

Sue at Home

Decor, Home, My house

Photo Wall or My New Favorite Thing In My House

I first told you about my obsession with oversized photo displays back in October 2012 when I spied this awesome picture from Palihouse on Dilly Dallas.

palihouse

Just to recap: I know that displaying personal pictures might not be #1 on every decorators must-do list (in fact, it’s usually on their NO list) but to me personal pictures are the way to keep a home looking, well…personal. And here’s the thing: I take a LOT of pictures. So, instead of picking a few great ones, framing them, hanging them up and calling it a day, I take a lot and then… they sit in my computer (and on Flickr and Shutterfly). The good part is that I don’t have to make any decisions (yeah!) but the bad part is that no one else gets to see them. And that’s just wrong. I mean, how can I keep pictures like this to myself:

aruba-139

So, I thought long and hard about how to do my photo wall. Should I create photo wallpaper like this Tribeca home by Rinaldi Interiors?

black and white

Nope. Too permanent. I want something that’s changeable. That certainly rules out something like this. I mean, how could I choose just one picture?

large pic

Hmm…maybe a mix of small frames, like this. (Yup, that’s Soph modeling in LHJ!) But, nah. Again, it’s too permanent and too much work to use the huge number of pictures I want to use.

soph modeling in LHJ

So, I decided to just cover a wall with pictures. No frames. Nothing permanent. I even thought about painting on some magnetic paint and then using tiny magnets but I figured there was an easier way. Tape. Just little rolls of Scotch tape on the back of each pic. But it was a little more methodical than just tape and pictures. Here is how I made it happen.

pinterest-photo-wall-198

Step 1: Set some rules for the pictures you want to include. Color or black and white? All horizontal, all vertical or a mix of both? Various sizes or just 4×6? Just immediate family, extended family or include friends, too? I decided on:

– color pictures (I mean, how could I go black and white when I’ve got a kid with baby blues like Lily’s?)

– a mix of horizontal and vertical (because I clearly have problems editing)

–  just 4×6 (to keep it to a graphic grid)

– and only immediate family. I know that family part might be confusing but there are other places to display extended family and friends and I wanted to keep this more focused.

Step 2: Order Prints. I took quite a few long nights on the couch going through all my pictures and ordering HUNDREDS of them. I figured that it had been years since I had actually ordered prints so even if some pics didn’t make it into the mix, they were still lots of favorites so it wouldn’t hurt to have some extra prints on hand. (I highly recommend using a print plan on Shutterfly to keep the cost down.) You can imagine my joy when this arrived:

shutterfly pics

Step 3: Edit into groups. First I split them into horizontal and vertical pictures and then I created three sub-categories: 1) Sophia without Lily (could include me and/or Pablo), 2) Lily without Sophia (again, parents are okay), and 3) Miscellaneous (could be just me and Pablo, all 4 of us, just him, just me, or the two girls together). Now I know this sounds slightly insane (or let’s just say it…totally anal)  but there was a reason for the madness. I really wanted to include an equal number of each kid. Because you know they’ll be counting! And when one kid has been around for 8 years and one has only been around for 5, you can end up with an uneven mix.

Step 4: Use a level to mark your middle line and start taping. I just used one quick roll of scotch tape on the back of each one as I placed them. I tried to keep it balanced with colors and close-ups vs. pulled-back shots. And I tried a balance of posed and candids. And even a good mix of various ages. It looks random but there was a method to the madness.

photo-wall-185

I used the level again every few rows to keep myself on track but I just eyeballed the distance between the pictures. Once I had 4 rows of vertical pictures (with 16 in each row), and 4 rows of horizontal (with 11 in each row), I noticed a problem: I had a lot more horizontal left over. So, I added a few extra rows of horizontal on the top and the bottom. And I have every intention of adding more rows over time but don’t tell Pablo: he thinks there are plenty already. But let’s face it; is he really going to fight seeing more pictures of his kids? I think not.

photo-wall-016

After I stood back and took a look, I had to move a bunch around to keep it balanced. But once I had them in the places I wanted them in, I retaped each one with a piece in each corner. And there you have it: my new favorite thing in the whole house.

photo-wall-026

We love sitting at the dining table and looking at all the awesome memories. And guests really love it too. It’s certainly a conversation piece!

photo-wall-195

Let’s take a closer look at some ridiculously geeky stats about the 141 pictures that made the cut:

106 were taken outdoors (that’s 75%!).

There are 56 pairs of sunglasses, 44 bathing suits, 27 hats, 11 Halloween costumes and 5 appearances by Sophia’s beloved silver sequin-covered cardigan.

Almost half were taken close to home in New Jersey or New York, while a whopping 23% of them were taken in Aruba (more on that here and here). Obviously, we like taking pictures on vacation because 19% were in New England and another 19% were in Florida. Nevis and the Bahamas round it out with one each.

I already mentioned that there are 87 pictures of each of the girls. There are 25 of Pablo and only 17 of me. And the reason for that lies here: I took 84% of them.

(Ignore the spiders on the lamp. I took these in October!)

photo-wall-034

So, I guess the take-away from those stats is this: I’ll continue to get outside to get some great shots, I’ll never take a vacation without the camera, and I need to give someone else the camera more often.

photo-wall-050

So, tell me…how do you display your family pictures? I’m currently working on a display of extended family pictures in our hallway. The plan is to use all black and white photos and solid black frames with mattes. Wish me luck!

XO

Sue at Home

P.S Congrats to Katie who won my Minted giveaway!

crafts, Decor, Entertaining, Home, My house

Spooky Decor

Just in time for our annual Halloween soiree, I finally got the house all spooked out and ready. I started with spiders in the light fixture and a black scarf draped over my painting to make it look a little less pink.

halloween-002

A lot of the decorations were left over from last year, like the little spiders, the tablecloth and the cobwebs. This year, I added lots of Martha Stewart Crafts that another editor gave me at my day job.
halloween-004

All of the wine bottle decorations are from Martha Stewart. You can find them here.  The little owl papers just stick on the front of the bottle. Sophia said they all reminded her of Harry Potter.

halloween-005

For the witchy wine, I combined the sticker from this kit with the witch’s hat from this kit.  My pumpkins are fake ones from Target that I spray painted and glued glitter onto.  (You know I’ll never spray paint a real one again after what happened last year!)

halloween-006

The girls made the creepy hands at an event at Sophia’s school. They’re just medical gloves filled with flour.

halloween-007

My favorite of the wine bottle decorations was this awesome vampire collar. We added fangs from the photo decor kit too.

halloween-008

Sophia made the striped planter at the Y.

halloween-009

Those ghosts in the back are the party favors for the kids. I just trimmed plain white lunch bags to have a ghost shape on top and Soph drew on the eyes.

haloween-010

My glitter skull from last year is sitting on the front windowsill surrounded by brass candlesticks. (And of course, some pretty carnations. They’re my go-to party flower because they’re cheap, pretty and they last a loooooong time.)

halloween-016

The girls colored pumpkins with metallic paint pens in lieu of carving.

halloween-017

Our front foyer table holds this little glass pumpkin (another Target find) filled with lots of essential Halloween toys like glow-in-the-dark teeth and spider rings. (Because you can never have enough spider rings!)

halloween-018

A little ghost that Lily made in pre-K last year hangs out in the den on top of a bowl of shells. Sometime between last Halloween and now, he lost an eye. But I think it’s a good look for him so we’re going with it!

halloween-020

I also did a couple of the Halloween crafts featured in the October issue of Ladies’ Home Journal so I can talk about them for an upcoming TV appearance on Better TV. This is all day job stuff but I’ll let you know when it’s airing. (Follow Sue at Home on Facebook to hear all about it!)

halloween-028

Up in Sophia’s room, she had a blast spookifying her place with this photo kit from Martha Stewart.

halloween-031

Of course, that was before she switched her costume a few minutes before the party. As I told her the first time she changed her mind about her costume, “You can be whatever you want as long as you can put it together from things in this house.” I’m happy to help buy/build/hunt for costumes but not when she changes her mind two days before Halloween! (BTW: She’s a cat–obviously–and Lily is Chee Chee from Teen Beach Movie. When I posted this picture on Instagram, I tagged Chrissie Fit, the actress that plays Chee Chee, and she liked my picture! It’s scary how excited that makes me but you need to understand that this movie is like an Oscar-caliber film in my house and Chrissie Fit is like our Meryl. I don’t even think the girls understand how cool it is!)

Halloween-049

And when they’re not being as cute as can be, they can turn up the spook and scare the crap out of you too!

Halloween 2013 BLOG

XO

Sue at Home

Home, Travel

Travel: Brevard Zoo

Well, it’s October and I’m finally getting around to writing posts with pictures I took in August. Would you say I’m a little bit behind? Yes, I would say so.

Anyway…back in August I took the girls to Florida to spend a week with my parents at their house. When we go there, we like to spend lots of time just swimming in the pool and chilling with Mimi and Papa but I always make sure I squeeze in at least one visit to the Brevard Zoo. Confession: I’m a little zoo obsessed and I can tell you that the Brevard Zoo is one of the best I’ve ever been to.  It’s not huge but there are tons of animals and lots of interactive opportunities.  In our week long trip, we ended up going there four times – twice for the animals and twice for the Treetop Trek obstacle course. (I’ll share some pics of that soon too.) 

But for today, here are just some purty pics of some of the animals at Brevard Zoo.

I took about 50 shots of this beauty. It was like he was posing for me!

zoo-875

One of my favorite things there is the giraffe exhibit. You stand on a pavilion high off the ground and feed crackers to these beautiful, kind, and gentle creatures. It’s totally surreal.  Of course, the day we fed them my camera battery was dead (CURSES!) but I snapped this quick pic of one when I went back. See one of our more successful giraffe feeding visits in this post.

zoo-439

The flamingos are by far the smelliest exhibit but they sure are beautiful. Not sure why we refer to them as pink flamingos because they really are more of a salmon or coral color.

zoo-451

There was some thunder rumbling in the distance so lots of the animals were grouped together like these guys. Even though it’s a picture of a flamingo butt, I think this could be really cool in a large scale print.

zoo-460

These are actually white rhinos but their daily mud baths keep them pretty dirty.

zoo-436

This bald eagle was amazingly large and regal looking.

zoo-474

I hung out with this river otter for about 20 minutes. I had such a blast just watching him swim in and out of his little pool. (I like to think he was watching me too.)

zoo-489

He was so cute I wanted to take him home!

zoo-531

Sometimes nature makes the best colors. Case in point–this hyacinth macaw. He reminded me of the bird from the animated movie Rio.

zoo-651

You’d think an anteater is really ugly (and his snout is certainly not very pretty) but I was surprised by how beautiful his fur was.

zoo-561

Speaking of ugly, I give you…the vulture.

zoo-562

I fed some seeds to a bunch of pretty cocktiels. I love their blush!

zoo-665

The alligator feeding is always a highlight.

zoo-600

And even bigger than the alligators are the crocodiles. This girl’s name is Lily!

zoo-619

Feeding the lorikeets was another highlight. You buy little cups of pureed fruit and they come and land on your arms and peck out of the cup. I had little claw marks all over my forearms but it was totally worth it.

zoo-796

zoo-801

This thing was totally creepy but I loved that it had feathers in such a gorgeous rainbow pattern.

zoo-837

XO

Sue at Home

Decor, Home

Mimi and Papa’s New House: Almost Done

We just got back from Clinton, CT where we got to check out my parents new house for the first time since July 4th. It is thisclose to being done. And it’s so beautiful that I’m just bursting with excitement for it to be finished! Sure, it’s coated in a layer of dust (from lots of sanding) and it only has a few pieces of furniture (my moms brand new stuff from Ethan Allen) but it’s so spectacular that I had to share a few detail shots. If you want to check out some process shots first, check out this post.

details-277

details-149

details-153

detail-141

detail-144

details-282

detials-124

details-288

details-298

detail-142

details-274

details-151

details-143

I took the girls to check out the beach down the street (which can be seen in the distance of the balcony pic above) and they absolutely loved it. I’m sure we’ll spend many summer days there next year.

Congrats Mom and Dad!

XO

Sue at Home

Decor, Home, My house

House Tour: The Man-ish Cave-ish Den

I have a secret. We have a room that I’ve kind of kept hidden from you.

Meet our den.

den-020

Being that this is the room Pablo spends most of his time in, it’s the closest thing we have to have a man cave. Granted, it’s the most well lit man cave in history but still…it’s his. And it’s super hard to decorate! Why? Well, for starters he insists we leave the wood paneling in place. (Seeing some cool wood paneled rooms on Pinterest has shown me that it’s possible.) Plus it’s long and narrow and has a weird layout:  a sliding glass door at one end, a fireplace at the other end, a wall of windows along the back, and finally a wall with a doorway and a weird opening to the kitchen.

den-024

The room was an addition that the previous owners built and it’s a full service space for us: a den for lots of TV watching, an “office” for Pablo (this is where his laptop lives), a music room (his piano and guitar hang out in here too), a casual dining area (though we eat most meals in the dining room, we do like to eat here at our Ikea Docksta sometimes), and now it’s become a storage space for me with the addition of a new credenza (which I’ll tell you about in a minute)…oh, and it’s our fireplace room, too!  And if that weren’t enough function for such a small space, it’s also the room that you walk through to get to our deck and backyard so we can’t pack it too full of furniture.

I’ve given you a couple peeks into the room before. Like, remember when I told you about the thrift shop chairs that I painted red?

den-027

And you learned all about our Suzani-covered ottoman recently, too.

den-033

But I haven’t revealed much else because…well, I’m still working on it. For a couple of years, it was seriously just the couch, piano, and TV in here. (Side note: Looking at this pic now, I see how badly that blue table in the back needs a lamp. With so many windows and recessed lighting, we just never needed the light but I think we just need the shape.)

den-034

But I’m thrilled to say it’s finally coming together. Hey look, there’s something hanging on the wall (details in this post)! Lots more art should be coming soon. I promise.

den-043

And the mantel is an embarrassment. That one frame is hung way too low. (I think I stuck it on the nail that was already there! Sad.) Or maybe it should just be propped up and not hung at all? Thoughts?

den-044

Pablo has a nice view from his spot on the couch into the land of not-wood-paneled dining room and living room.

den-052

We’re on the fence about the TV. Tell me: do we hang it on the wall above the piano? (Which is certainly convenient because the cable cord is over there.)

den-056

Or does it go above the credenza where the tape marks are? (This was our preferred spot but after I realized it would be a cable cord nightmare, I’m pushing for above-the-piano.)

den-032

Oh! And let’s talk about that purty credenza, shall we? It’s vintage but we had it refinished and painted white. I know some people think it’s sacrilegious to paint such a beautiful vintage piece but with wood walls and a wood floor, we didn’t need any more natural wood.  We got it from Forgotten Furniture. (They’ll deliver so check them out online here.) We also got the mid-century dresser in our bedroom and a new headboard for Sophia from them. Their prices are amazing.

I had been looking for a mid-century credenza for this space since we moved in 2 1/2 years ago. The problem wasn’t finding something I liked, it was finding something I liked and could afford. Nice vintage credenzas that I had seen were in the $900-$2000 range. Another option is this mid-centuryesque one from BDDW that sells for a whopping $11,800.  (Umm…I don’t think so.)  We actually got pretty close to getting the Dumont from West  Elm but I know with shipping, that $699 price would have blossomed so I’m glad we didn’t do it. This one came to us by luck. The sellers had something similar but they sold it so when we went to see them to get Sophia’s headboard (solid wood, Depression-era for $75!) I asked if they had anything else similar. Rich showed me a picture of this one on his phone (before it was painted and refinished) and told me he would sell it for $300 “as is” or $400 painted. We bought it on the spot, sight unseen! He delivered it to our house two days later looking as good as new and we were both thrilled. I’m now using it to store some of the “office paperwork” that used to live in the attic. (Remember, I don’t have an office or desk of any kind so my papers and office supplies are all over the place. A girl needs a place to put her washi tape!)

den-030

But let’s be real, this room is far from done. There are still plenty of things wrong in here. Like this eyesore of an air conditioner that’s stuck into the wall. We rarely use it but don’t want to be left with a whole in the wall if we take it out. I’m thinking about sticking a big plant in front of it. Or building something to hide it, like this genius DIY.

den-049

And then there’s this ugly tile that’s in the little windowsill into the kitchen. Ick.

den-047Oh, and I think worst of all is the whitewashed paint job on the window trim.  It just looks dirty and gross.

See?

den-041Now let’s talk about the serious lack of decorating. Poor Pablo gets stuck with my cast offs from other rooms, like this weird grouping. (I hate that little man but he’s been with Pablo for years so we’re stuck with him.)

den-070

I don’t mind this vignette but it could use a little love. The coral is from Aruba so it holds a special place in our hearts. (Remember when Lily used it to make some art for her room?)

den-062

And of course, he has to store all his man stuff in this room. Those weird things in the back are push-up paddles. (Ya know. Cause you can’t do a push up without a twisting paddle? Whatever. He looks hot so I shouldn’t sweat the technique.)

den-065

And now here’s another little secret: I took these pictures a month ago and I’ve actually fixed one of the problems already. Reveal coming soon!

Hint. Hint. Consider this the “before” shot.

den-080

For more den-spiration, follow my Mid-Century Man Cave Inspiration board on Pinterest.

XO

Sue at Home

P.S. It’s the time of year to start thinking about yummy pumpkin baked goodies so check out one of my favorite recipes ever. Click below to be taken to the deliciousness!

pumpkin-whoopie-pie-pin-183