
Let’s take a little trip down memory lane, shall we? Back in January I took place in the Young House Love Macklemore Thrift Shop Challenge – with great success if I might say so myself.

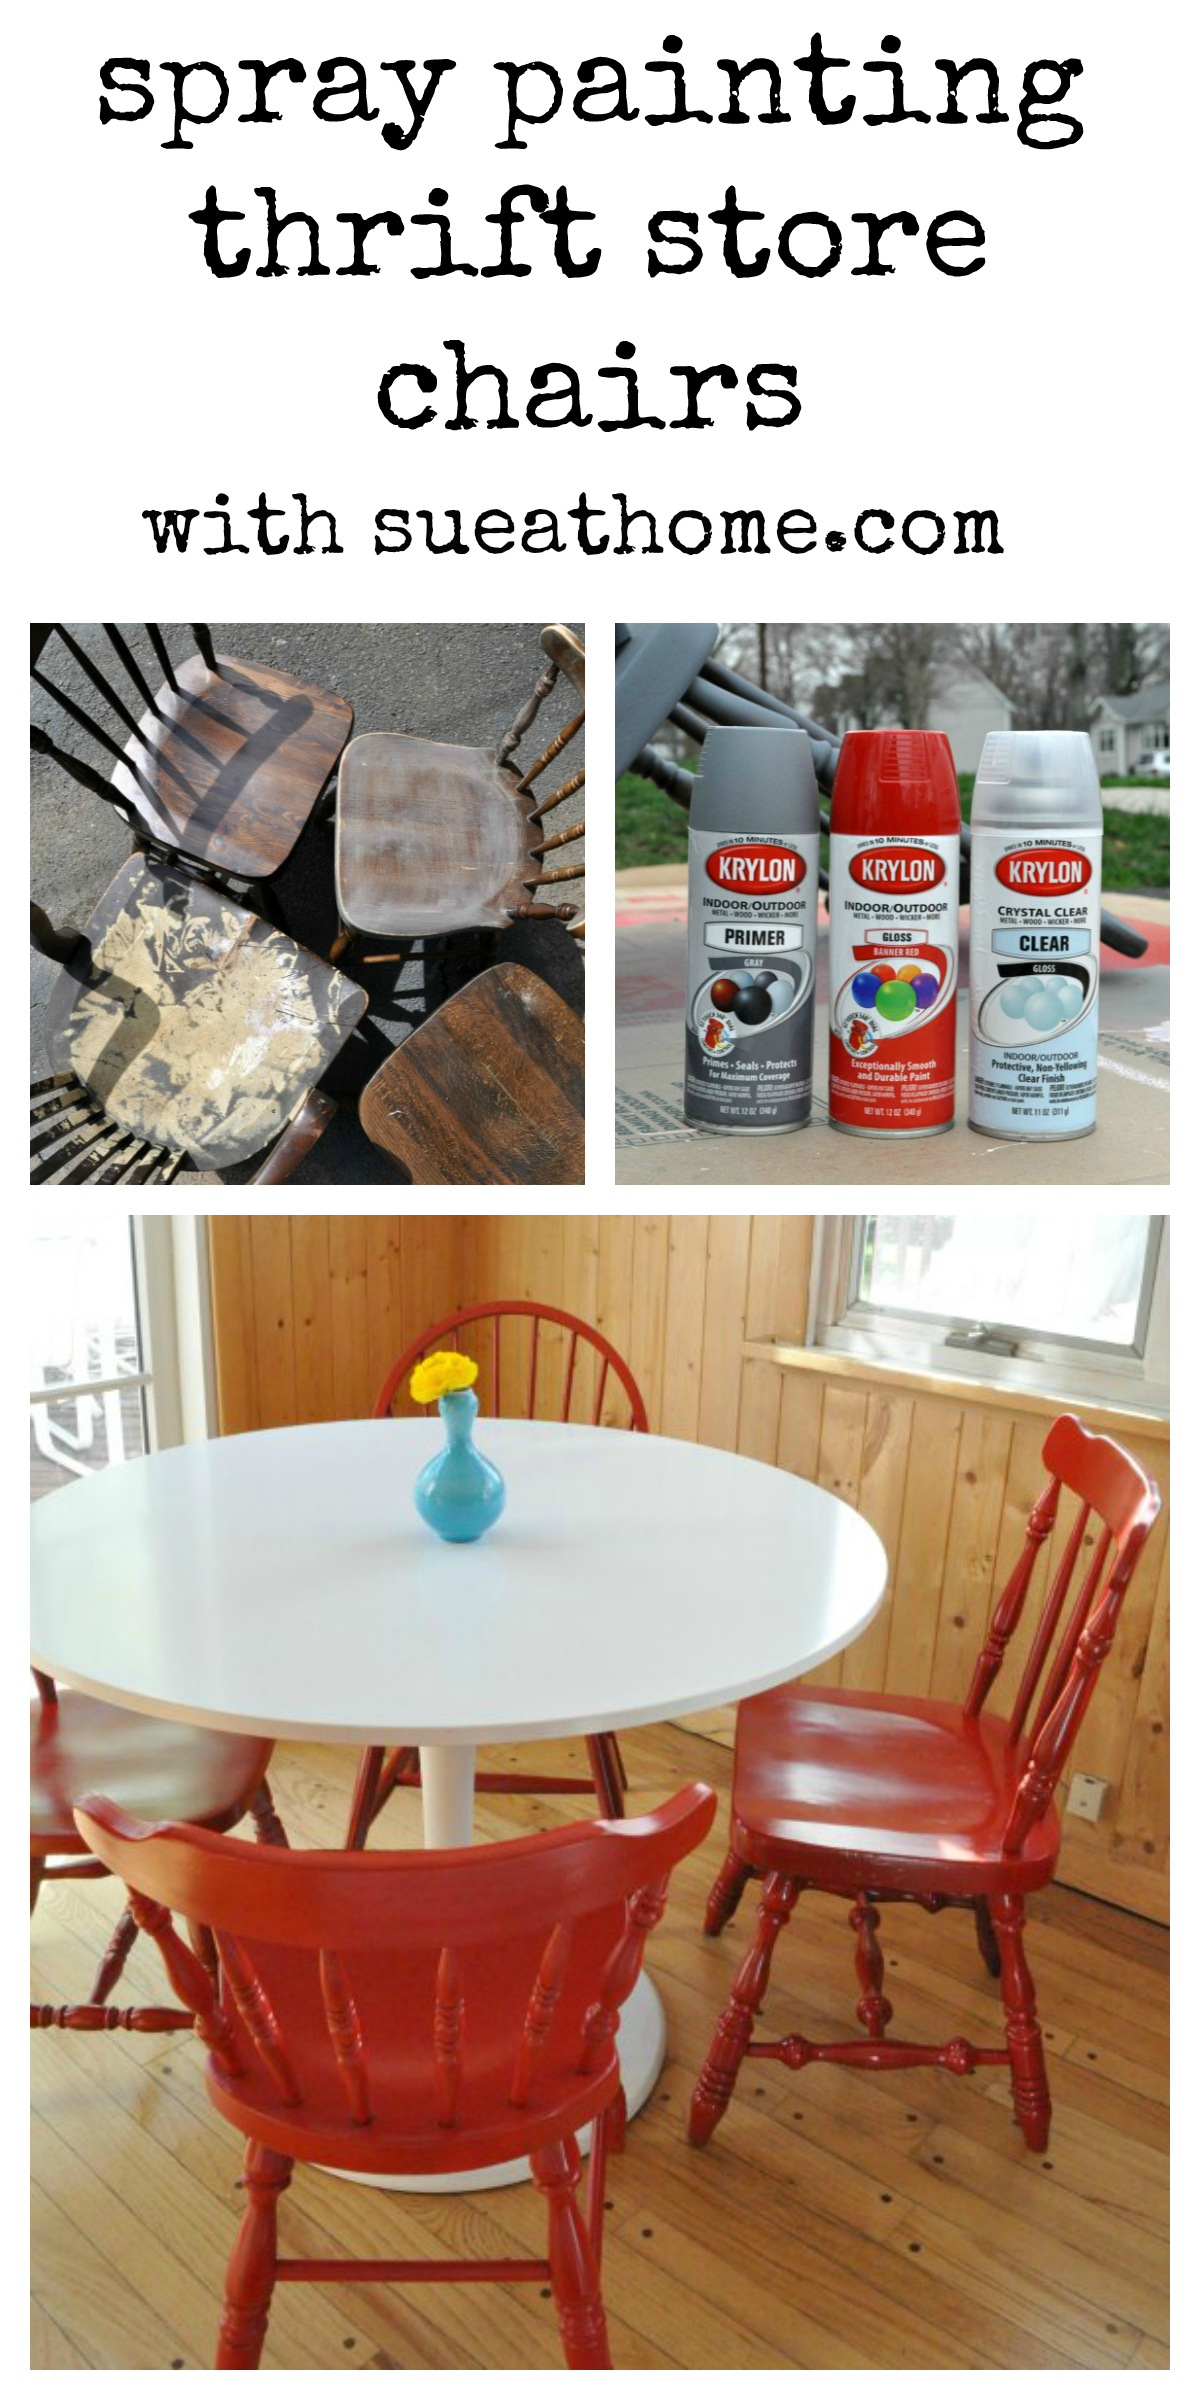
I spent my $20 on four busted looking chairs and I had some pretty grand plans for them. Ya know – something like this where mismatched chairs become a cohesive set thanks to some spray paint and some love.

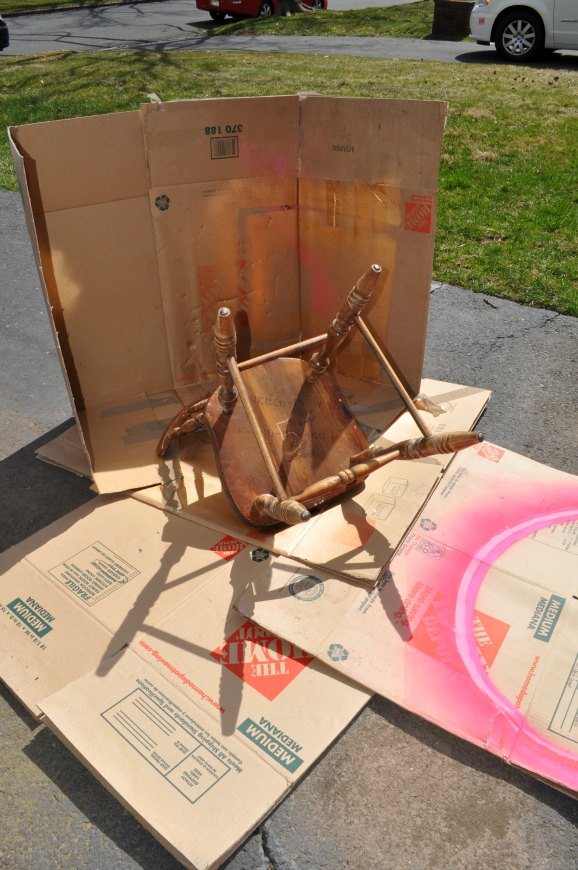
But as I said back then, I was going to have to wait because freezing cold temperatures don’t work with spray painting. So at the first signs of spring, I took to the driveway with my chairs, some sandpaper and lots and lots of spray paint.
You may have noticed that one of the chairs was replaced from the original post. I just found one to be too wimpy. (Keep your eyes peeled – it happens again! Still, the total spent on chairs was under $30.)

Step one was to give each chair a light sanding with fine grade (220) sandpaper. I was using a spray primer first so I didn’t make myself crazy with this step. Just a little roughing up.

Next, I built myself a little area to paint with cardboard boxes and some duct tape. Obviously, I completely underestimated how much the fine mist of paint would travel and my driveway ended getting a little redish but it actually washed right off. (Note that I started with them upside-down first so I had less chance of getting any sticky marks on the parts that show by doing it the other way around.)
As for my spray paint, I went with a three product method: Krylon Primer in Gray, Krylon Gloss in Banner Red, and Krylon Crystal Clear protective coat. I’m a Krylon addict ever since it performed so well in my gold spray paint test.
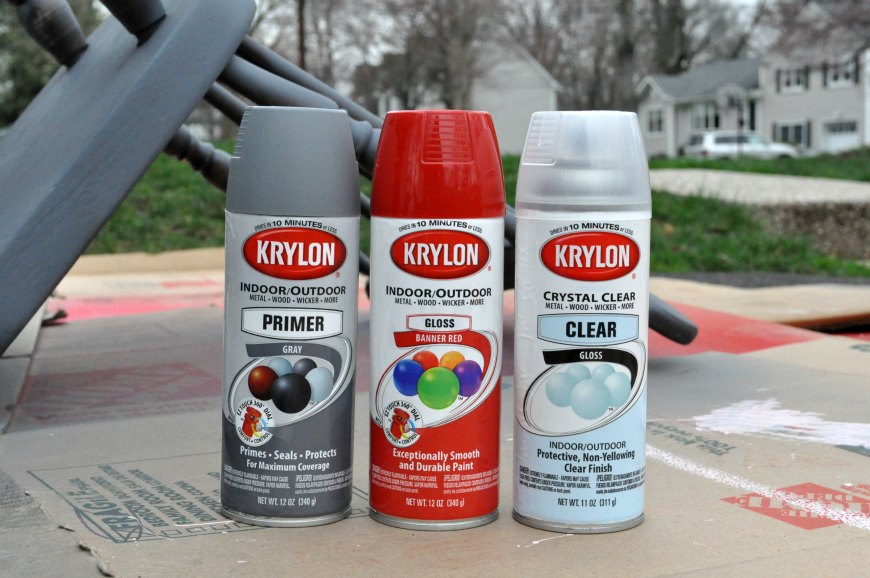
It took a lot more coats than I anticipated but finally, it started to look red. I think during the process, I wiped out all the Banner Red in the tri-state area. I’m kidding of course but I did have to try 5 or 6 local stores to track down all the paint I needed. After I was done, I think I used a total of 3 cans of primer, 9 cans of color and 3 cans of top coat for the four chairs. I used every Michael’s coupon I could get my hands on and I bought a bunch at my local hardware store so I saved when I could but it definitely ended up costing more for the paint then I ever imagined. Lucky for me, the chairs were cheap!

Here’s a look at three chairs: 1 primed, 1 with a couple coats of color, and 1 all done. Yay for the all done!

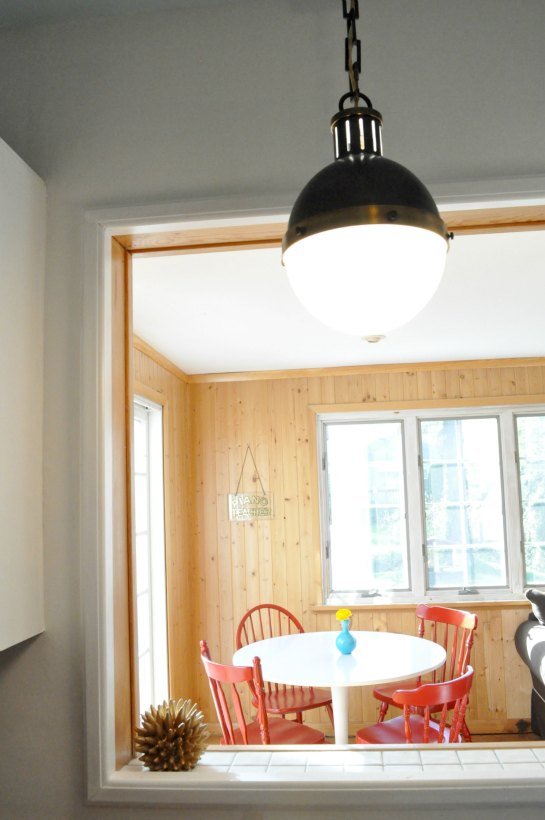
Now, before I show you how cute the finished chairs look in our den, let’s take a peek at the sad spot that so badly needed them. Poor little Docksta!

And now…
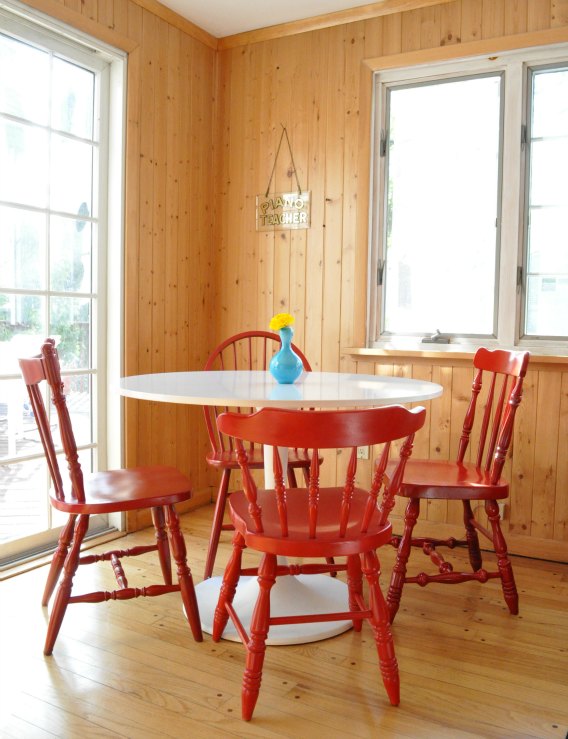
Now it’s a happy place!
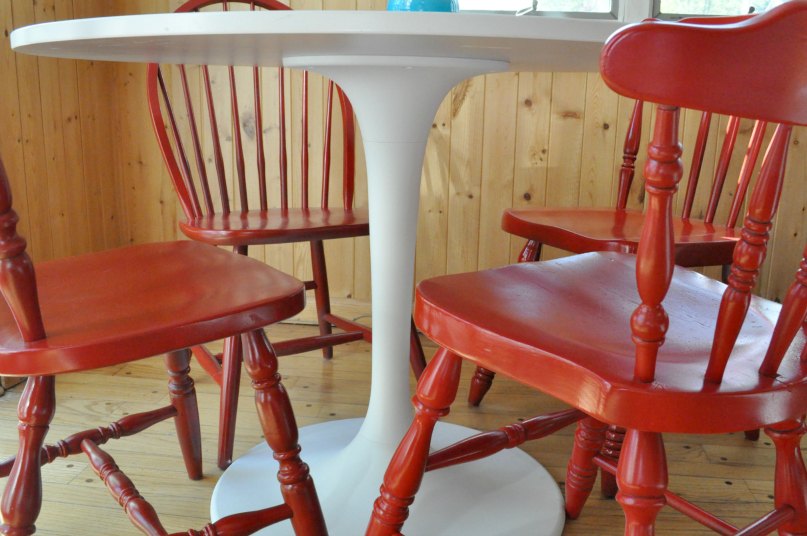
The chairs fit perfectly around the table and add some much needed color to the room. Check out how much better my view is from the kitchen “window”.
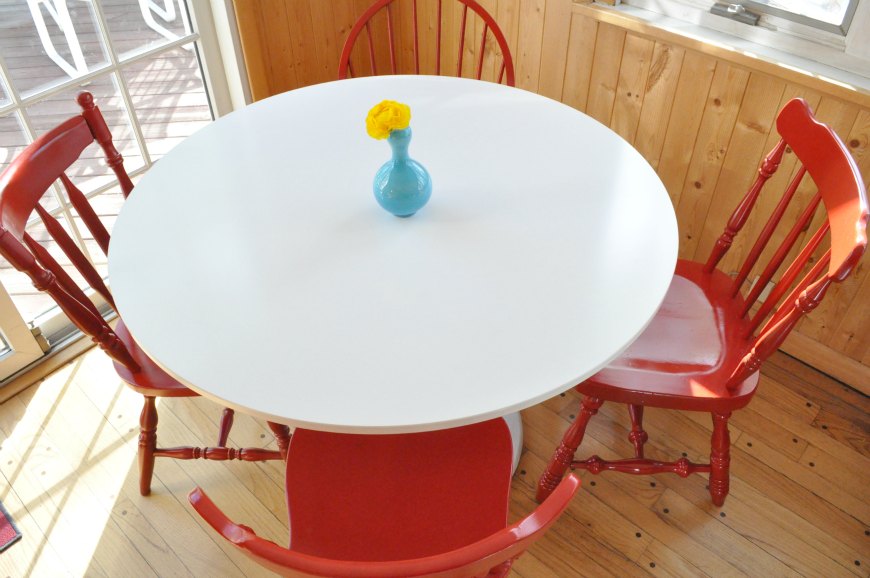
I didn’t sand them like crazy so they’re not perfect but I do like the slight glossyness of the finish.


Now that the weather is nicer and this room is no longer freezing, I’m thrilled to get to sit here for lots of lunches and dinners.

And I think the red works so well with lots of other things in the room. (I know this picture doesn’t show much. I promise to take more pictures of this room soon. Really! I promise!)

One thing I will point out is the little vintage Piano Teacher sign I got on Ebay. It was a birthday gift for Pablo. This room is the closest thing he has to a “man cave” so I wanted to add something personal. And since playing the piano is one of his loves, I figured it was fitting. It’s small but we both love it.

So, what do you think? I’m really happy with how they came out. They’ve got a lot more personality than something store bought and they’re a LOT cheaper!
XO
Sue at Home


Great job! Painting chairs doesn’t cost anything but changes everything!!!
Nice!