crafts

How to Make a DIY Starbucks Latte Halloween Costume

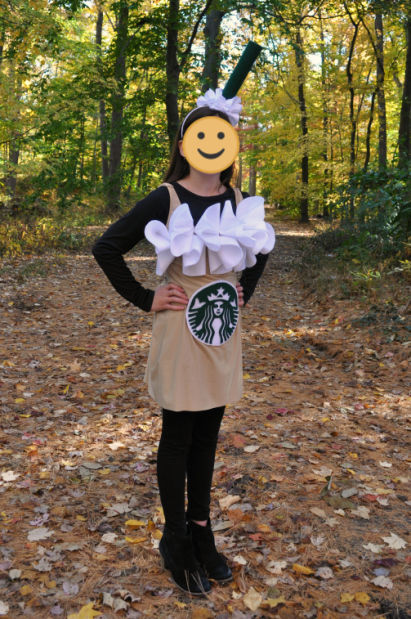
I live by the motto that it’s never too early to start thinking about a Halloween costume. Even if you don’t share my passion for the one day of the year when dressing up like a weirdo is totally celebrated, you can’t deny that stores have started stocking black and orange decorations. And costume catalogs are probably flooding your mailbox as we speak. So, I figured it was about time I shared a how-to on S’s costume from last year: A Starbucks grande iced pumpkin spice latte with whipped cream!
latte (1)

I already had an old slip and headband so the costume cost us less than $10 in felt and hot glue! When we were searching for ideas last year, we found lots of cute pictures (this blog post was our big inspiration) but there was no resource that really explained how to create the Starbucks logo and how to use felt to create the foam/whipped cream. But now, thanks to this blog post, there is!

You’ll need a tan dress (I had an old slip that fit S loosely but these cheapies from Amazon are a great option), a plain headband, 2 one-foot square pieces of dark green felt, white felt (enough to make at least six 9-inch circles and eight 3.5-inch circles), felt glue, a black Sharpie (to write the “order” on the back of the “cup”), a hot glue gun, and whatever you want to wear underneath.

Search for the Starbucks logo online and make an enlarged print about 7 inches in diameter. To make the traceable template, you’ll need to cut it out. This will be super annoying and time-consuming and you’ll get carpal tunnel but just think about how awesome your costume is going to be and deal with it. Plus…good news! Since it’s symmetrical, you can cut half of it and just flip it over when tracing. (Be sure to have a bowl of mini pumpkins nearby to help you get in the holiday spirit!)
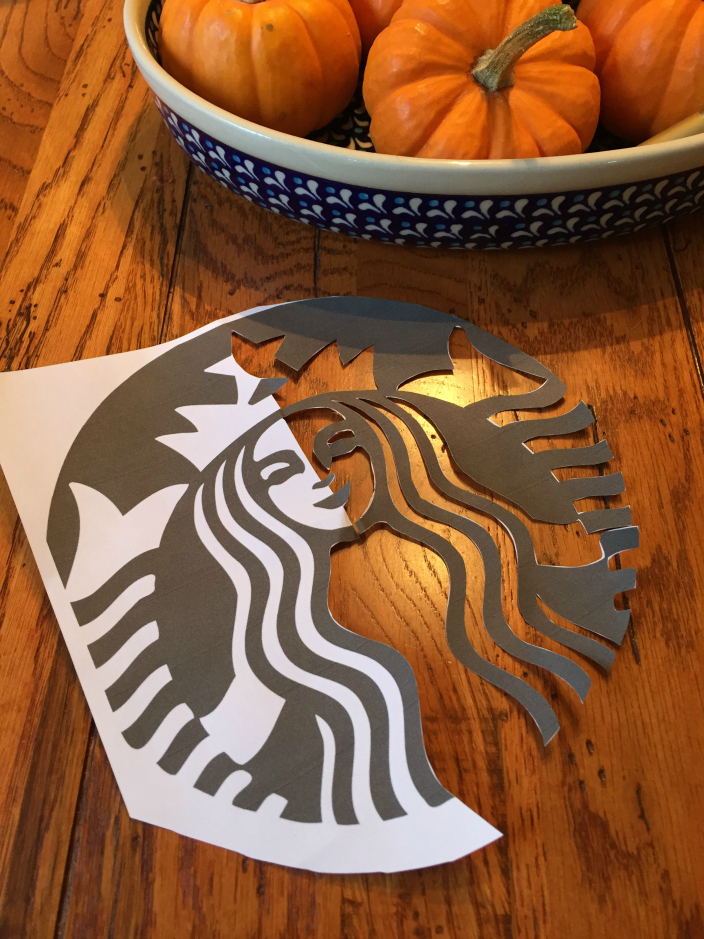
Sue at Home Starbucks Latte Costume tracing 1

Use a black Sharpie to trace around the design.
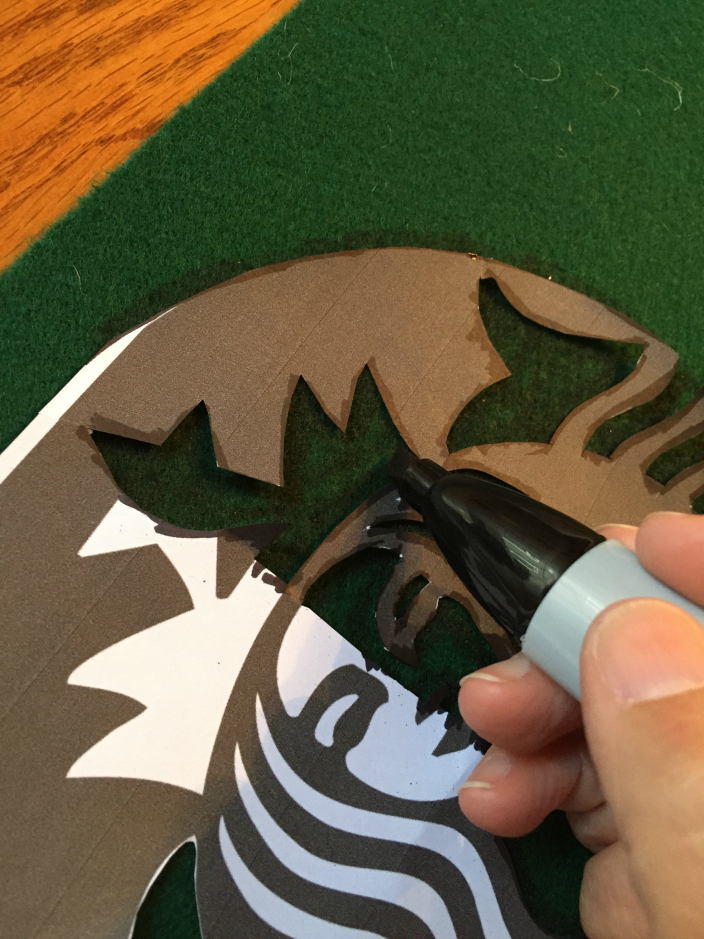
Sue at Home Starbucks Latte Costume tracing 2

Then flip your template over to trace the other side.
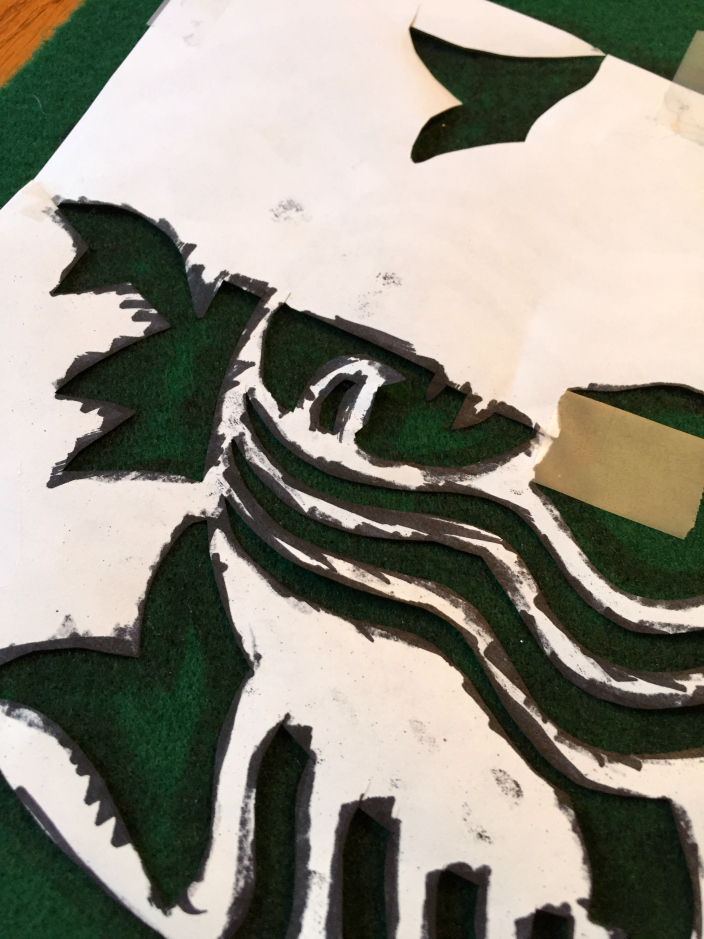
Sue at Home Starbucks Latte Costume tracing logo felt

Next step: Stop and marvel at how good it’s looking!
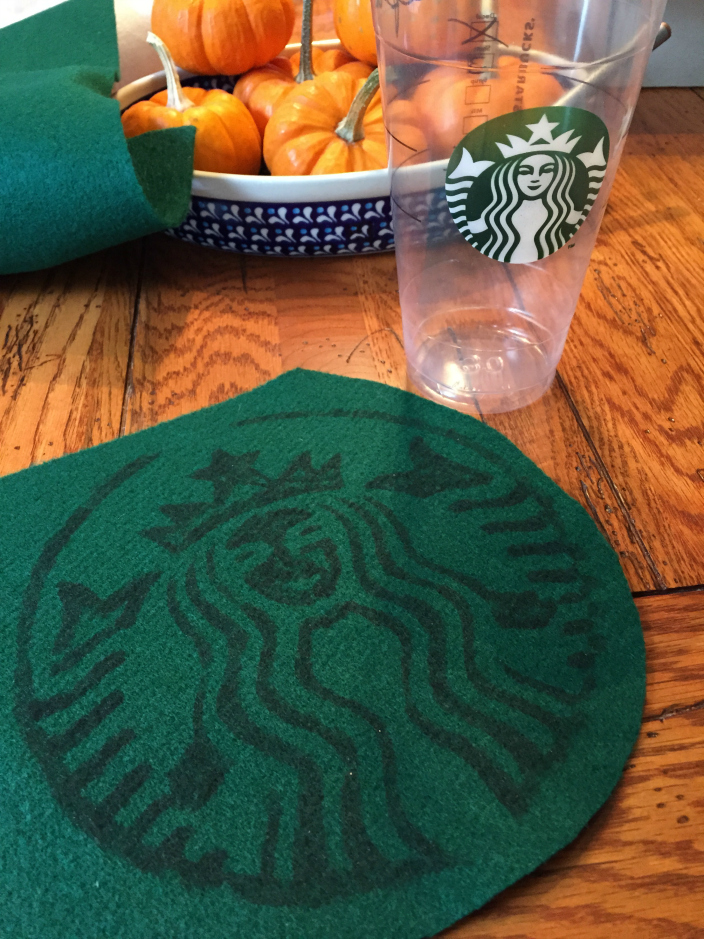
Sue at Home Starbucks Latte Costume tracing logo

Then — yup, you guessed it — just when you’re starting to get feeling back in your hand, more cutting! Once you’ve got it all cut out, glue down each part of the design with felt glue. (Felt glue is easier and less messy than hot glue so it’s best to use felt glue for this step.)

Sue at Home Starbucks Latte Costume felt

Soon it’ll look like this and all will be right with the world. (Don’t forget the nose, mouth and the little triangle in the middle of the crown.)
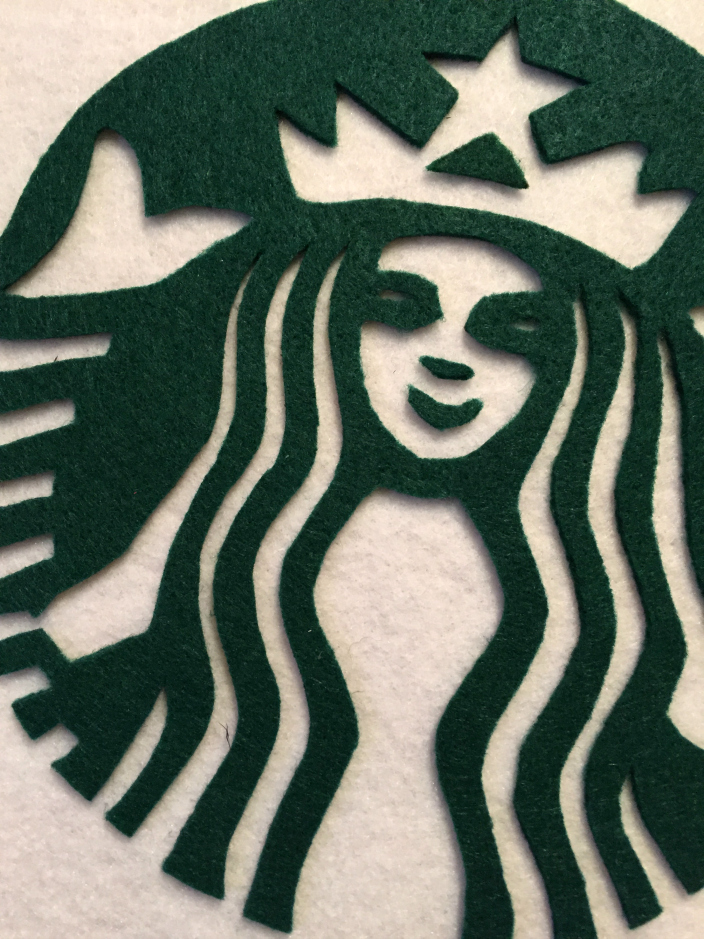
Sue at Home Starbucks Latte Costume layered felt

Then cut out the circle and you’re ready to glue the logo on the front of the dress. Just make sure you put it down low enough so you have plenty of room for the foam/whipped cream across the top.

sue-at-home-starbucks-latte-costume1 (1)

To make the whipped cream you’ll need 5 or 6 white felt circles that are about 9 inches in diameter. If you want the foam to go across the back, you’ll need more. We decided against it because we wanted more room for the “drink order” on the back. (More on that later.)  They don’t need to be perfect circles so don’t worry your pretty little head about making it precise.  (The little ones pictured here are for the headband.)
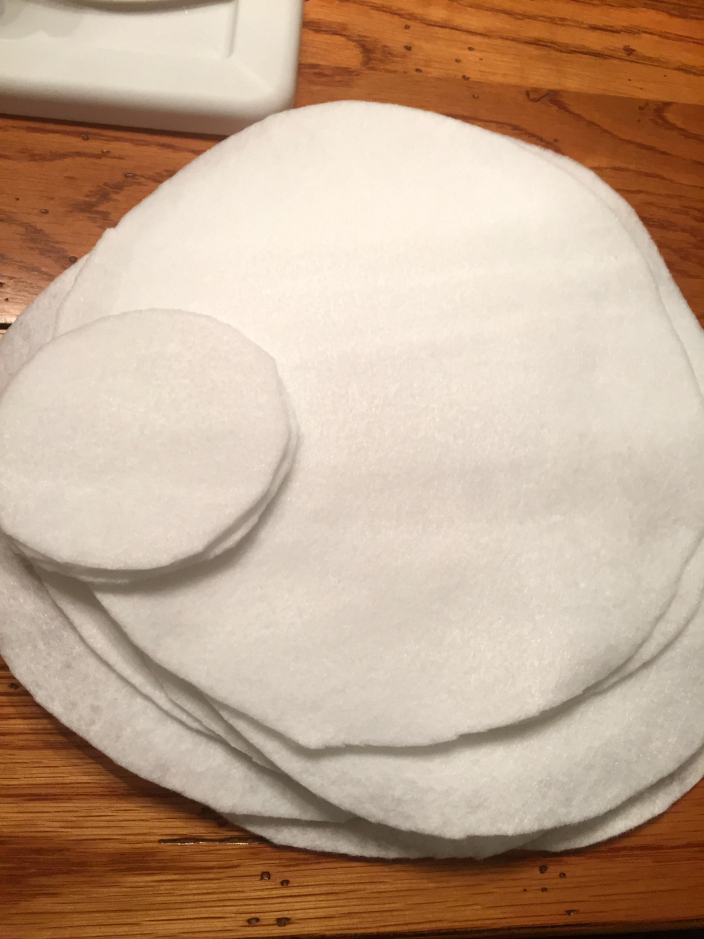
Sue at Home Starbucks Latte Costume white felt

To make the whipped cream, fold your felt in an accordion fold vertically along the dotted lines below. Add small horizontal lines of hot glue (it adheres faster than the felt glue) across the center to glue each section together. Then fold it along the middle and you’ve got a big, fluffy, frothy glob of whipped cream / foam! Use a thin line of hot glue along the center back of the felt to attached it to the dress.
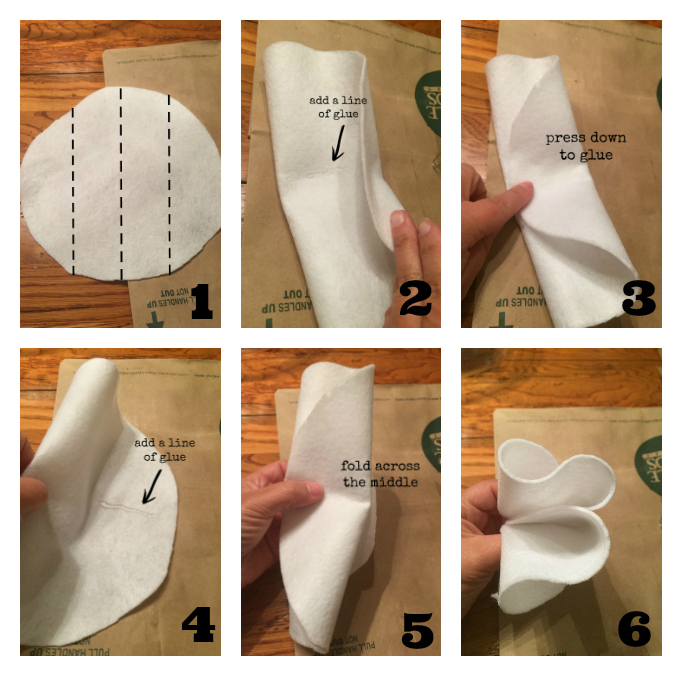
Sue at Home Starbucks Latte Costume foam

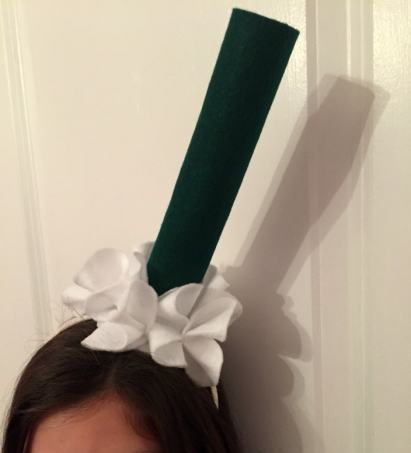
To make the frothy headband, grab two of the smaller circles and glue them together with the headband running through the middle of it. This will be your base to build the straw and foam onto. Lots of tutorials suggested a paper towel roll with green paint but I had some extra green felt so I tried gluing it into a tube shape and it worked! Just use paper clips to hold it together while the glue sets. Once your straw is dry, cut 4 slits in the bottom of it and glue the tabs onto the circles on your headband. Again, use paper clips to keep it in place while it dries.
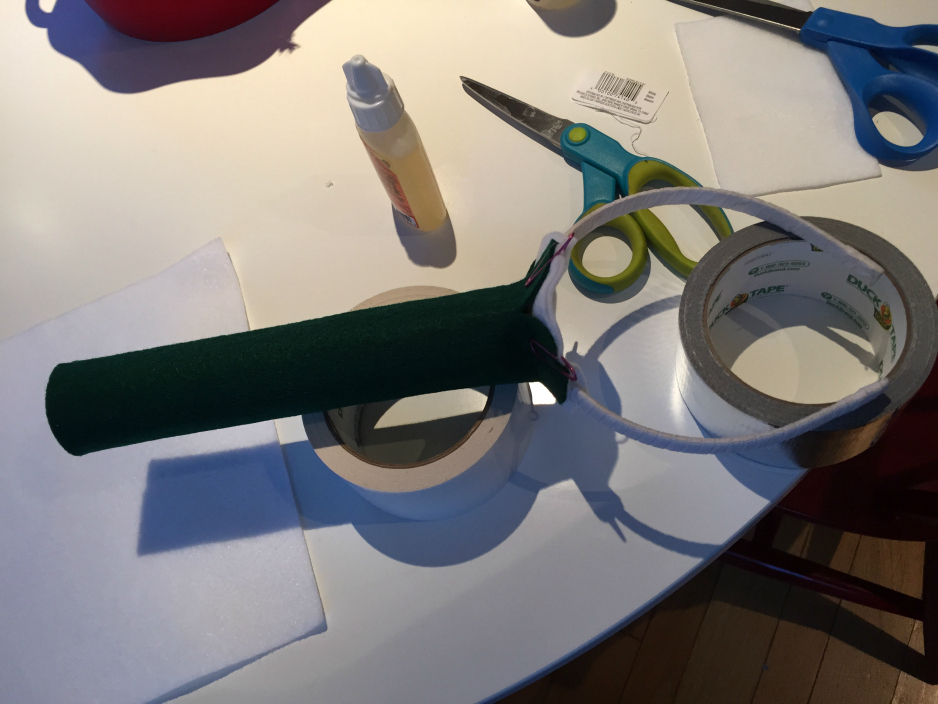
Sue at Home Starbucks Latte costume headband

After the straw was glued in place, I added some more white felt over the green on the base to cover it up. Then I made the whipped cream with the small circles using the same method as I used on the dress.
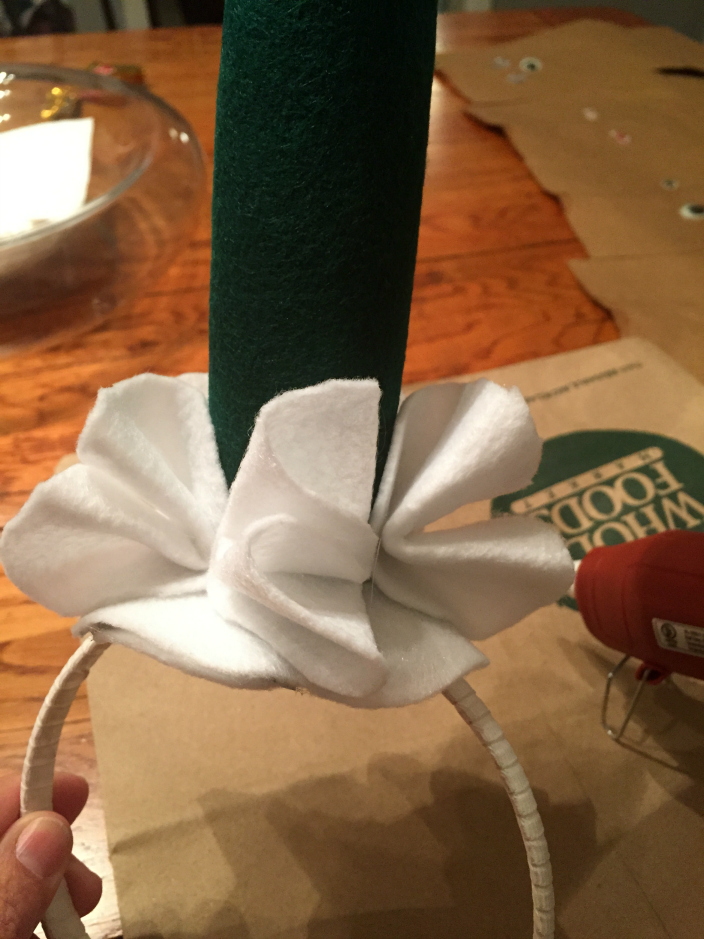
Sue at Home Starbucks Latte Costume straw how to

Perfect!

Sue at Home Starbucks Latte Costume straw

To really make it look like a Starbucks cup, I wrote the “drink order” on the back with a black Sharpie. The order boxes from top to bottom are: Decaf, Shots, Syrup, Milk, Custom, and Drink. We customized Sophia’s with an X in the decaf box (to make it a decaf – duh), with a WC in the custom box (to add whipped cream) and PSL in the drink box (to make it a pumpkin spice latte). We also wrote her name but since they ALWAYS get it wrong at Starbucks, I wrote Sophie instead of S. Check with your local barista to make sure your costume matches your real order!
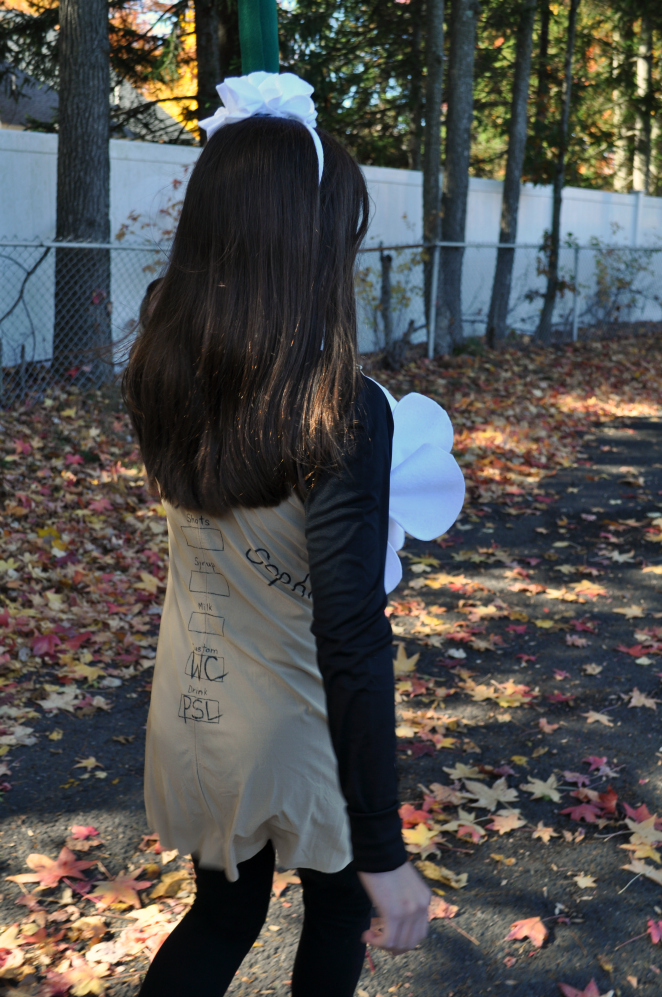
Sue at Home Starbucks Latte Costume back

I hope you liked this Starbucks latte costume tutorial.

XO

Sue at Home

P.S. If the thought of a Pumpkin Spice Latte is making you hungry, check out my recipe for Pumpkin Spice Whoopie Pies with Cream Cheese Filling!

P.P.S. Thanks so much for visiting Sue at Home and reading this post. I wrote it back in 2016 and it’s now been viewed 25,000 times! If you enjoyed reading about my creativity and want to see what I’m up to now, check out Libby & Smee, my handmade line of simple fun statement jewelry! And be sure to use coupon code SUEATHOME10 for 10% off your first order at libbyandsmee.com !
crafts, Decor, Entertaining, Home, My house

Spooky Decor

Just in time for our annual Halloween soiree, I finally got the house all spooked out and ready. I started with spiders in the light fixture and a black scarf draped over my painting to make it look a little less pink.

halloween-002

A lot of the decorations were left over from last year, like the little spiders, the tablecloth and the cobwebs. This year, I added lots of Martha Stewart Crafts that another editor gave me at my day job.
halloween-004

All of the wine bottle decorations are from Martha Stewart. You can find them here.  The little owl papers just stick on the front of the bottle. Sophia said they all reminded her of Harry Potter.

halloween-005

For the witchy wine, I combined the sticker from this kit with the witch’s hat from this kit.  My pumpkins are fake ones from Target that I spray painted and glued glitter onto.  (You know I’ll never spray paint a real one again after what happened last year!)

halloween-006

The girls made the creepy hands at an event at Sophia’s school. They’re just medical gloves filled with flour.

halloween-007

My favorite of the wine bottle decorations was this awesome vampire collar. We added fangs from the photo decor kit too.

halloween-008

Sophia made the striped planter at the Y.

halloween-009

Those ghosts in the back are the party favors for the kids. I just trimmed plain white lunch bags to have a ghost shape on top and Soph drew on the eyes.

haloween-010

My glitter skull from last year is sitting on the front windowsill surrounded by brass candlesticks. (And of course, some pretty carnations. They’re my go-to party flower because they’re cheap, pretty and they last a loooooong time.)

halloween-016

The girls colored pumpkins with metallic paint pens in lieu of carving.

halloween-017

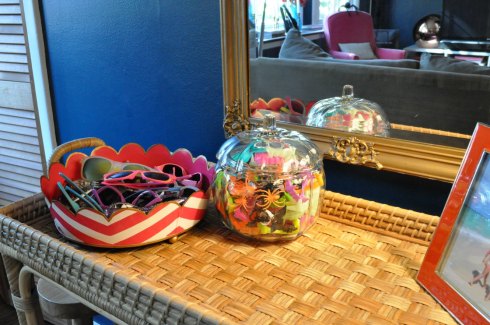
Our front foyer table holds this little glass pumpkin (another Target find) filled with lots of essential Halloween toys like glow-in-the-dark teeth and spider rings. (Because you can never have enough spider rings!)

halloween-018

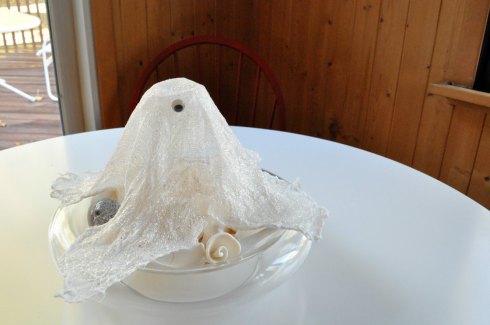
A little ghost that Lily made in pre-K last year hangs out in the den on top of a bowl of shells. Sometime between last Halloween and now, he lost an eye. But I think it’s a good look for him so we’re going with it!

halloween-020

I also did a couple of the Halloween crafts featured in the October issue of Ladies’ Home Journal so I can talk about them for an upcoming TV appearance on Better TV. This is all day job stuff but I’ll let you know when it’s airing. (Follow Sue at Home on Facebook to hear all about it!)

halloween-028

Up in Sophia’s room, she had a blast spookifying her place with this photo kit from Martha Stewart.

halloween-031

Of course, that was before she switched her costume a few minutes before the party. As I told her the first time she changed her mind about her costume, “You can be whatever you want as long as you can put it together from things in this house.” I’m happy to help buy/build/hunt for costumes but not when she changes her mind two days before Halloween! (BTW: She’s a cat–obviously–and Lily is Chee Chee from Teen Beach Movie. When I posted this picture on Instagram, I tagged Chrissie Fit, the actress that plays Chee Chee, and she liked my picture! It’s scary how excited that makes me but you need to understand that this movie is like an Oscar-caliber film in my house and Chrissie Fit is like our Meryl. I don’t even think the girls understand how cool it is!)

Halloween-049

And when they’re not being as cute as can be, they can turn up the spook and scare the crap out of you too!

Halloween 2013 BLOG

XO

Sue at Home

crafts, Entertaining, Family, Home

Luau Birthday Party

We recently celebrated Lily’s 5th Birthday with a luau at our house. Let’s take a peek at how we put it all together.

As you saw in last week’s post, I created an umbrella wreath for the front door out of paper parasols.

wreath-154

 I bought two hibiscus plants that I put in some pots that I had painted last year.

luau-125

They added the perfect tropical touch.

luau-126In the foyer, I put tons of leis in a bucket and displayed the invitation that I made on PicMonkey.

luau-118

For the favors, I got sunglasses from The Children’s Place, some Swedish Fish (Lily loves “sweetest fish”!) a hibiscus tattoo, and either a Hello Kitty necklace for the girls or a foam plane of the boys (both from the One Spot at Target).

luau-250

I just put all the goodies into white paper bags and added a little tag–that said “Thanks for coming to Lily’s Luau”– thanks to Picmonkey again. (I “borrowed” some of Sophia’s fun tape to attach them to the bags.)

Some grass skirts for the girls were laid out the back of the couch so kids could grab them as they came in.

luau-122I usually don’t like a matching set of paper plates but when I saw these at Ikea, I had to have them. I got the straws eons ago at Pottery Barn outlet and they’ve been sitting in a party bin in the attic just waiting for a luau!

luau-176

I kept the food pretty simple: pizza for dinner, tortilla chips and homemade guacamole, and lots of fruit. I had to include some pineapple, of course! (more cute napkins from Ikea)

luau-109

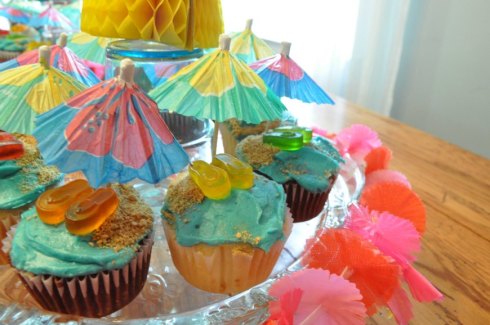
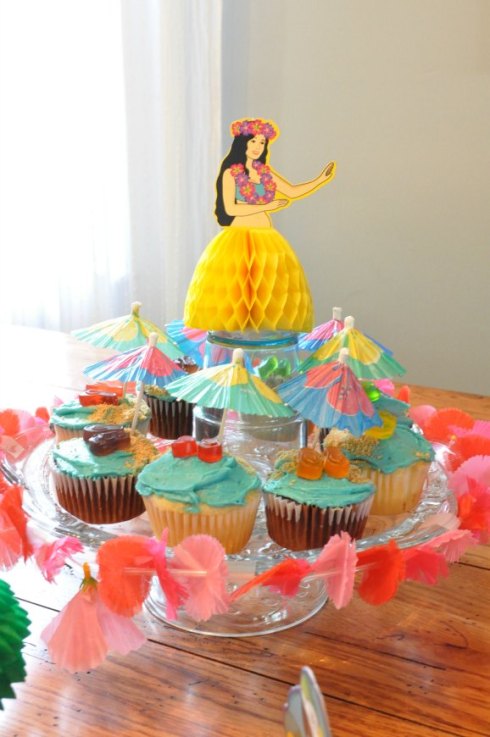
As for the cupcakes, I made them at home and used blue frosting to represent water, crunched up graham crackers for sand, gummy flip flops and a paper parasol.

luau-105

luau-106

I pulled out all my cake stands and decorated some of them to look like they had grass skirts on.  I just cut up a piece of green craft paper and taped it all the way around. Then I cut apart one of the leis and glued flowers around the paper with fabric glue.

luau-098

I also wrapped one of the cake stands with a lei.

luau-096

The little tissue paper decorations are from Oriental Trading –where I got just about everything I needed–and they came in really handy to give some height to the cupcake displays. (I just stuck them on top of a plastic cup turned upside down.)

luau-101

As for activities, we kinda just winged it. I was nervous because we don’t have a swingset anymore (remember how I told you that Hurricane Sandy took it out?) But we just put out all of our frisbees, wiffle balls and bats, and bubbles and let the kids have fun in the yard.  They loved it and there wasn’t a dull moment.

It was a perfect day with lots of good friends, good food and drinks, and good times!

Happy 5th Birthday Lily!

XO

Sue at Home

crafts, Entertaining, Family, Home

40 Envelopes with 40 Memories for a 40th Birthday

birthday-460

Yup. It’s that time again…the Pinterest Challenge. And this time, I created a project for Pablo’s 40th celebration. (Maybe next time, I’ll do something for myself!) When I saw this birthday envelope surprise on Oh Happy Day I knew it was the perfect way to present Pablo with the sweet notes that I was planning for his birthday.

37

The first step was to get the memories. Lucky for me, Pablo is very loved so even though I started this the day before his birthday (!), all I had to do was send one group message on Facebook and one group email for the non-Facebookers and the memories came flooding in. There were a few people I couldn’t find but I managed to get over 35 messages. (I simply asked everyone to send me a memory of a time they spent with Pablo. I filled in the last few from me and the girls.) Once I got them all, I cut and pasted them into a word document, formatted them, and printed them on bright colored paper. Some were long and some were short but that worked perfectly for my purposes.

birthday-466

Next I found some random envelopes in my stationary stash and laid them out to spell 40. First on the floor (to get a layout I liked) and then up on the wall of the dining room.

birthday-459

The girls helped me stuff the envelopes…
birthday-427

…until each envelope – all 40 of them! – had a personal note from a friend or relative.

birthday-424

When he came home and we surprised him with it, he was a little perplexed at first. (I think he may have been wondering if this was a permanent installation!)

But once he started reading through all the memories with the girls (with a little bit of editing to take out any mature subjects!), he loved it.

birthday-447

I think it was a perfect gift for him (because he loves reminiscing) and for this year (because with me working part time now, there are no extra funds for a grand gift so I needed to make a grand gesture instead.)

We did get him a few little goodies, though, because everyone needs to open some gifts on their birthday.

birthday-434

birthday-451

As you can see, he had a great time. Thanks to everyone who contributed memories to this project. I couldn’t have done it without you.

Thanks for reading! 

Sue at Home

P.S. Thanks so much for visiting Sue at Home and reading this post. I wrote it back in 2013 and it’s now been viewed over 60,000 times! If you enjoyed reading about my creativity and want to see what I’m up to now, check out Libby & Smee, my handmade line of simple fun statement jewelry! And be sure to use coupon code SUEATHOME10 for 10% off your first order at libbyandsmee.com !

crafts, Family, Home

Making a Wigwam for a School Project

This may not seem like one of my normal DIY projects but it’s still a fun and creative one so I thought you might want to see it.  For any parents out there, flag this post because your day will come too! Lucky you — I’m here to show you how we did it. Come inside and warm yourself by the fire!

S’s 2nd grade class is studying Native Americans this month and her assignment was to build a replica of the shelter that the Shawnee tribe lived in. The only stipulation was that she should use as many natural materials as possible. We used this website as a guide.

We started by tracing a tray to make a big circle onto an old corkboard that I found in our garage. Then we measured around the circle and marked off where our holes should go. Next, we drilled small holes into the board to anchor the sticks but we made sure not to drill all the way through. We gathered lots of sticks from the yard (there were plenty from Sandy) and we tied pairs together to make the frame.

It took some time to find the right sticks (without them breaking) and get them glued into the holes but we were excited that our frame was coming together just like an authentic wigwam.

In lieu of bark or woven mats, we used brown bags to make a cover for the wigwam. First we cut them into strips.

Then we cut fringe onto each strip…

…and slowly added each row of fringe to the frame. If we had better glue, I would have used that but instead we took the easy road and used tape!

We built the layers up and then took a little time to add a rock-lined walkway and a stone hearth in the center. S was great at coming up with ideas, like using red and orange construction paper to build the fire.

We dressed one of her Polly Pockets in a brown bag dress and propped her up by the door. (I had to promise S that we’d be able to peel the glue off her feet after she gets the project back!)

It was a lot of work but S and I had a great time building it together. She was so proud of the finished product and I’m so proud of how hard she worked on it.

XO

Sue at Home

P.S. Thanks so much for visiting Sue at Home and reading this post. I wrote it back in 2012 and it’s now been viewed 70,000 times! If you enjoyed reading about my creativity and want to see what I’m up to now, check out Libby & Smee, my handmade line of simple fun statement jewelry! And be sure to use coupon code SUEATHOME10 for 10% off your first order at libbyandsmee.com !

https://libbyandsmee.com/
crafts, Decor

Epic Pumpkin Fail

When I started this blog, I promised to share my successes and my failures. And while I’ve had some toot-my-own-horn  successes lately (dying a slipcover, creating an easy jewelry storage solution, and cooking up a yummy seafood paella), I need to tell you about the pumpkin catastrophe that recently occurred in my house. You’ll remember that I bought some smallish pumpkins and coated them in matte black spray paint. 

Now, I have seen TONS of bloggers write about painting pumpkins and I have never seen any of them warn that this will kill the pumpkins! I painted them on October 1st and you can imagine my surprise when Sophia said, “Mommy. The pumpkin is opening up.” on October 12th. When I came to investigate, I found this:

After we got over the shock, me and the girls took turns plucking the stems off of the rotting pumpkins. They fell right off.

They were so rotten in some spots that they were caving in.

Before you say “maybe they were just bad pumpkins”, I’ll tell you that I bought three other pumpkins from the same place on the same day and those are fine. Surprise, surprise! They have no spray paint on them!

I bought some new ones and I’m thinking of attempting a little gold craft paint on them. I think the key might be to not cover the whole thing. I guess I must have suffocated them! Sorry pumpkins.

 I’m attempting a craft this afternoon with the girls. Hopefully this one will work out a little better. Have you had any craft fails lately? Please tell me and make me feel better!!

XO

Sue at Home

crafts, Decor, Home, My house

DIY: Quick and Easy Jewelry Display

I recently completed Phase 2 of organizing my jewelry (which you read about here yesterday) and I managed to find a home for just about everything–except for a handful of long necklaces.  I spun around my room scanning for a place to put them and this frame that I had sitting on our dresser jumped out at me. You see, I had put it there recently because I felt like I needed something in front of my For Like Ever poster (read more about that here) to break up the vastness of it. It’s not fancy–I just cut a piece of old wrapping paper and stuck it in the frame. Thankfully, it worked and it was all starting to look a little more like a pretty vignette rather than a massive poster propped against a wall.  Here’s what it looked like with the addition of the frame:

You’ll also notice another new little friend. That’s the teeny tiny piggy bank I bought at Daytrip Jr during our trip to Maine. Isn’t he cute?

You might recognize that wrapping paper that I used as the drawer liner from Phase 1 of The Great Jewelry Organization Project (read more about that here.) See it hidden under all my baubles?

Anyway, back to the frame.  I noticed that it was kind of long–like the necklaces–so I figured I could make something out of it. I grabbed some pretty rose-goldish nails that I had bought for a forthcoming String Art project and got to work. FYI: The frame I used was the Wood Gallery 4×6 triple frame from Pottery Barn. At 18″ high and only 11″ wide,  it’s the perfect size.  (Yes, my hammer is pink. You got a problem with that?)

I removed everything from the frame (I would not recommend trying this with the glass still in there!) and drew a straight-ish line across the top in pencil. Then I measured 1 inch spaces across the top so the nails would be somewhat uniform. As I nailed, I decided to put some a little off the line because I figured I might split the wood if I stayed on the same line. Did it come out pretty and perfect? Nope! But as you’ll see below, you can’t tell that the nails are a little lot crooked when it’s all put together.) I was very careful to make sure they were nailed in far enough to hold a necklace but shallow enough so they weren’t coming through the other side.

When I was done, I put the frame back together and started hanging the necklaces.

I’m glad I put the nails an inch apart instead of closer because I needed a little space between each necklace.

I think the little piggy likes it too!

XO

Sue at Home

Have you done any fun DIY projects recently? Let me know in the comments below!

Before and After, crafts, Decor, Home, My house

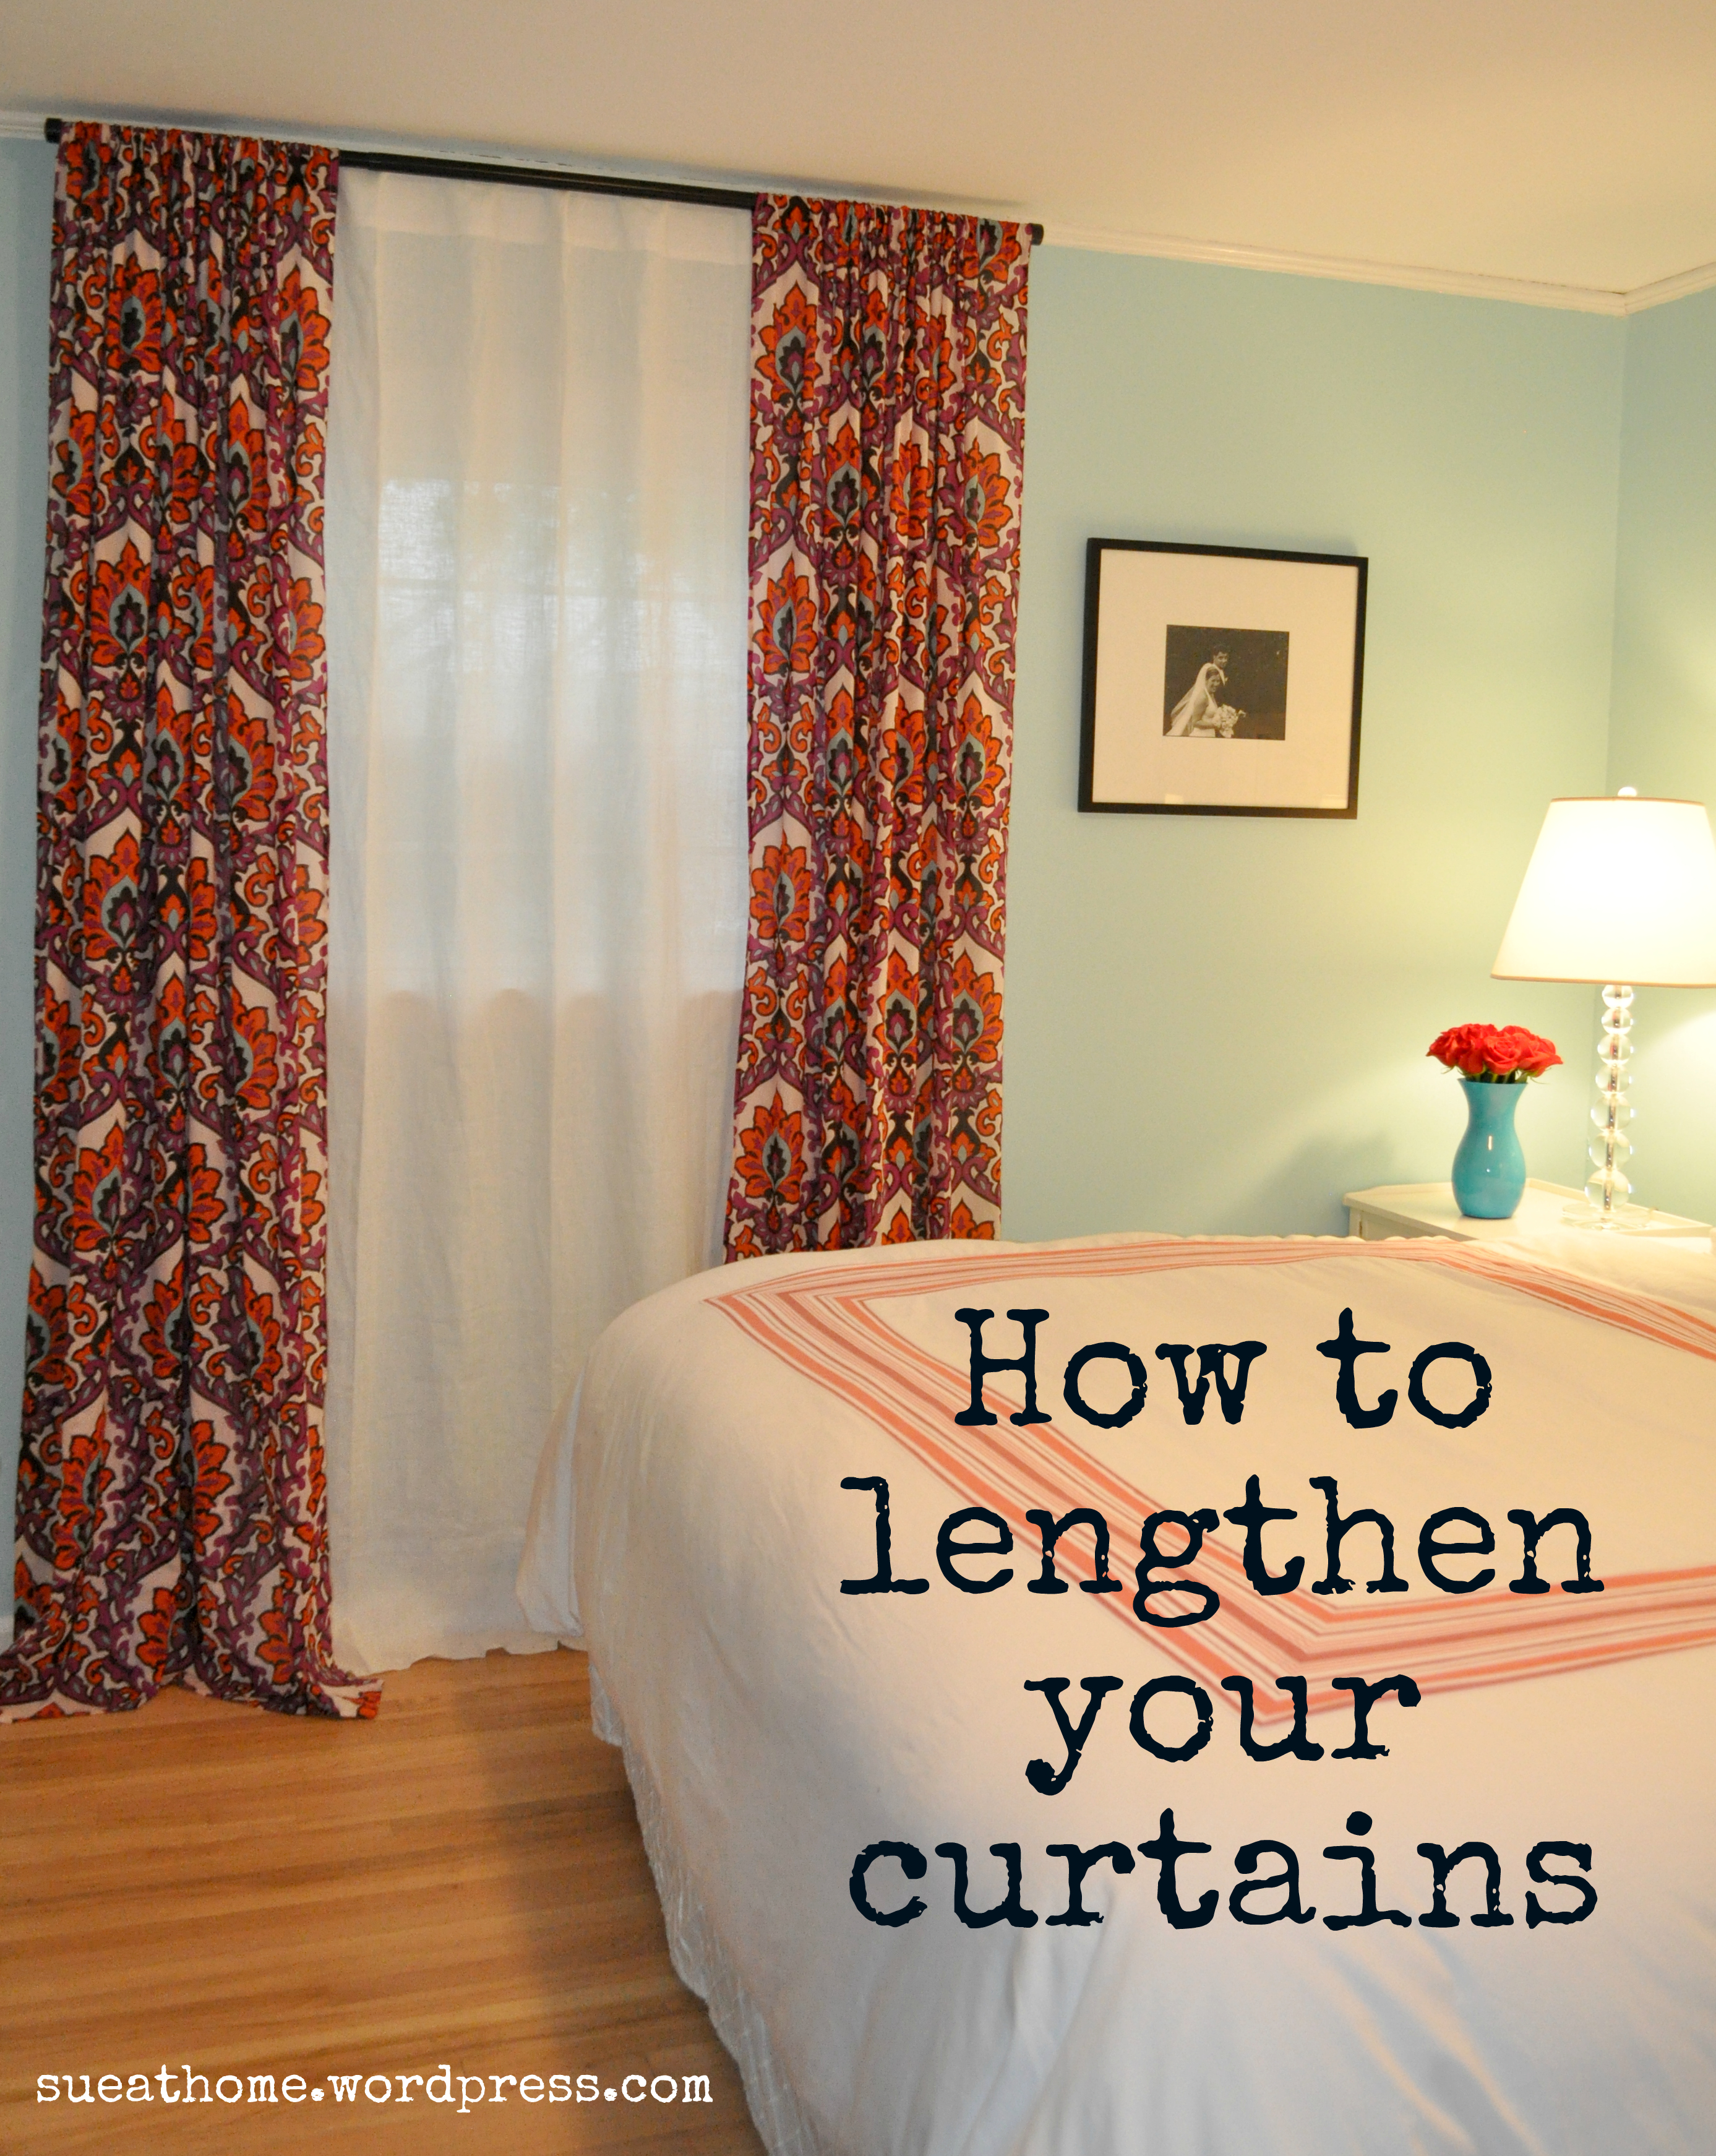
DIY: Lengthening our Master Bedroom Curtains

I suppose putting DIY in the title of this post is a little misleading. It should be more like “figure-out-how-to-do-it-and-then-hire-someone-else-to-do-it-because-you-can’t-sew”. That’s a little more honest. But if you can sew then you can absolutely do this yourself. Anyway…

I have a love/hate relationship with curtains. I mean, I get it – I know that they can totally transform a room but I find them to be a little fuddy duddy and too “designer-y” for my taste  – plus they are often A SMALL FORTUNE. For just a piece of fabric. It kinda makes me crazy.

Let me stop and remind you about the inspiration picture for our bedroom. Olatz Schnabel’s bedroom from House Beautiful. Ahhh. I could just stare at this pic all day. It’s so dreamy.

olatz house beautiful

Yes, I’m aware we don’t have high ceilings like that, nor do we have a gajillion dollar bed but still, I figured we can work with the color palette. Just go with it, ok?

(Sidenote: Before I get into telling you about the curtains I ended up with, let’s just gloss over the EPIC CURTAIN FAIL that happened when I ordered 4 red silk shantung panels from Macy’s. Small room with low ceilings + inexpensive but trying-to-look-expensive drapery panels = turning one’s bedroom into a brothel. I’m not talking about a high class Heidi Fleiss kinda place. I’m talking about 8th and forty-deuce. It was HORRIBLE. They were quickly returned and we shall never speak of this again. Okay? Okay.)

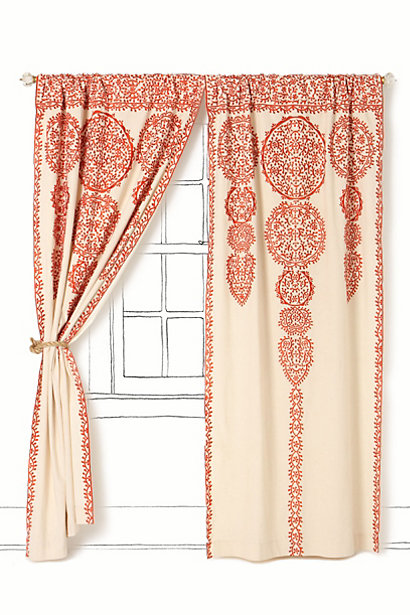
So, I spent a lot of time looking high and low for some curtains for our bedroom. I knew I wanted something that would really pop against our blue walls. Something in either a bold red or a rich purple or even a major print. There were many I fell in love with – most from Anthropologie. Some are long gone now but the ones I was loving are similar to these:

The Marrakech Curtain – This would add an eclectic vibe.

Wandering pleats – I love that rich purple color.

And the new Swing Stripes curtain (they’ve got POM POMS! And I love me some pom poms!)

Since an Anthro curtain can run you from $148-188 per panel, these were all out of the question. (I needed 4 panels and there was NO way I would be spending $600+ on curtains when I don’t even have a grown-up bed.  More on that at a later date.)

Then I started looking through the curtains at Anthropologie’s little sister, Urban Outfitters, and there were a lot of pretty prints. They’re all much lighter, semi-sheer cottons but I kind of like that look so I didn’t mind. (Remember, I’ve got an aversion to thick, fancy, old ladyish “draperies”.) I was thrilled when I found this amazing one that was kind of flourishy in purple, orangey-red and even a little of a light blue that kind of worked with our walls. (It’s still available in other colors.)

I bought the longest length they had (84″) and I hung the rod a little bit above the window so the curtains skimmed the floor. I don’t have a picture of this because I was embarrassed by how it looked.  Here’s the problem: We all know that curtains need to be hung as close to the ceiling as possible so I knew I was trying to cheat and get away with a cheap solution. What was I thinking? (I know actually. I was thinking about doing it as cheaply as possible.)

In case it’s unclear what I mean, check out the great post from Erin Gates of one of my favorite blogs, Elements of Style. She illustrates the problem in the most simple way:

Hanging curtains way up there just makes the ceilings look higher – and it gives the room a French boudoir feel to it. Ooh la la!

 But I had 84″ curtains and I needed 96″. So how to deal with too-short curtains? I ordered 1 extra panel from Urban and they were on sale at that point so I got it for a song. Then I brought all 5 of the panels to my tailor (that sounds so fancy but it’s just my dry cleaner who hems stuff for me!) and asked her to cut the extra panel and add an extra 12 inches to the bottom of each curtain. Is it perfect? Nope! But I asked my dry cleaner to do it and I think she charged me $20 for all 4 panels so I’m not going to complain. (If I had done it myself, I probably would have been a little more anal particular about lining up the print perfectly but I’m quite sure they would not have been sewn straight.) See how messed up there are?

It’s pretty obvious there but when I pull back it’s not as bad. I don’t think anyone would notice unless I pointed it out. See?

One cheap place where you can always count on finding long curtains is Ikea. They sell most panels in one long length that comes with hemming tape so you can make them any length you want. We have these polka dot ones in S’s room. I think they look great and they were so cheap. You can’t beat $13.99 for a pair! The hot pink crinkle sheers are from here.

Since I finally took some decent pics of our master, this will be the first in a series of posts about what’s happening in the bedroom. (No. Not that stuff! Get your head out of the gutter!) So, make sure you subscribe to Sue at Home to see all the action. (Decorating action! Jeez. You should be ashamed.)

XO

Sue at Home

crafts, Family, Food

Our Wedding: The Details

First of all, thanks so much for your interest in our wedding! Monday’s post on the setting for our wedding, and Tuesday’s post on the fashion choices were two of my most read blog posts EVER, so thanks!

Today, I’d like to show you some of the details from the wedding. Let me first explain something to the youngins out there: Before Pinterest, there was a wedding binder. And let me tell you, mine was huge! I pulled it out of the attic (of course I still have it!) to take a peek again. Honestly, the binder seems to be the most outdated part of my wedding! The cover, which features a flower inspiration pic and our teal detailed invitation, shows the color palette we worked with. There were also touches of Tiffany Blue throughout the wedding.

Here’s a picture of a flower inspiration page. Pretty, huh? I would have died to have carried a huge arrangement of peonies but they weren’t in season so when I saw this picture of cabbage roses from Martha Stewart Weddings,I was smitten.

The arrangement came out beautifully. It was heavy as hell – but I loved it. (That’s me and my dad before we left the mansion to walk down the aisle.)


Funny story: My dad is no sap but he can be known to get a little sentimental.  So, I warned him. I said, “Dad, don’t you dare turn to me right before we walk down the aisle and say something that makes me cry. I want you to tell me a joke.” And he took this task very seriously. He bought joke books and looked for the perfect one for weeks. Finally, he decided on this short, sweet, and giggle-inducing one: A pig is sitting at a bar drinking beer and after beer. Finally, the bartender asks him if he needs to use the bathroom and he says no thanks. He continues to drink and the bartender is baffled. After a few more beers, the bartender asks again, “Don’t you need to use the bathroom?” and finally the pig says, “No. Don’t you know who I am? I’m the little pig who goes Wee Wee Wee all the way home!”

Thanks Dad for the potty humor when I needed it the most. (You can actually see me gaffaw in the wedding video!)

Ok – back to the decorative details:

The bridesmaids all carried different flowers in various shades of pink. Everything from hydrangeas to daisies to snapdragons. They were small and simple and they looked great. (For more about the bridesmaids dresses and where you should NOT get yours, check yesterday’s post).

For centerpieces we had some low and some tall and they were mixes of pinks and greens.  I spent weeks making beaded table numbers but they were a bit of a bust. In fact, they’re crooked and you can’t even see them in these pics. I feel like I need to explain: I took wires, added large silvery clear beads and bent the wires in the shapes of the table numbers. Then I had the florist insert them into the centerpieces. Unfortunately, they were too small/clear and no one could see them. Oh well.


One of my favorite flower arrangements was the huge one in the Music Room. As guests arrived, they entered through the foyer and then were directed into this small blue room that had a large arrangement in it with all the seating cards stuck in the arrangement. (I guess sticking things into flowers was a big thing 10 years ago! Or at least I thought it was!)

Now to the yummiest detail – the cake! Now listen, my mood on my wedding day was one that I have never had before or after. (Yes, even different than the birth of my kids.) I was giddy, elated, and high-on-life. I drank several glasses of champagne throughout the evening and none of it touched me. It was like I was drunk from the day itself and nothing else could compare. So maybe you don’t want to trust me when I tell you that my wedding cake was The. Most. Delicious. Cake. Ever.

But it was.

It was simple – white cake with buttercream and chocolate ganache covered in fondant. And now that I think of it, I need to take a trip to Fall River, Massachusetts and get an anniversary cake sometime this summer from Confections.  We rented the vintage cake stand from the bakery and I think it really added the perfect touch.

Our favors were another favorite detail of mine. I discovered early on when we were dating that our initials were the same as the initials for salt and pepper (S&P) so it was natural that we gave shakers as our favors. I found these great stainless steel ones from Crate and Barrel which featured holes in the shape of the letters S&P. I found acrylic boxes to put them in and I decorated each one with a wide silk blue ribbon and a label that said “S&P  – Love is the Spice of Life – July 27, 2002”

The best is that they’re totally personal. They wouldn’t make sense for anyone but us. Unless you have S&P initials, of course! I’m happy to say that many of our friends use them everyday – and we do too!

Hope you enjoyed all the details of our wedding! Stay tuned for more wedding fun tomorrow.

XO

Sue at Home