crafts

How to Make a DIY Starbucks Latte Halloween Costume

I live by the motto that it’s never too early to start thinking about a Halloween costume. Even if you don’t share my passion for the one day of the year when dressing up like a weirdo is totally celebrated, you can’t deny that stores have started stocking black and orange decorations. And costume catalogs are probably flooding your mailbox as we speak. So, I figured it was about time I shared a how-to on S’s costume from last year: A Starbucks grande iced pumpkin spice latte with whipped cream!

latte (1)

I already had an old slip and headband so the costume cost us less than $10 in felt and hot glue! When we were searching for ideas last year, we found lots of cute pictures (this blog post was our big inspiration) but there was no resource that really explained how to create the Starbucks logo and how to use felt to create the foam/whipped cream. But now, thanks to this blog post, there is!

You’ll need a tan dress (I had an old slip that fit S loosely but these cheapies from Amazon are a great option), a plain headband, 2 one-foot square pieces of dark green felt, white felt (enough to make at least six 9-inch circles and eight 3.5-inch circles), felt glue, a black Sharpie (to write the “order” on the back of the “cup”), a hot glue gun, and whatever you want to wear underneath.

Search for the Starbucks logo online and make an enlarged print about 7 inches in diameter. To make the traceable template, you’ll need to cut it out. This will be super annoying and time-consuming and you’ll get carpal tunnel but just think about how awesome your costume is going to be and deal with it. Plus…good news! Since it’s symmetrical, you can cut half of it and just flip it over when tracing. (Be sure to have a bowl of mini pumpkins nearby to help you get in the holiday spirit!)
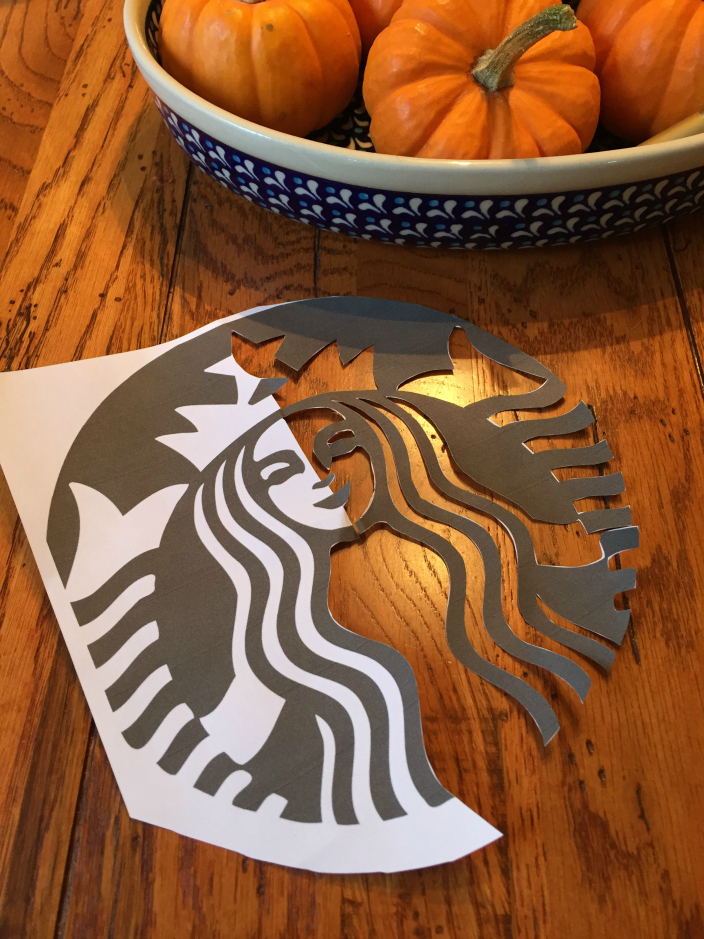
Sue at Home Starbucks Latte Costume tracing 1

Use a black Sharpie to trace around the design.
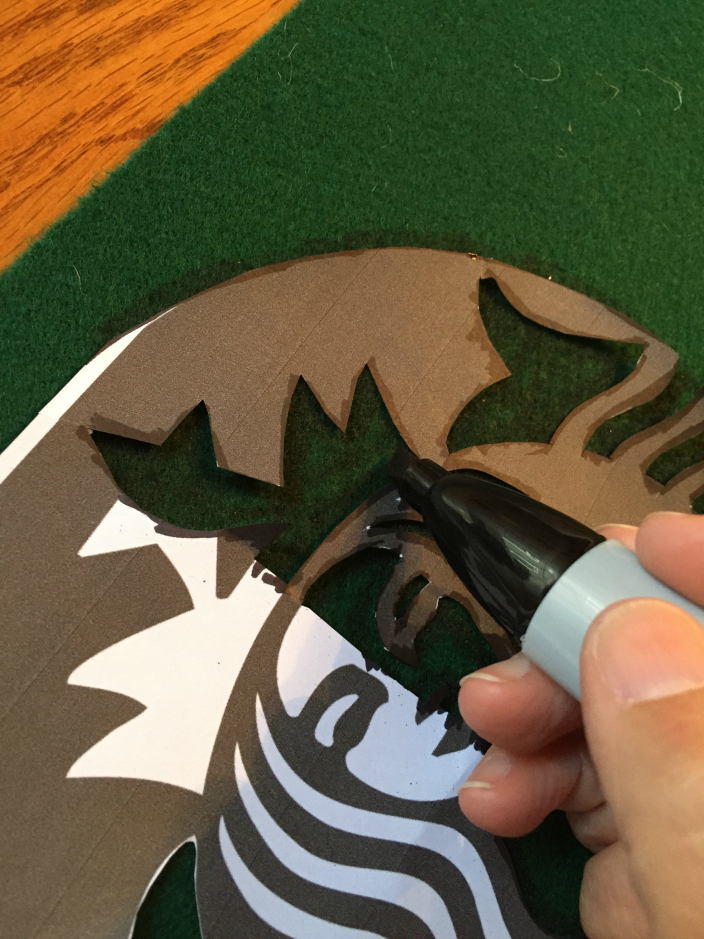
Sue at Home Starbucks Latte Costume tracing 2

Then flip your template over to trace the other side.
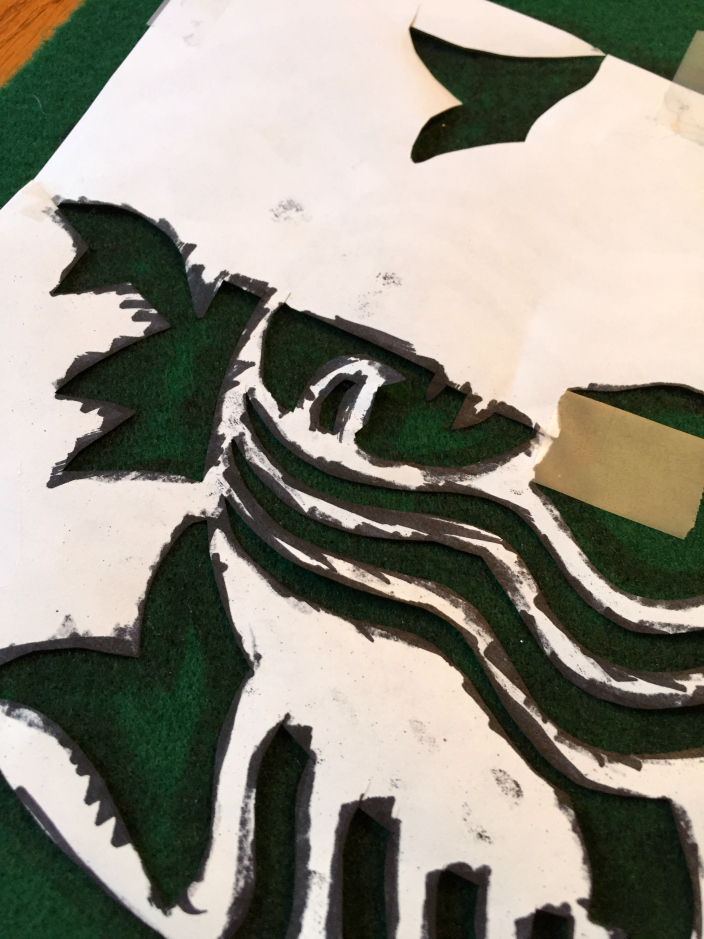
Sue at Home Starbucks Latte Costume tracing logo felt

Next step: Stop and marvel at how good it’s looking!
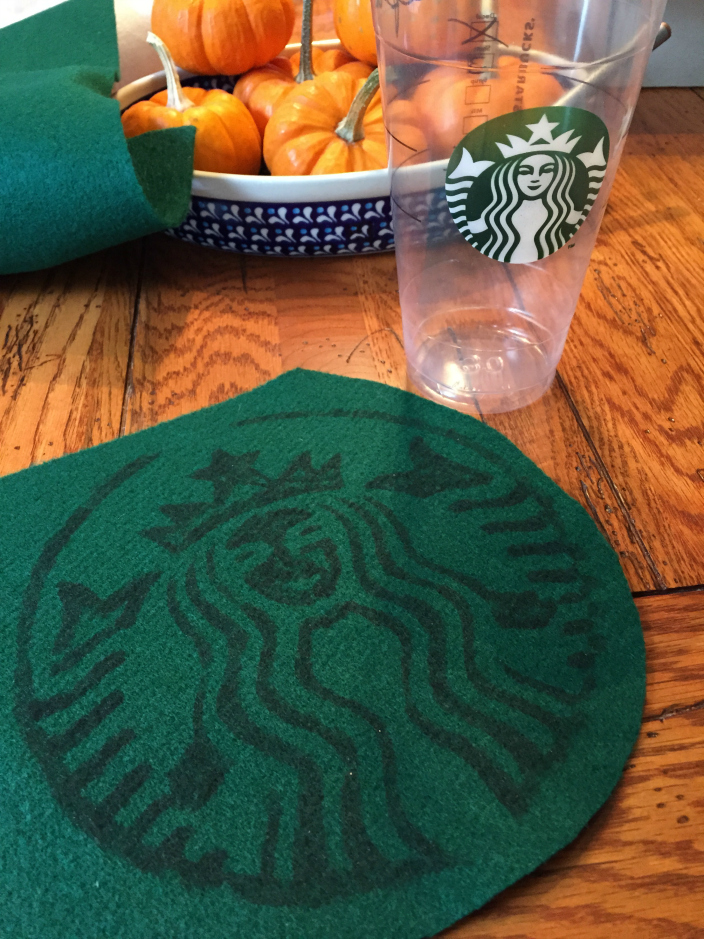
Sue at Home Starbucks Latte Costume tracing logo

Then — yup, you guessed it — just when you’re starting to get feeling back in your hand, more cutting! Once you’ve got it all cut out, glue down each part of the design with felt glue. (Felt glue is easier and less messy than hot glue so it’s best to use felt glue for this step.)

Sue at Home Starbucks Latte Costume felt

Soon it’ll look like this and all will be right with the world. (Don’t forget the nose, mouth and the little triangle in the middle of the crown.)
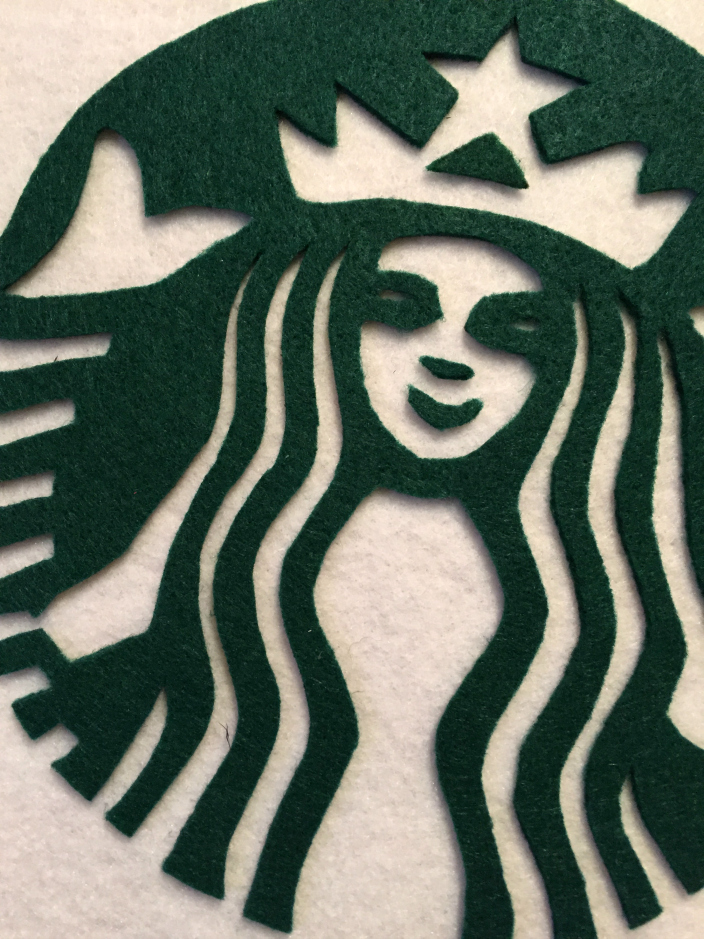
Sue at Home Starbucks Latte Costume layered felt

Then cut out the circle and you’re ready to glue the logo on the front of the dress. Just make sure you put it down low enough so you have plenty of room for the foam/whipped cream across the top.

sue-at-home-starbucks-latte-costume1 (1)

To make the whipped cream you’ll need 5 or 6 white felt circles that are about 9 inches in diameter. If you want the foam to go across the back, you’ll need more. We decided against it because we wanted more room for the “drink order” on the back. (More on that later.)  They don’t need to be perfect circles so don’t worry your pretty little head about making it precise.  (The little ones pictured here are for the headband.)
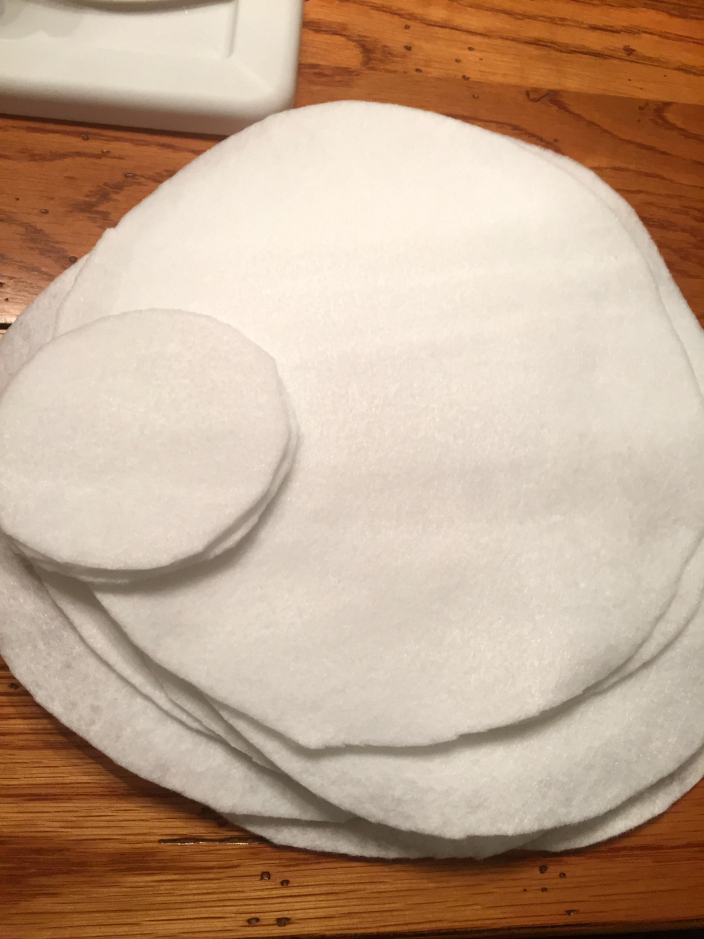
Sue at Home Starbucks Latte Costume white felt

To make the whipped cream, fold your felt in an accordion fold vertically along the dotted lines below. Add small horizontal lines of hot glue (it adheres faster than the felt glue) across the center to glue each section together. Then fold it along the middle and you’ve got a big, fluffy, frothy glob of whipped cream / foam! Use a thin line of hot glue along the center back of the felt to attached it to the dress.
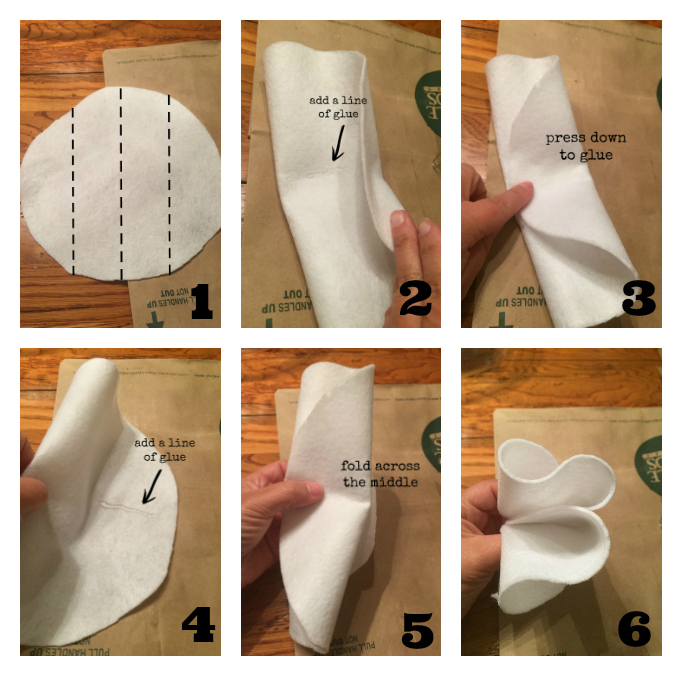
Sue at Home Starbucks Latte Costume foam

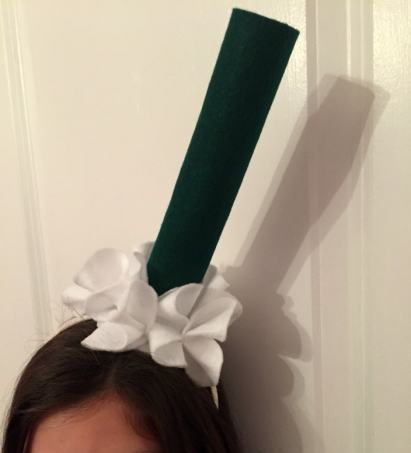
To make the frothy headband, grab two of the smaller circles and glue them together with the headband running through the middle of it. This will be your base to build the straw and foam onto. Lots of tutorials suggested a paper towel roll with green paint but I had some extra green felt so I tried gluing it into a tube shape and it worked! Just use paper clips to hold it together while the glue sets. Once your straw is dry, cut 4 slits in the bottom of it and glue the tabs onto the circles on your headband. Again, use paper clips to keep it in place while it dries.
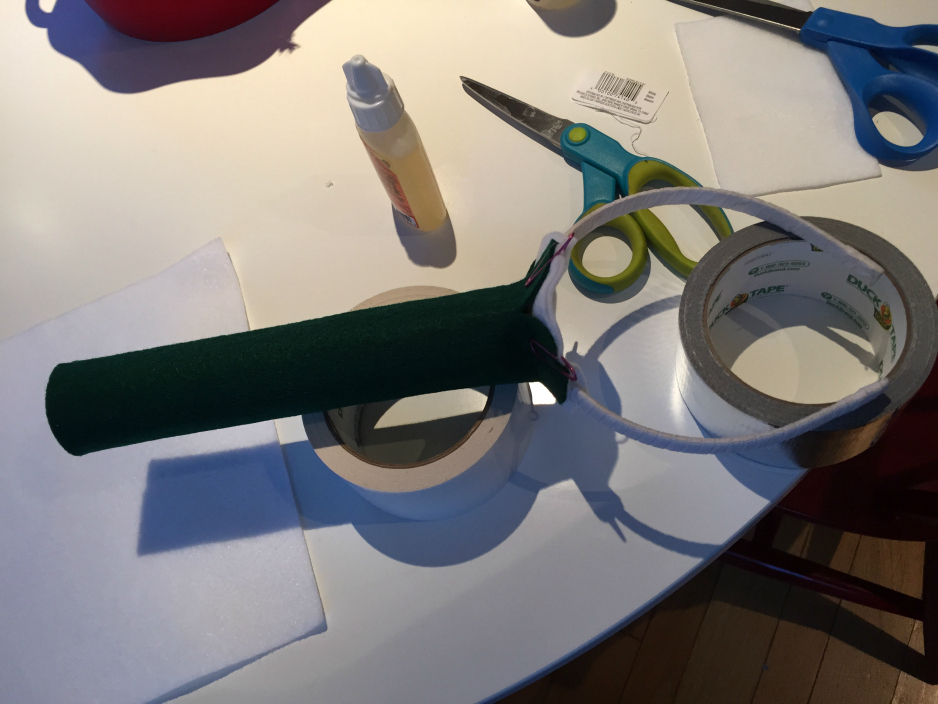
Sue at Home Starbucks Latte costume headband

After the straw was glued in place, I added some more white felt over the green on the base to cover it up. Then I made the whipped cream with the small circles using the same method as I used on the dress.
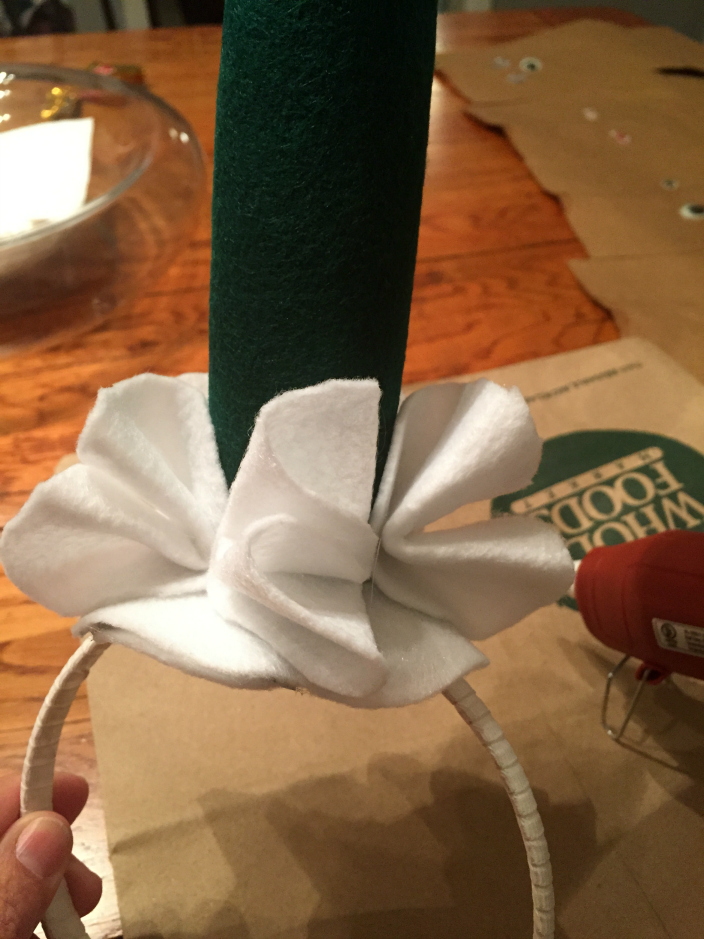
Sue at Home Starbucks Latte Costume straw how to

Perfect!

Sue at Home Starbucks Latte Costume straw

To really make it look like a Starbucks cup, I wrote the “drink order” on the back with a black Sharpie. The order boxes from top to bottom are: Decaf, Shots, Syrup, Milk, Custom, and Drink. We customized Sophia’s with an X in the decaf box (to make it a decaf – duh), with a WC in the custom box (to add whipped cream) and PSL in the drink box (to make it a pumpkin spice latte). We also wrote her name but since they ALWAYS get it wrong at Starbucks, I wrote Sophie instead of S. Check with your local barista to make sure your costume matches your real order!
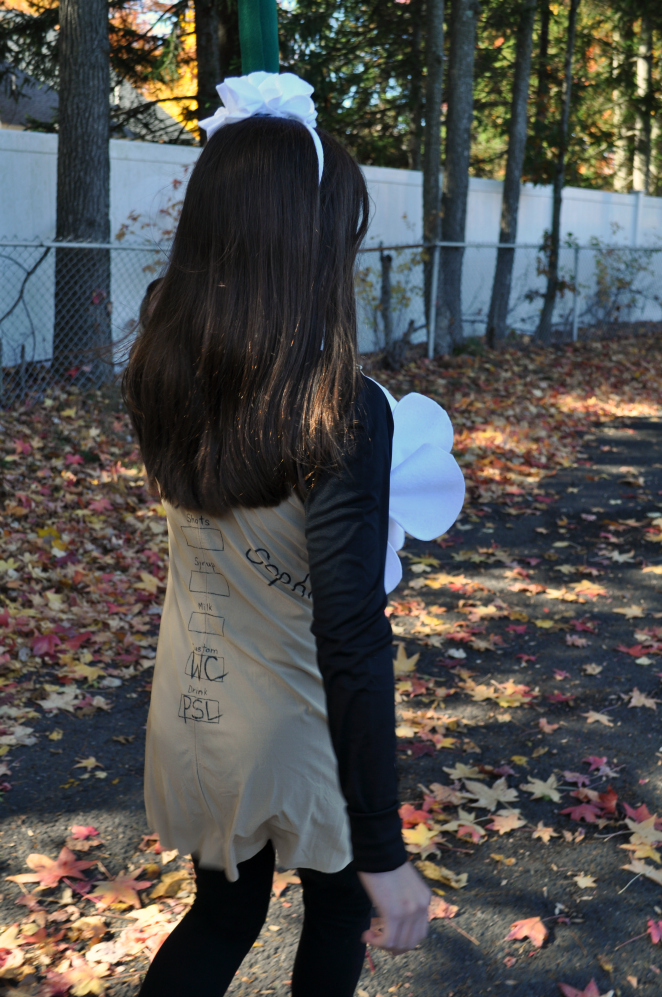
Sue at Home Starbucks Latte Costume back

I hope you liked this Starbucks latte costume tutorial.

XO

Sue at Home

P.S. If the thought of a Pumpkin Spice Latte is making you hungry, check out my recipe for Pumpkin Spice Whoopie Pies with Cream Cheese Filling!

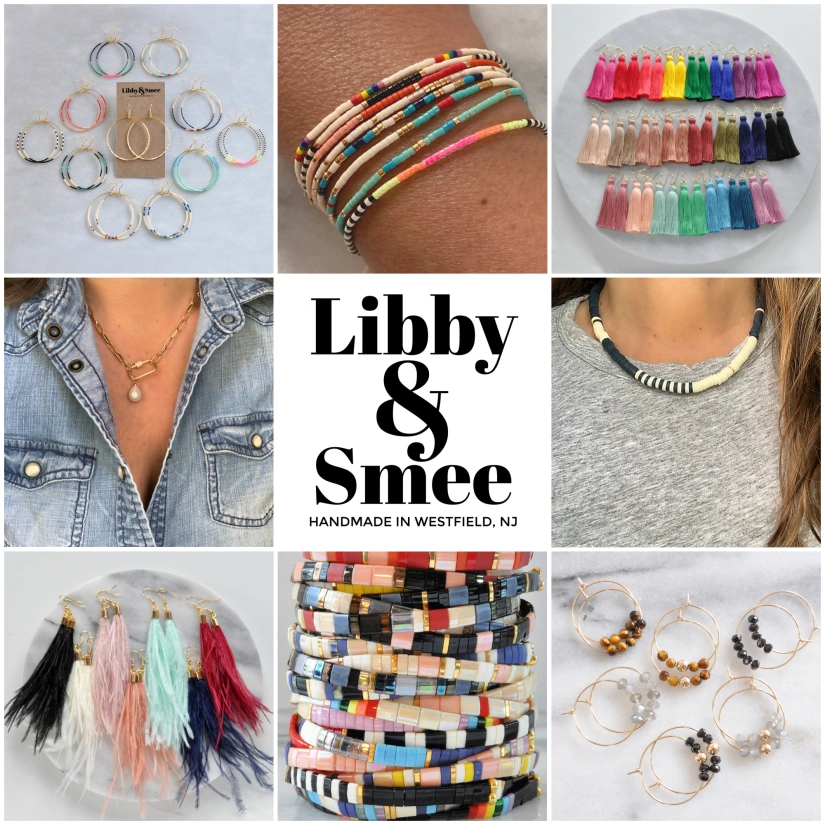
P.P.S. Thanks so much for visiting Sue at Home and reading this post. I wrote it back in 2016 and it’s now been viewed 25,000 times! If you enjoyed reading about my creativity and want to see what I’m up to now, check out Libby & Smee, my handmade line of simple fun statement jewelry! And be sure to use coupon code SUEATHOME10 for 10% off your first order at libbyandsmee.com !
Before and After, Decor, Home, My house

I Have a Hot Pink Chair!

I have been wanting a hot pink couch or chair for like ever. Remember when I showed you all those dreamy pink pics and told you I was thinking about dying an old slipcover I wasn’t using? Well, I did it!

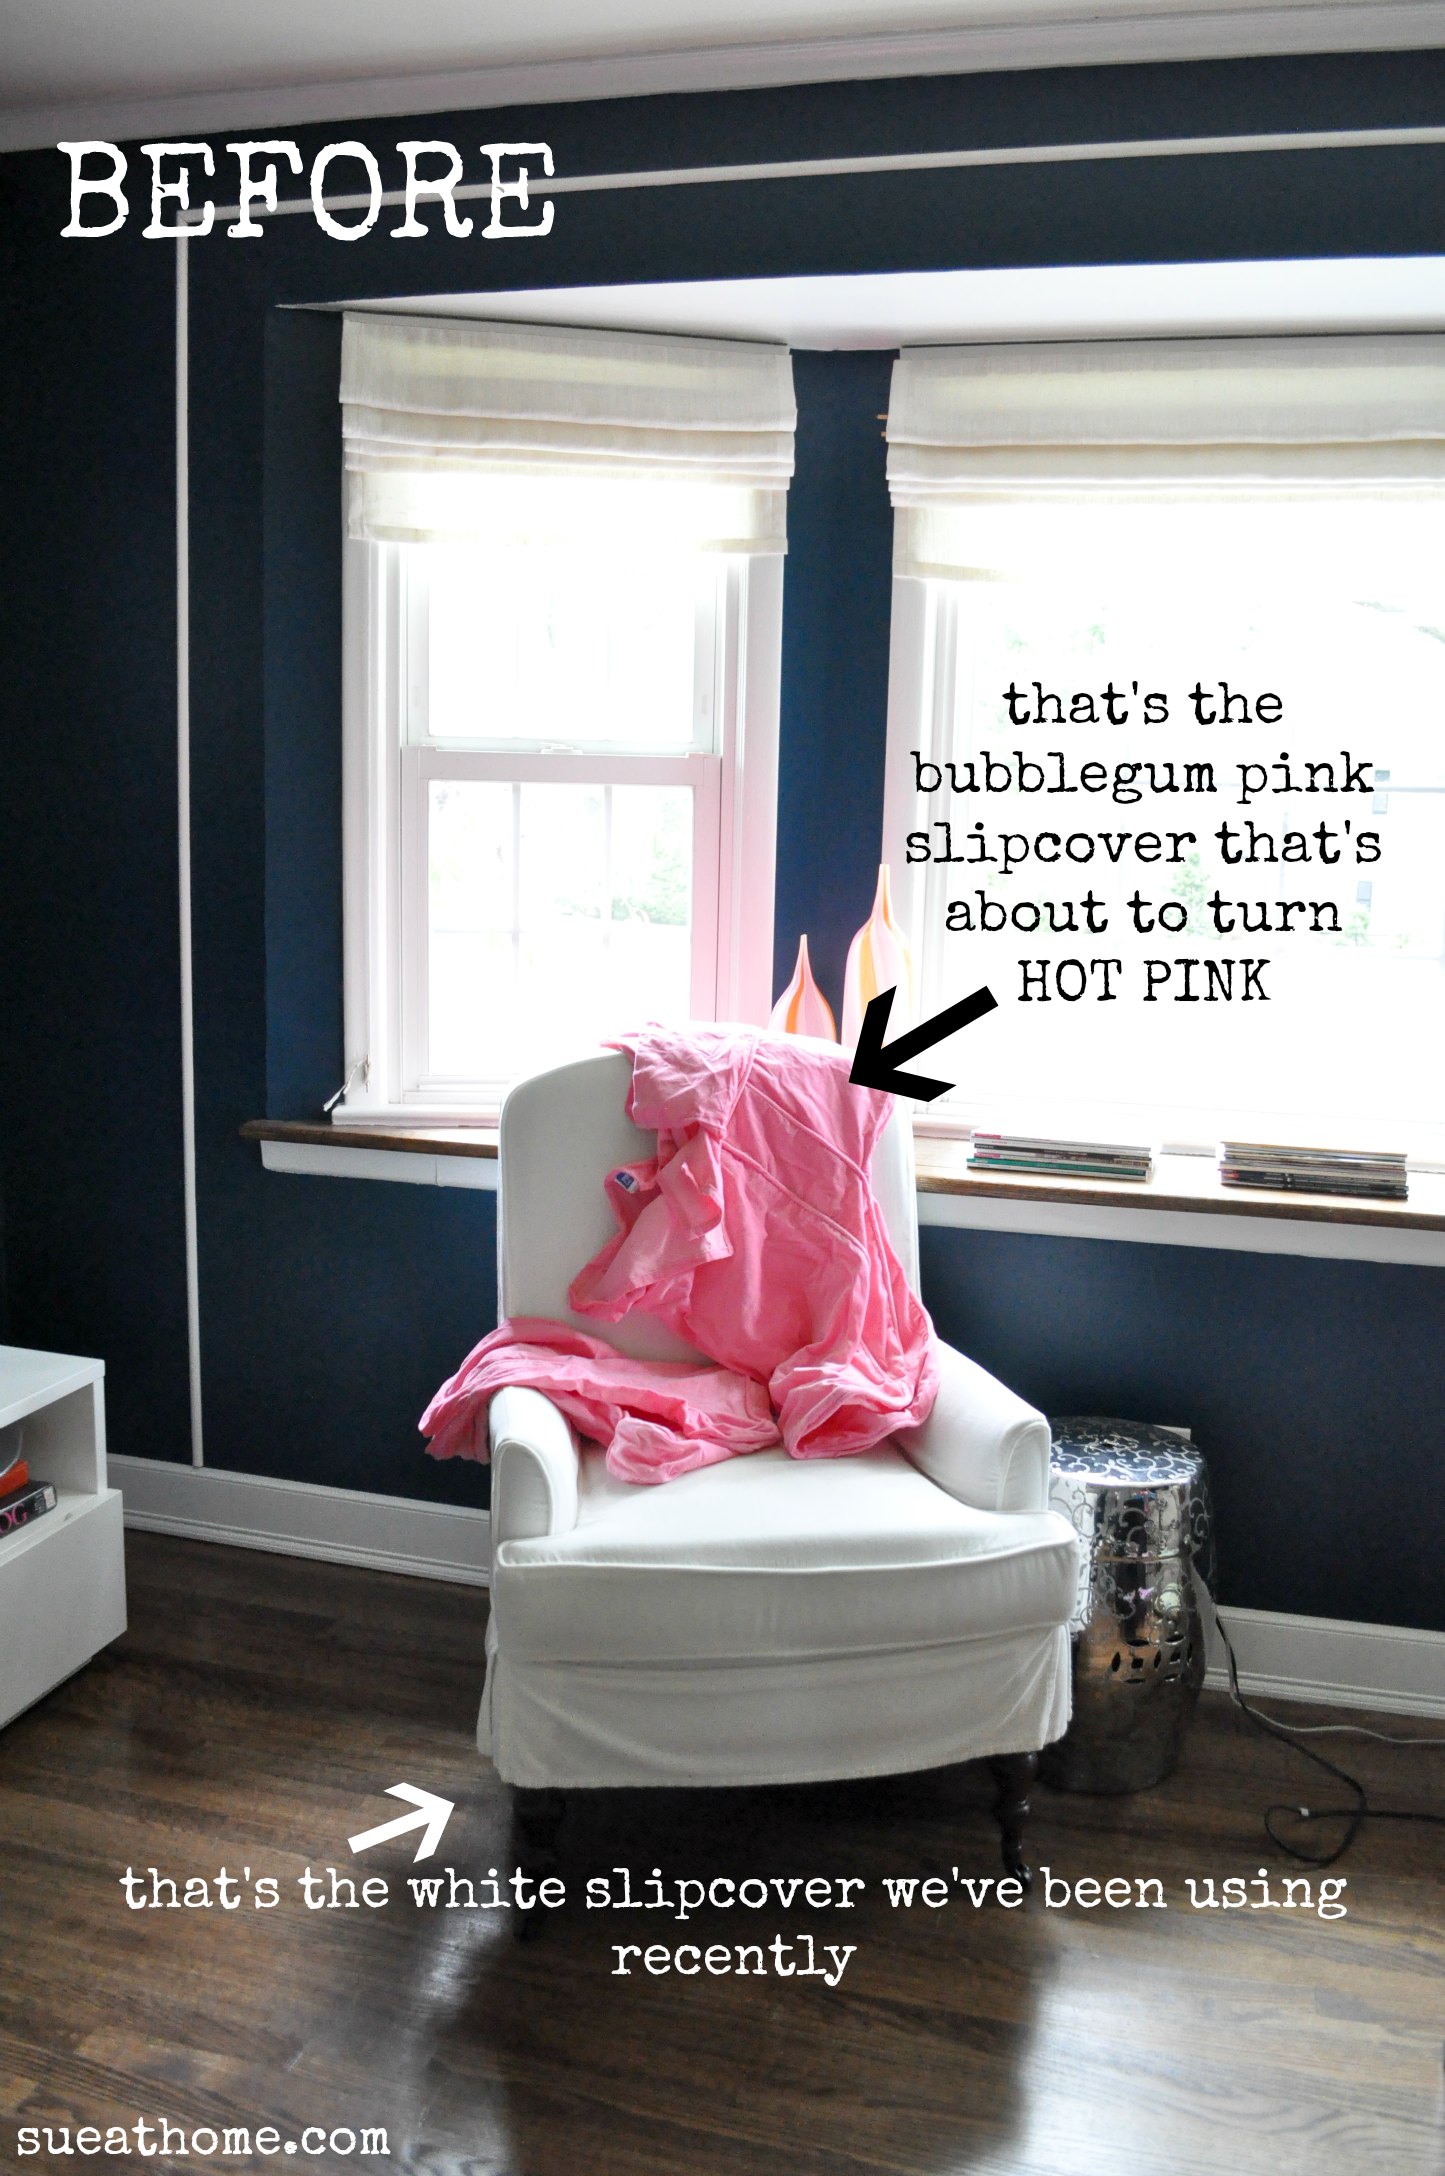
Here’s the best part: this renovation cost less than $10. That’s right! Ten buckaroos! How, you ask? Well, I already had the chair and a pale pink slipcover. The chair is from PB Teen but unfortunately for you, they don’t make it anymore which I think is a crime to humanity because it’s comfortable, cute and cheap and for quite a while, they were offering slipcovers in different fabrics and patterns. When I got the chair, I picked up three velvet covers: white, bubblegum pink, and pale blue. (What? I figured the chair could be used in other rooms so I wanted to have options! That’s normal to buy three, right? ) Of course, I’ve only ever used the white one.

I decided to use RIT dye in fuschia. The directions called for 1 package of dye for every pound of fabric so I went for three since my slipcover was nearly 3 pounds. I couldn’t find a bucket big enough so grabbed this color-coordinated (!!) storage bin at Home Depot and got to work. First step, fill the bucket with 9 gallons of hot water:

Then I mixed 3 packages of dry dye with 6 cups of hot water and stirred it very well until all the dye dissolved. (Note: it did not stain my measuring cup. Bonus!)

Then I added the mix to the dye bath and stirred. (Please note that I did all this on my deck and I was wearing rubber gloves. They are not kidding about the staining possibilities so take all the warnings seriously! If you don’t believe me, come and ask the few pink dots on my kitchen countertop.)

Before adding the slipcover, I pre-wet the fabric in hot water so the color would penetrate the fabric evenly. (Having the lid to the storage bin was helpful for this step because it gave me something to carry the wet fabric on.)

And then in it went! Next up, I stirred and stirred and stirred for about 25 minutes. If you’ve never pushed a sopping wet pile of velvet around with a paint stick before, I can tell you that you will use muscles you didn’t even know you had. Ouch!

Next up, I rinsed it in the utility sink (which is now pink) in my laundry room. First in warm water, then cooler until it ran clear. This was another special type of muscle torture that I wouldn’t wish on my worst enemy! Then the scariest part of all – into my beautiful new-ish washer it went! (Don’t worry. The washer came out unscathed.)

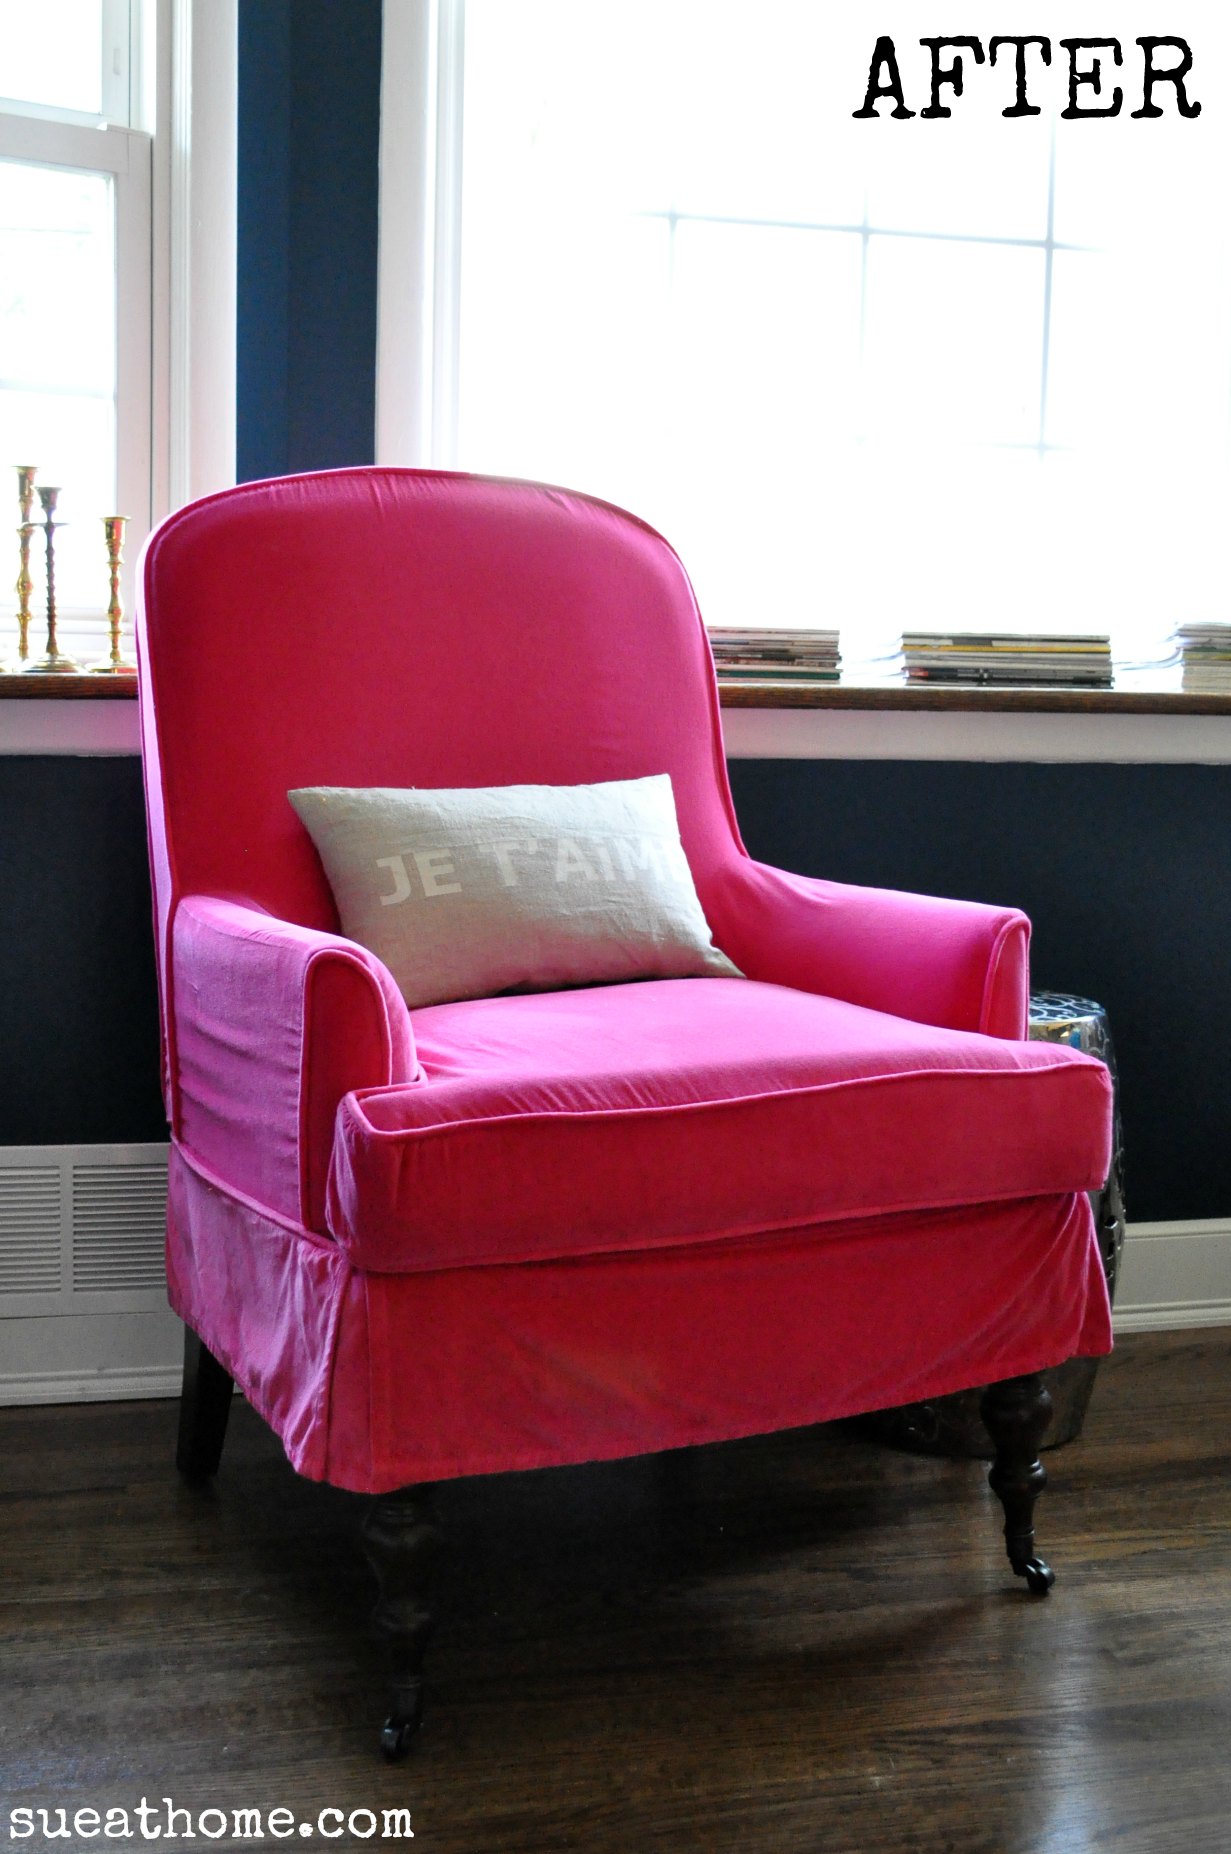
I gave it an air-only dry in the dryer and ta-dah! Here is the finished product!

My wise husband (who so kindly signed off on this project before I did it and then called it “awesome” because he knew how excited I was about it) was the one to point out the patterned pillow was a little too much. So, I stole the Je T’aime pillow (similar here) that used to live on our bed. Much better, don’t you think?

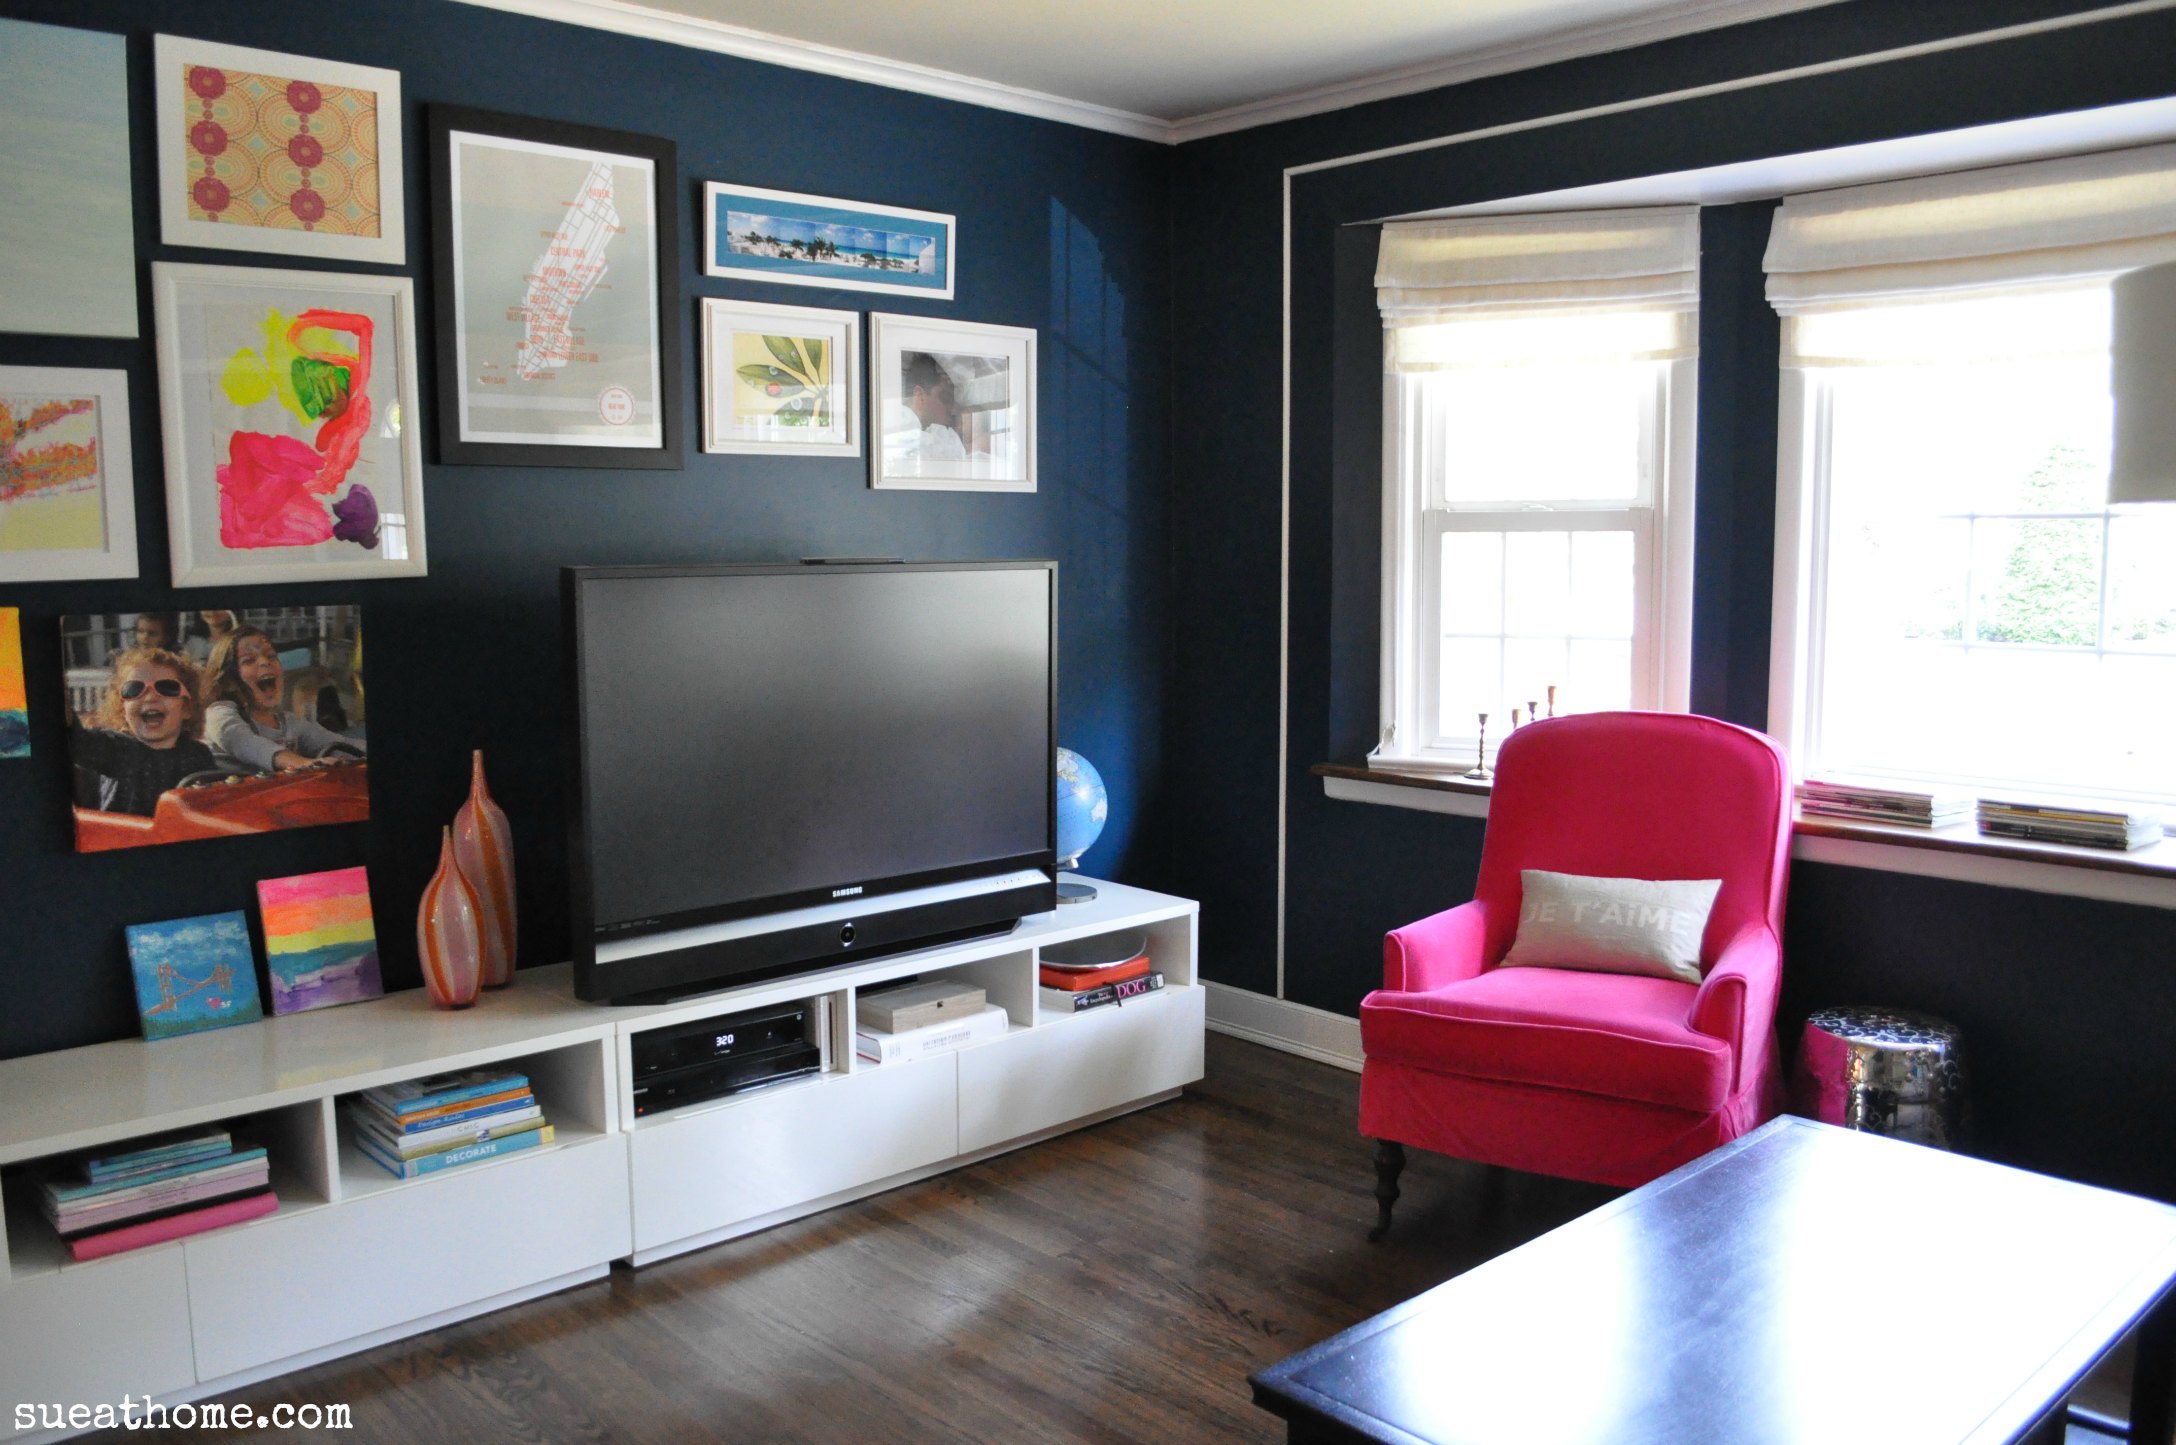
I love how the pink looks against the dark teal walls.

The color came out so even. I’m actually mad at myself for being so scared to do this for so long!

I love the way it pops in the room.

Maybe now guests will sit in the chair. They were always kind of scared of it when it was white.

Oh happy day! I have a hot pink chair!

XO

Sue at Home

Disclaimer: Please do not dye anything hot pink in your home without running it by your significant other. I’ve learned that though there are many people who like the looks of hot pink furniture, there are not a lot of people brave enough to go for it. And there are many, many more people who are terrified of it. Thankfully, my husband is comfortable enough in his sexuality to not be so concerned about a little pink in his house. (Though maybe he should because I could possibly love this chair more than I love him. Kidding, honey!)

Before and After, crafts, Decor, Home, My house

DIY: Lengthening our Master Bedroom Curtains

I suppose putting DIY in the title of this post is a little misleading. It should be more like “figure-out-how-to-do-it-and-then-hire-someone-else-to-do-it-because-you-can’t-sew”. That’s a little more honest. But if you can sew then you can absolutely do this yourself. Anyway…

I have a love/hate relationship with curtains. I mean, I get it – I know that they can totally transform a room but I find them to be a little fuddy duddy and too “designer-y” for my taste  – plus they are often A SMALL FORTUNE. For just a piece of fabric. It kinda makes me crazy.

Let me stop and remind you about the inspiration picture for our bedroom. Olatz Schnabel’s bedroom from House Beautiful. Ahhh. I could just stare at this pic all day. It’s so dreamy.

olatz house beautiful

Yes, I’m aware we don’t have high ceilings like that, nor do we have a gajillion dollar bed but still, I figured we can work with the color palette. Just go with it, ok?

(Sidenote: Before I get into telling you about the curtains I ended up with, let’s just gloss over the EPIC CURTAIN FAIL that happened when I ordered 4 red silk shantung panels from Macy’s. Small room with low ceilings + inexpensive but trying-to-look-expensive drapery panels = turning one’s bedroom into a brothel. I’m not talking about a high class Heidi Fleiss kinda place. I’m talking about 8th and forty-deuce. It was HORRIBLE. They were quickly returned and we shall never speak of this again. Okay? Okay.)

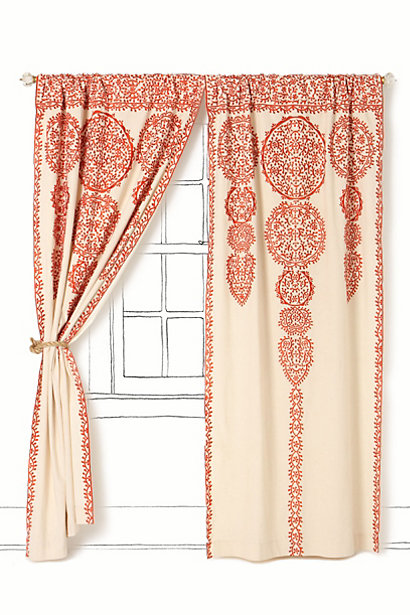
So, I spent a lot of time looking high and low for some curtains for our bedroom. I knew I wanted something that would really pop against our blue walls. Something in either a bold red or a rich purple or even a major print. There were many I fell in love with – most from Anthropologie. Some are long gone now but the ones I was loving are similar to these:

The Marrakech Curtain – This would add an eclectic vibe.

Wandering pleats – I love that rich purple color.

And the new Swing Stripes curtain (they’ve got POM POMS! And I love me some pom poms!)

Since an Anthro curtain can run you from $148-188 per panel, these were all out of the question. (I needed 4 panels and there was NO way I would be spending $600+ on curtains when I don’t even have a grown-up bed.  More on that at a later date.)

Then I started looking through the curtains at Anthropologie’s little sister, Urban Outfitters, and there were a lot of pretty prints. They’re all much lighter, semi-sheer cottons but I kind of like that look so I didn’t mind. (Remember, I’ve got an aversion to thick, fancy, old ladyish “draperies”.) I was thrilled when I found this amazing one that was kind of flourishy in purple, orangey-red and even a little of a light blue that kind of worked with our walls. (It’s still available in other colors.)

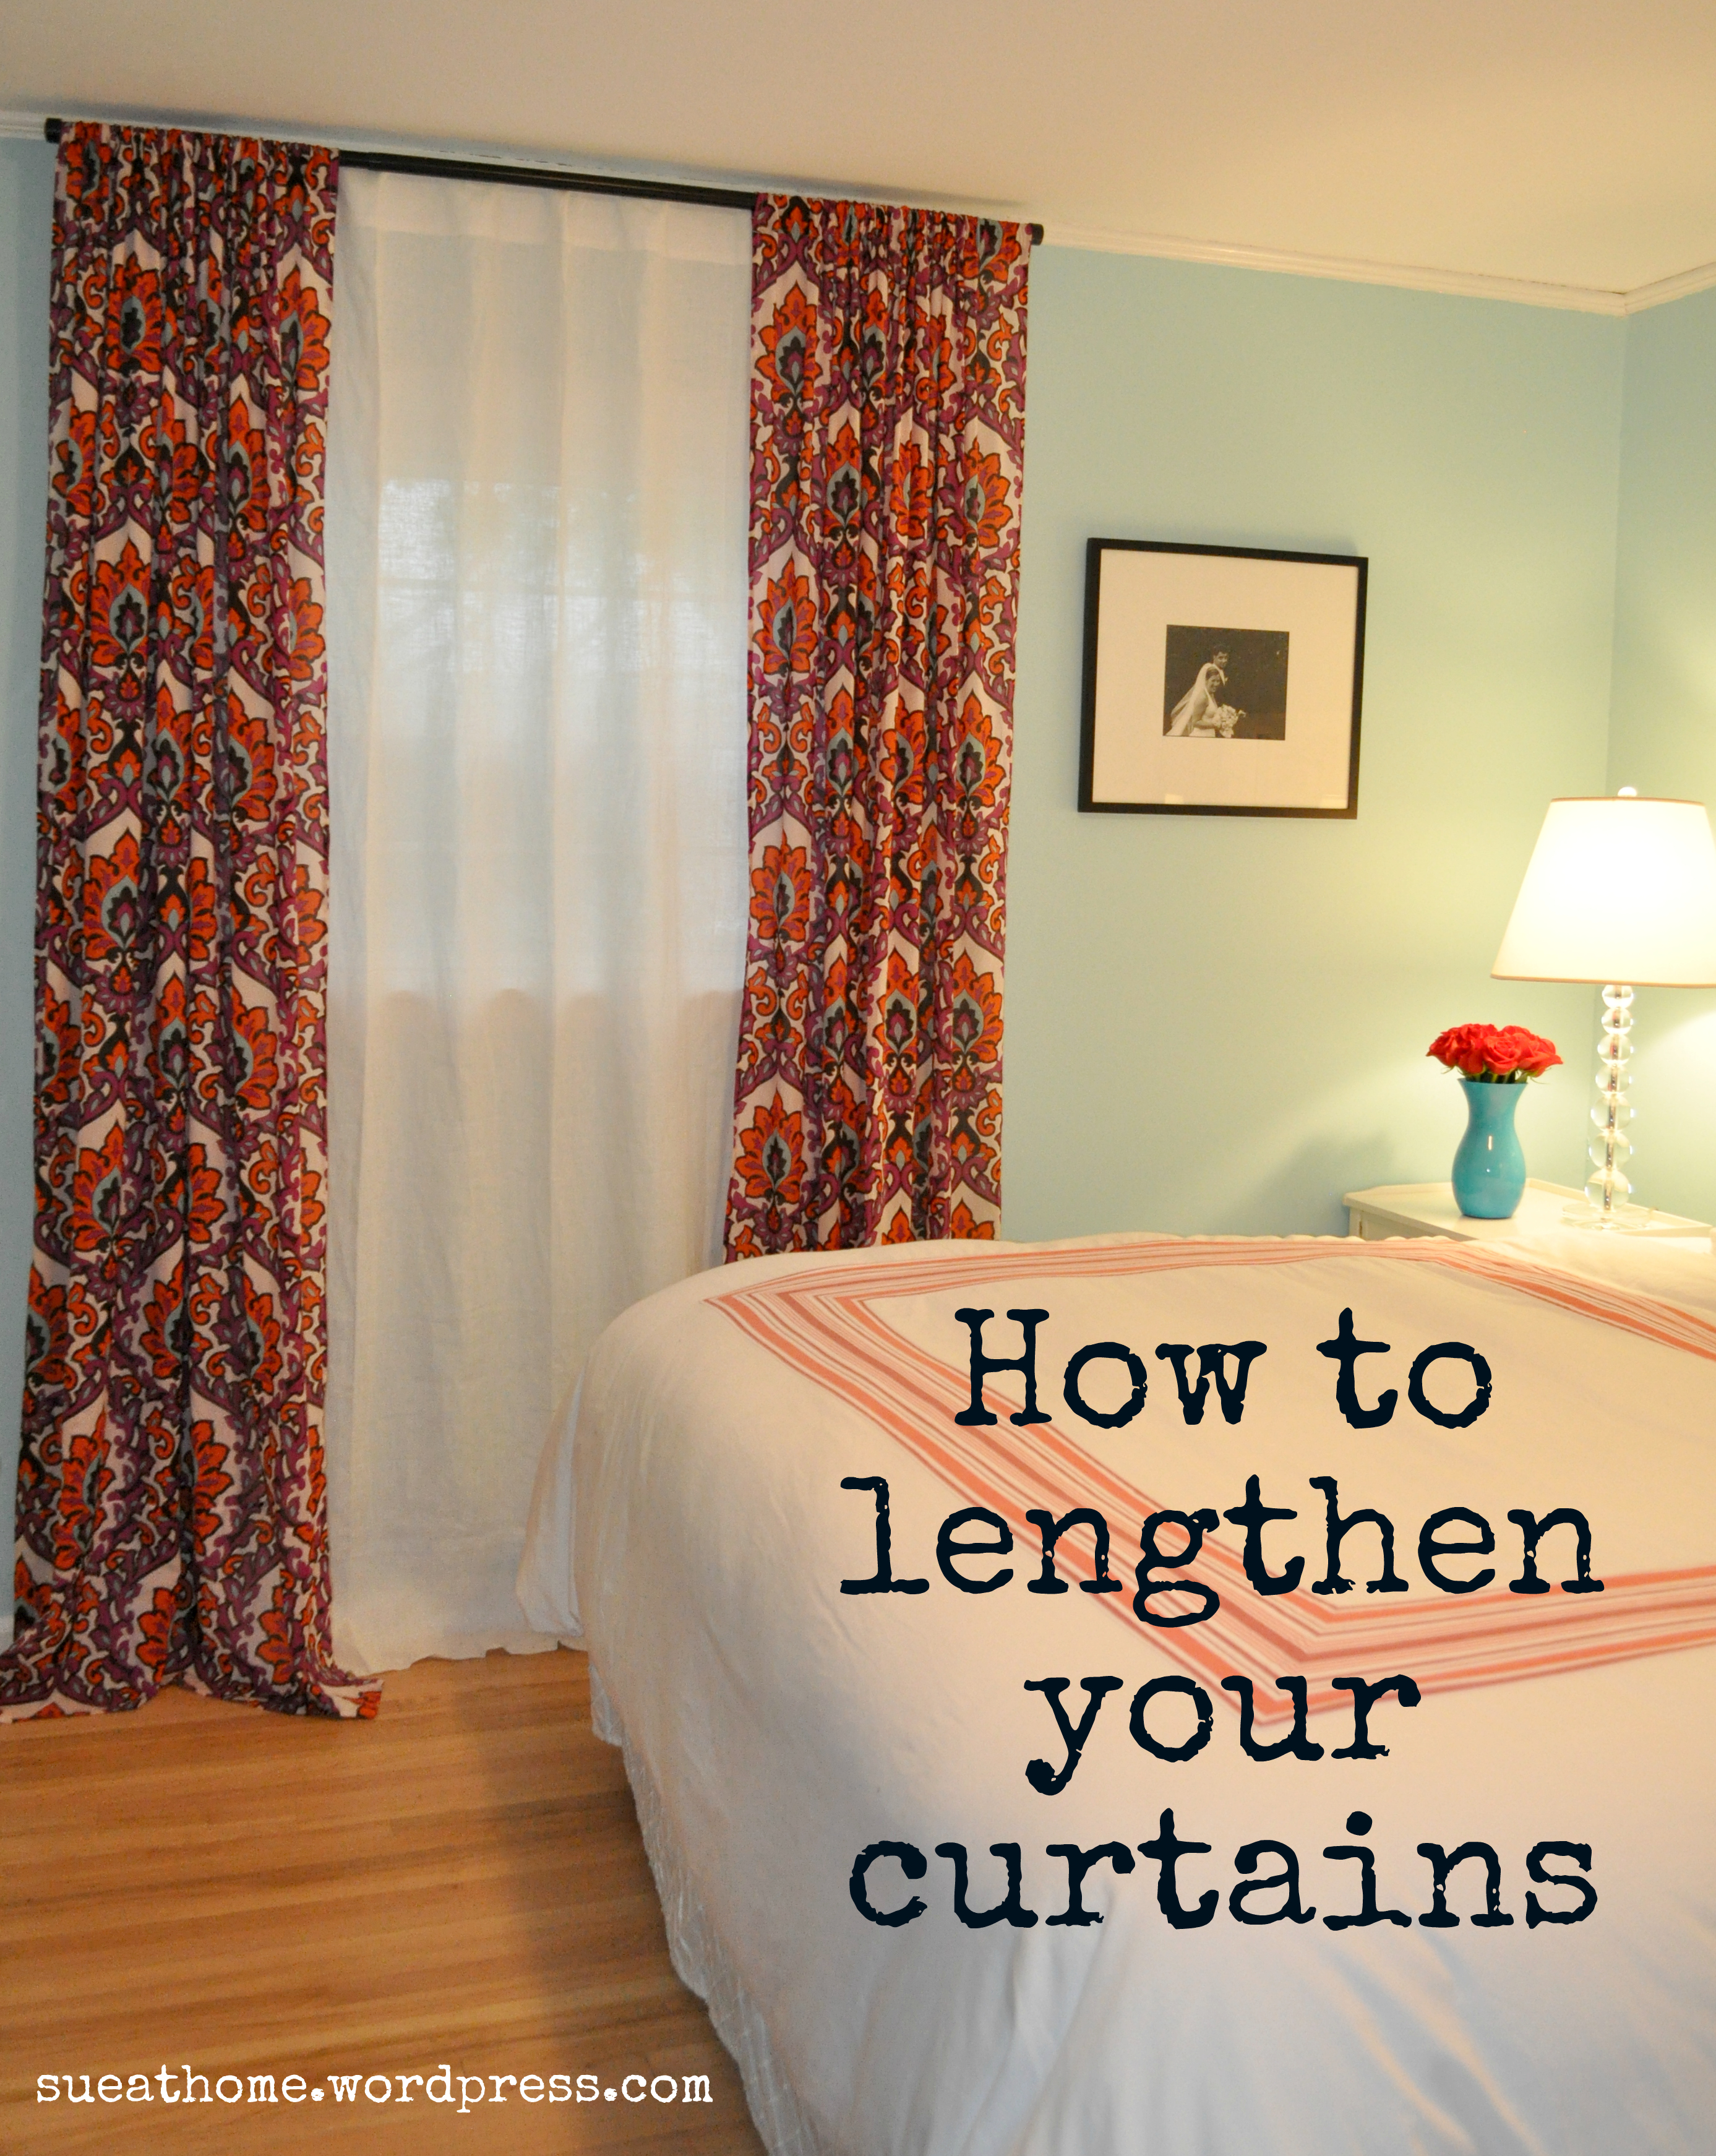
I bought the longest length they had (84″) and I hung the rod a little bit above the window so the curtains skimmed the floor. I don’t have a picture of this because I was embarrassed by how it looked.  Here’s the problem: We all know that curtains need to be hung as close to the ceiling as possible so I knew I was trying to cheat and get away with a cheap solution. What was I thinking? (I know actually. I was thinking about doing it as cheaply as possible.)

In case it’s unclear what I mean, check out the great post from Erin Gates of one of my favorite blogs, Elements of Style. She illustrates the problem in the most simple way:

Hanging curtains way up there just makes the ceilings look higher – and it gives the room a French boudoir feel to it. Ooh la la!

 But I had 84″ curtains and I needed 96″. So how to deal with too-short curtains? I ordered 1 extra panel from Urban and they were on sale at that point so I got it for a song. Then I brought all 5 of the panels to my tailor (that sounds so fancy but it’s just my dry cleaner who hems stuff for me!) and asked her to cut the extra panel and add an extra 12 inches to the bottom of each curtain. Is it perfect? Nope! But I asked my dry cleaner to do it and I think she charged me $20 for all 4 panels so I’m not going to complain. (If I had done it myself, I probably would have been a little more anal particular about lining up the print perfectly but I’m quite sure they would not have been sewn straight.) See how messed up there are?

It’s pretty obvious there but when I pull back it’s not as bad. I don’t think anyone would notice unless I pointed it out. See?

One cheap place where you can always count on finding long curtains is Ikea. They sell most panels in one long length that comes with hemming tape so you can make them any length you want. We have these polka dot ones in S’s room. I think they look great and they were so cheap. You can’t beat $13.99 for a pair! The hot pink crinkle sheers are from here.

Since I finally took some decent pics of our master, this will be the first in a series of posts about what’s happening in the bedroom. (No. Not that stuff! Get your head out of the gutter!) So, make sure you subscribe to Sue at Home to see all the action. (Decorating action! Jeez. You should be ashamed.)

XO

Sue at Home