
I live by the motto that it’s never too early to start thinking about a Halloween costume. Even if you don’t share my passion for the one day of the year when dressing up like a weirdo is totally celebrated, you can’t deny that stores have started stocking black and orange decorations. And costume catalogs are probably flooding your mailbox as we speak. So, I figured it was about time I shared a how-to on S’s costume from last year: A Starbucks grande iced pumpkin spice latte with whipped cream!

I already had an old slip and headband so the costume cost us less than $10 in felt and hot glue! When we were searching for ideas last year, we found lots of cute pictures (this blog post was our big inspiration) but there was no resource that really explained how to create the Starbucks logo and how to use felt to create the foam/whipped cream. But now, thanks to this blog post, there is!
You’ll need a tan dress (I had an old slip that fit S loosely but these cheapies from Amazon are a great option), a plain headband, 2 one-foot square pieces of dark green felt, white felt (enough to make at least six 9-inch circles and eight 3.5-inch circles), felt glue, a black Sharpie (to write the “order” on the back of the “cup”), a hot glue gun, and whatever you want to wear underneath.
Search for the Starbucks logo online and make an enlarged print about 7 inches in diameter. To make the traceable template, you’ll need to cut it out. This will be super annoying and time-consuming and you’ll get carpal tunnel but just think about how awesome your costume is going to be and deal with it. Plus…good news! Since it’s symmetrical, you can cut half of it and just flip it over when tracing. (Be sure to have a bowl of mini pumpkins nearby to help you get in the holiday spirit!)

Use a black Sharpie to trace around the design.

Then flip your template over to trace the other side.
![]()
Next step: Stop and marvel at how good it’s looking!
![]()
Then — yup, you guessed it — just when you’re starting to get feeling back in your hand, more cutting! Once you’ve got it all cut out, glue down each part of the design with felt glue. (Felt glue is easier and less messy than hot glue so it’s best to use felt glue for this step.)
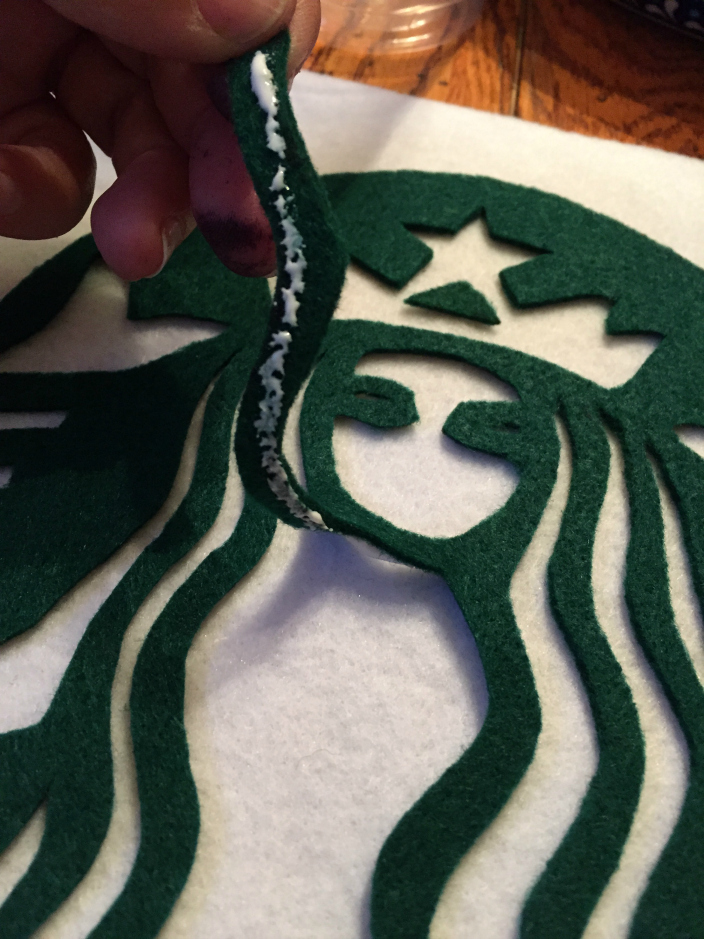
Soon it’ll look like this and all will be right with the world. (Don’t forget the nose, mouth and the little triangle in the middle of the crown.)

Then cut out the circle and you’re ready to glue the logo on the front of the dress. Just make sure you put it down low enough so you have plenty of room for the foam/whipped cream across the top.

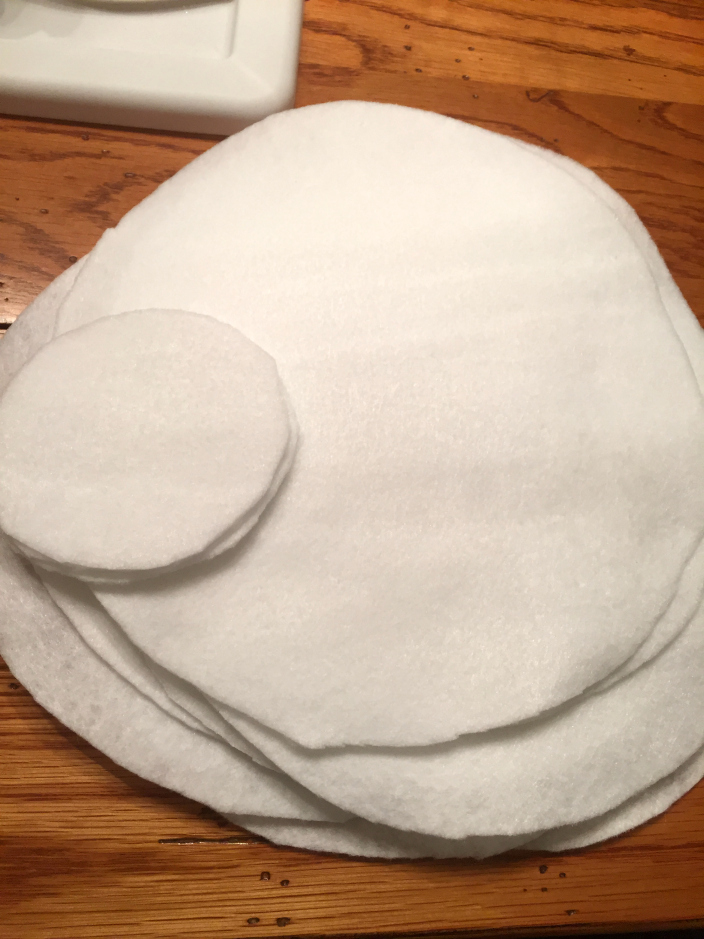
To make the whipped cream you’ll need 5 or 6 white felt circles that are about 9 inches in diameter. If you want the foam to go across the back, you’ll need more. We decided against it because we wanted more room for the “drink order” on the back. (More on that later.) They don’t need to be perfect circles so don’t worry your pretty little head about making it precise. (The little ones pictured here are for the headband.)
To make the whipped cream, fold your felt in an accordion fold vertically along the dotted lines below. Add small horizontal lines of hot glue (it adheres faster than the felt glue) across the center to glue each section together. Then fold it along the middle and you’ve got a big, fluffy, frothy glob of whipped cream / foam! Use a thin line of hot glue along the center back of the felt to attached it to the dress.

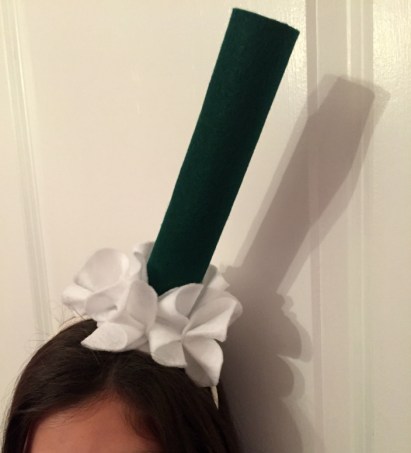
To make the frothy headband, grab two of the smaller circles and glue them together with the headband running through the middle of it. This will be your base to build the straw and foam onto. Lots of tutorials suggested a paper towel roll with green paint but I had some extra green felt so I tried gluing it into a tube shape and it worked! Just use paper clips to hold it together while the glue sets. Once your straw is dry, cut 4 slits in the bottom of it and glue the tabs onto the circles on your headband. Again, use paper clips to keep it in place while it dries.

After the straw was glued in place, I added some more white felt over the green on the base to cover it up. Then I made the whipped cream with the small circles using the same method as I used on the dress.

Perfect!
To really make it look like a Starbucks cup, I wrote the “drink order” on the back with a black Sharpie. The order boxes from top to bottom are: Decaf, Shots, Syrup, Milk, Custom, and Drink. We customized Sophia’s with an X in the decaf box (to make it a decaf – duh), with a WC in the custom box (to add whipped cream) and PSL in the drink box (to make it a pumpkin spice latte). We also wrote her name but since they ALWAYS get it wrong at Starbucks, I wrote Sophie instead of S. Check with your local barista to make sure your costume matches your real order!

I hope you liked this Starbucks latte costume tutorial.
XO
Sue at Home
P.S. If the thought of a Pumpkin Spice Latte is making you hungry, check out my recipe for Pumpkin Spice Whoopie Pies with Cream Cheese Filling!
P.P.S. Thanks so much for visiting Sue at Home and reading this post. I wrote it back in 2016 and it’s now been viewed 25,000 times! If you enjoyed reading about my creativity and want to see what I’m up to now, check out Libby & Smee, my handmade line of simple fun statement jewelry! And be sure to use coupon code SUEATHOME10 for 10% off your first order at libbyandsmee.com !


